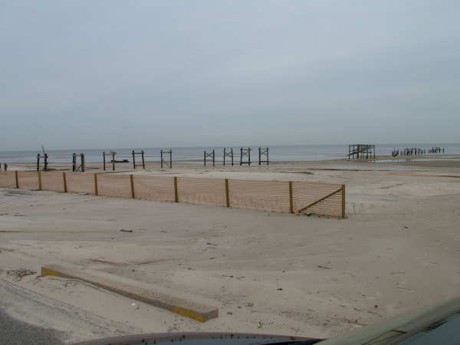
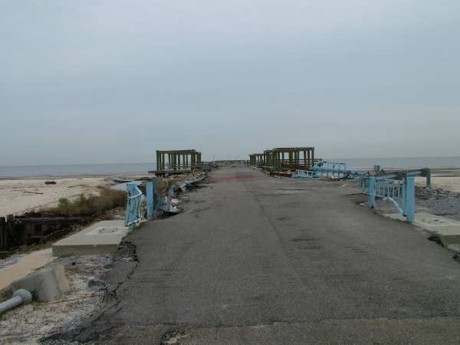
I had the extreme good fortune to visit New Orleans the first week of January 2007. The Hurricane Katrina disaster happened 16 months before, and the disaster recovery efforts I witnessed were minimal. My takeaway from visiting the area was that on a personal level my family is not adequately prepared for a major disaster. I'm willing to wager that most people are not prepared to deal with a large-scale natural disaster that could result in utilities or services being disrupted for days or weeks.
Disaster preparedness, I believe, is a two-phase process. Resign yourself now to the fact that you will have to deal with both short term and long term disaster management. You are going to have to react immediately to take care of yourself right after the disaster, and then it may take months or longer before your life and home are back to normal.
For example, let's imagine your area is hit with a major wind or ice storm that knocks out electric power to hundreds of thousands of customers. (The disaster could be any event such as an earthquake, hurricane, major snowstorm - some event that affects many people and brings an area to its knees.)

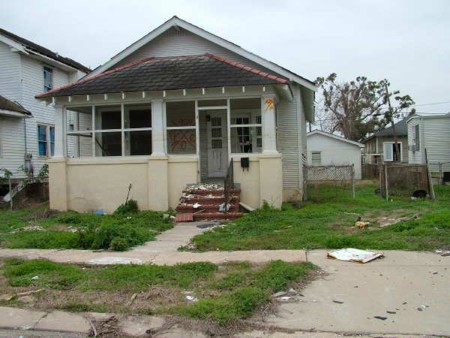
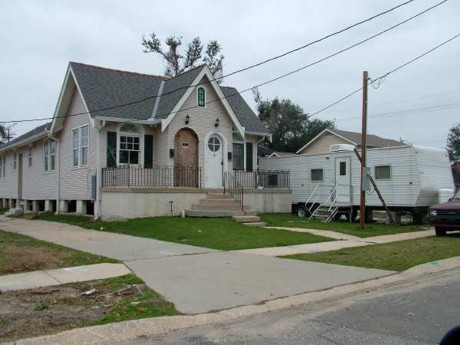
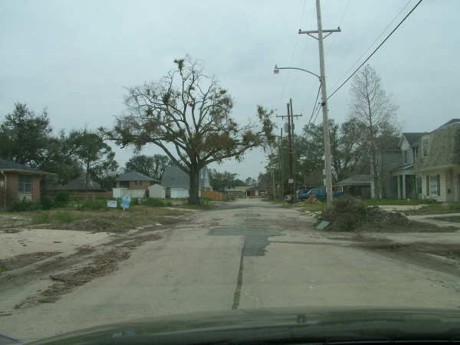
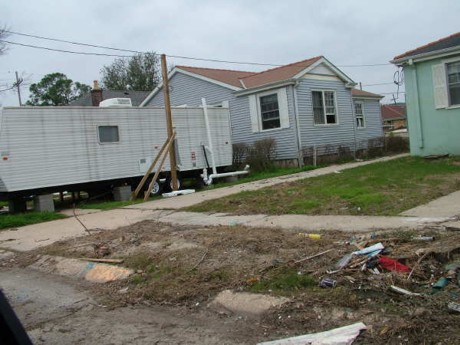
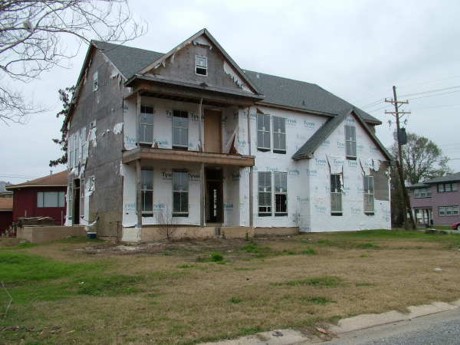
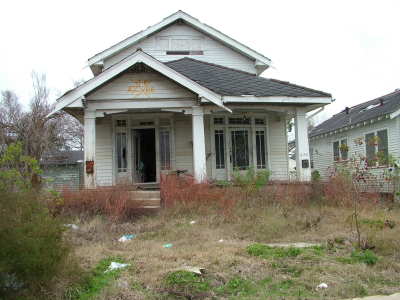
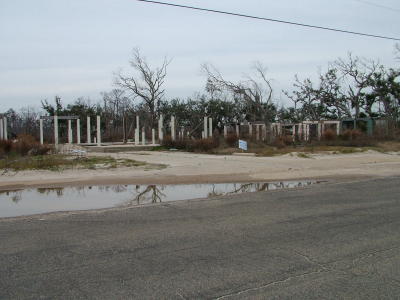
This is storm debris from Hurricanne Katrina 16 months AFTER the monster raped the suburb of Lakeview in New Orleans. The debris has been at the curb for who knows how long. The house being rebuilt is not the norm. Many more houses sat empty, forlorn and vacant than were being rebuilt. PHOTO CREDIT: Tim Carter
Let's also assume that the damage occurs at many individual houses so the utility company workers are vexed with the problem of reconnecting tens of thousands of customers. How many trucks equipped with cherry-picker buckets do you think your local utility company operates? Fifty, 75, even 200? Even if your utility company has a mutual-aid agreement with utility companies located in other states and cities, how many crews will come to your city or town, and when will they get there?
How many hours a day do you expect the utility crews that man each truck will work? It is unreasonable for you to expect them to work 24 hours a day non-stop until all houses are reconnected. Fatigue can cause mistakes - deadly ones.
Furthermore, keep in mind the utility companies have a list of priority customers that serve the public good that must be connected long before you need power. Hospitals, government offices, communication centers, critical businesses, food distributors, gas stations, etc. are at the top of this list. It could be weeks before your home gets electric power, water, natural gas, etc. restored.
The initial response to disaster recovery should be on a personal level. Even though you and I pay taxes, do not expect the government at any level (Federal, State or Local) to be at your beckoned call. For one, they simply do not have the manpower nor equipment to help all people at once in a large-scale disaster.
Plan to help yourself and your family. Period, end of story. If you do get help at some later date, fine; but operate as if there is no government. In my opinion, those who feel the government should take care of them and bail them out of trouble are living in a dream world.
This means that you will need to have enough food, water and other supplies for days and possibly a week, maybe even longer. Think about everything you, your family and your pets consume - water, food, medication, etc. All must be on hand in sufficient quantities so you can survive for five, seven, perhaps ten days. It may be smart to have up to a month's supplies on hand. Crazy as it sounds, it might be prudent to install an above-ground swimming pool that has thousands of gallons of water available for all sorts of uses, including basic fire protection.
You don't have to eat steak each day, so think about foods that are canned and can survive with no refrigeration. Meals Ready to Eat (MREs) that are issued to our military personnel are affordable and delicious. I have eaten these, and not only are they tasty but they also offer a great variety of nutritious food in the sealed package. They come with special heat packs that mix with water to make the food hot.
Most of us have become far too reliant upon electricity, so think about investing in a portable generator. Many common gasoline-powered generators are not large enough to supply you with all of the electric you typically consume at one time. You can purchase a giant generator to supply you with all of the electricity you need, but there is a good chance the price will take your breath away.
If you do purchase a smaller portable generator that generates 5,000 watts or less, you may have to do some rewiring so that only critical appliances and lighting circuits are powered by the generator. Plan to have rolling blackouts in your own home as you run certain things for a period of time, then switch the generator to other circuits, appliances or lights.
If you do not know how to properly connect a generator to your household electric system, hire a licensed electrician to do it for you. It is vital they are connected to your electric system properly so you do not injure a utility company worker by feeding power backwards into the grid. This connection is typically done with a transfer switch.
Think about stockpiling supplies to temporarily secure your home in the event of roofing damage, broken windows, flooding, etc. These supplies could disappear from stores in hours after a storm. This assumes the stores are even open and have power to sell them. Buy large fiberglass tarps that will create a temporary roof. Invest in sheets of plywood that will cover broken windows or doors. Have all the supplies you need to clean up after flooding or any water intrusion. Make sure you have all needed fasteners, ropes, screws nails, hand tools, etc., to secure the tarps, plywood or whatever covering you intend to use.
Flashlights and any other type of portable lighting will become invaluable. Have plenty of fresh batteries on hand. I am not talking one or two packs. You may need 20, 30 or even 50 batteries to keep your portable devices powered up for days or even weeks.
Purchase flashlights that are hand powered. I own a flashlight that you wind up and it works for hours before needing additional cranks. You can buy radios that operate with a hand crank and even have solar panels for daytime operation on sunny or partly cloudy days.
Think long and hard about communications. Your traditional phone may not work after a storm. Cell phone batteries will die after a day or so. My amateur radio license ( W3ATB) is invaluable as I can communicate with a small handheld radio that can broadcast and receive up to 25 miles. No cell phone has a reach like that. It takes a little work to get an amateur radio license, but the day may come when it could save your life and get you help when others around you are waving blankets, spray painting messages on roofs or are trying to send smoke signals.
Now is the time to go over your insurance coverage, not after the disaster. Read your policy closely to see exactly what is and is not covered. Pay very close attention to the wording about water damage. Determine if you are covered if water rushes into your home overland or seeps in through walls and up from floors.
You might be shocked to discover you have no coverage for many instances when water enters your home. You will have to purchase a separate policy to cover you for flood damage. These policies are part of a Federal Government program. Sewer backups and other forms of water infiltration may be covered by a rider to your existing homeowner's policy.
The bottom line is you need to really understand what constitutes a valid insurance claim. It goes without saying that you need to be sure you are fully insured. Your current policy may not have upper limits that cover the lion's share of your total damage claim.
Upgrade your policy if your coverage is weak or non-existent in certain areas. Keep in mind that the insurance company is just going to write you a check, not arrange to have the repair work done. You need to think now who you might call in the event of a problem. After the disaster strikes, contractors, especially the good ones, will already be busy. They will undoubtedly service past customers, not new ones they do not know.
It could be months, many months before repair work is done on your home. Now is the time to bone up on temporary repairs you may have to do yourself to secure your home until such time as a good contractor can be found who will do permanent repairs. Think and act like a seasoned Boy/Girl Scout - Be Prepared!
And for all you ham radio operators: I'm clear on your final.
Column EM0048