Insulation Installation

Insulation installation | You need to read the written instructions. This is a modern vapor retarder - Certainteed MemBrain - but some contractors don’t believe in them for a host of reasons. (C) Copyright 2019 Tim Carter

"The same exact thing can happen inside a wall cavity in a home in a frigid climate if you don't block and stop the water vapor from getting into the wall cavity."

Insulation Installation - Simple If You Read Instructions

The inspiration for this column happened just two days ago while I was working on my daughter and son-in-law’s new home up in Downeast Maine. It’s important to realize I’m not the builder but act as their primary advisor, the plumber, electrician, and radiant heat installer.

My son-in-law and I arrived at the house to work about 7:00 AM and at 8:30 AM a medium-sized box truck pulled onto the lot along with a pickup truck. Five workers tumbled out of both vehicles and they started to put in fiberglass insulation up under all the floors in the house.

With the help of my son-in-law, a month or so ago we had installed 900 Uponor heat transfer plates and 6,000 feet of Uponor hePEX tubing that will keep my daughter, son-in-law and new granddaughter warm as bugs in a rug.

Uponor hepex

This is the Uponor hePEX that we installed under the floor of the future office/guest bedroom suite above the garage. It's not easy to install it three rows of heat transfer plates per truss bay. CLICK or TAP HERE to watch a video showing how it's done.

Who Is A Leader in Radiant Heat Products?

Uponor happens to be one of the leaders in radiant heat products and technology. Read the beginning pages of their installation manual about the simple science behind radiant heat and you’ll be amazed.

The middle-aged leader of the insulating crew, let’s imagine his name is Sebastian (it’s not), and I got into a friendly discussion about exactly how the insulation batts should be installed. Sebastian asked me, “Do you want a 1 or 2-inch airspace between the insulation and your PEX tubing?”

“I don’t want any airspace. The Uponor installation manual says to put the insulation in direct contact with the tubing.” I replied.

“Well, my entire career we’ve always installed the insulation with an airspace. That’s the way to do it.” Sebastian countered.

“That’s very interesting, Sebastian. Since heat travels directly to cold, you want the insulation to be in contact with the heat pipes. This forces the heat upwards into the floor. If what you suggest is the right way to do it, why are you filling the wall cavities all the way with your fluffy insulation? Why not leave an airspace between the back of the drywall and the batt?”

Doing Things Wrong For Twenty Years

I said the above as respectfully as possible because most older people don’t like to be challenged or have their intelligence questioned. I could tell the gears up in his head were spinning. We then had a quick discussion about the new high-performance vapor retarder my son-in-law and I were installing over his insulation. Once again, his lack of scientific critical thinking soon bubbled to the surface.

Downeast Maine can get darn cold in the winter. This past winter I was working in the house installing cast iron drain pipes and it was 2 F in the house. Sebastian had never thought about the condensation that forms on the outside of his cold can of beer while sitting on his deck after work.

You can watch a funny outake insulation video here.

The same exact thing can happen inside a wall cavity in a home in a frigid climate if you don't block and stop the water vapor from getting into the wall cavity.

The water vapor that’s in the warm air inside a house can easily travel through drywall and fiberglass on its way to the outdoors. When this vapor contacts the cold exterior wall sheathing, it transforms to liquid water just as the droplets of water form on your soda can, beer can, or glass of iced tea on a humid day.

Should You Install a Vapor Barrier?

Watch this video and decide for yourself, then read about Sebastian.

When Sebastian first arrived he introduced himself to my son-in-law. At lunch that day, my son-in-law said to me, “Tim, guess what? Sebastian came up to me a couple of hours after talking with you and out of the blue said, ‘I just discovered I’ve been doing things wrong for my entire career.’ "

Do Egos Get in The Way?

I’ve had similar conversations with other contractors and sub-contractors for years, but Sebastian was the first one that admitted he was wrong. You should realize that a strong ego is highly recommended if you want to survive in the residential construction industry. But you can temper it with an open mind and the desire to apply simple science to the building process.

One of my biggest complaints about the construction industry, as a whole, is there’s no formal education required to get into the game. Think about it. You can go to a big box store just after reading this column of mine and buy a ladder, a tool belt, a hammer, tape measure, and razor knife and be a roofer by noon. Yet, you’ve never been trained on how to install a roof. You’ve never read the written instructions that are out there. However, my guess is you can get a customer or two to hire you to re-roof their home.

STOP Trusting Contractors

What does this have to do with you and your hard-earned money? You need to stop trusting all contractors. You need to STOP assuming they’re always doing things the right way. You need to stop assuming they’re always thinking of your best interests.

You need to start doing one simple thing to protect your home and your investment. You need to select the products you want to use for your next project, your next remodeling adventure, or your next new home. Then you must take the time to READ the written installation manuals or watch the manufacturer’s installation videos online.

You need to do this before you hire a contractor not after when things go wrong. Ask her/him exactly how they intend to do the job. See if they’ve been doing it wrong their entire career.

Yes, this is work. Yes, this conversation with the contractor is not comfortable. But what the heck, it’s only your money so what’s the big deal, right?

Column 1305
PVC Pipe Sizes and Types of Pipe

1304 PVC Pipe Sizes

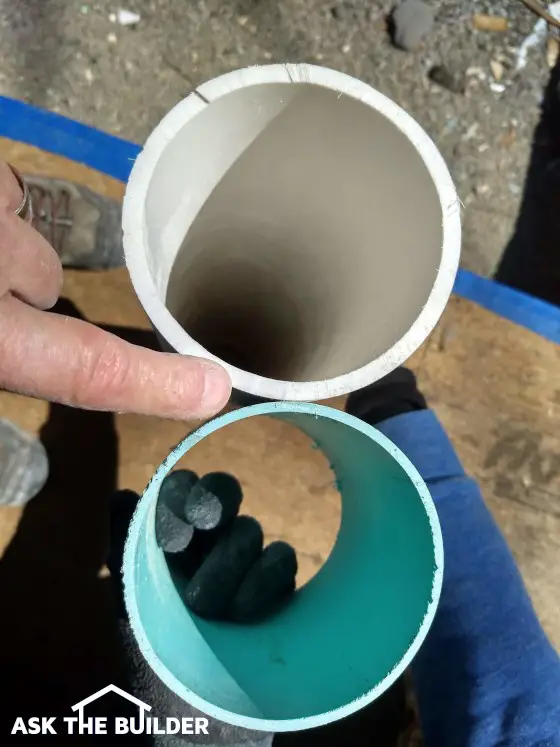
PVC Pipe Sizes - Both pipes are 4 inches in diameter, but the schedule 40 white one has much thicker sidewalls than the green SDR-35 pipe. If you're trying to draw plumbing plans, you better consult with a master plumber like me. (C) Copyright 2021 Tim Carter

PVC Pipe Sizes - Thickness Matters

QUESTION #1: Tim, I went to buy some plastic drain pipe and after looking at all the types my head started to hurt. I decided to leave the store and do some research. I’ve got several projects where I need a plastic pipe. I need to add a bathroom in a room addition, I need to replace old cracked clay downspout drain lines, and I want to install one of the linear french drains I saw on your website to dry out my basement. Can you give me a quick tutorial on the sizes and types of plastic pipe the average homeowner might use around her/his home? Lori M., Richmond, VA

It’s fairly easy to get flummoxed like Lori did as there are so many different plastic pipes. Just ten days ago, I installed a somewhat special plastic pipe to vent my daughter’s new high-efficiency boiler. It was made from polypropylene and can withstand much higher temperatures than standard PVC that most plumbers might use.

Watch this video of this amazing boiler or water heater vent pipe:

It’s very important to realize that there are lots of different plastic pipes that you might use and the chemistry of them is quite complex. I’m just going to stick with the most basic ones you might run into or may be required to use by your local inspectors.

CLICK or TAP HERE to get FREE BIDS from local plumbers who know plastic pipe sizes.

What are the Most Common Plastic Pipes?

PVC and ABS plastic pipes are perhaps the most common ones you’ll run into when it comes to drainage pipes. Water supply lines are another ball of wax and I’m not even going to try to confuse you further about those!

What's the Difference Between ABS and PVC Pipe?

ABS and PVC pipe look similar, but ABS can perform at a wider range of high and low temperatures. ABS pipe has a higher impact strength than PVC pipe. ABS is about 20 percent more expensive than PVC pipe.

What are the Common PVC Pipe Sizes?

The most common PVC pipe sizes you’d use around your home would be:

  • 1.5 - inch
  • 2-inch
  • 3-inch
  • 4-inch

I used PVC for decades and it’s a fantastic material.

What are the Different Sizes Used For?

The 1.5-inch size is used to capture water that might flow out of a kitchen sink, a bathroom vanity, or a tub. The 2-inch pipe is commonly used to drain a shower stall or washing machine and it may be used as a vertical stack for a kitchen sink.

A 3-inch pipe is what’s used in homes to pipe toilets. The 4-inch pipe is used as the building drain under floors or in crawlspaces to transport all the wastewater from a home out to the septic tank or sewer. The 4-inch pipe is also used as a vertical drain stack in a home. Always do this if two or more bathrooms drain into the same stack. Plumbers and inspectors use pipe-sizing tables to tell them what size pipe needs to be used where.

cast iron lines meghan house

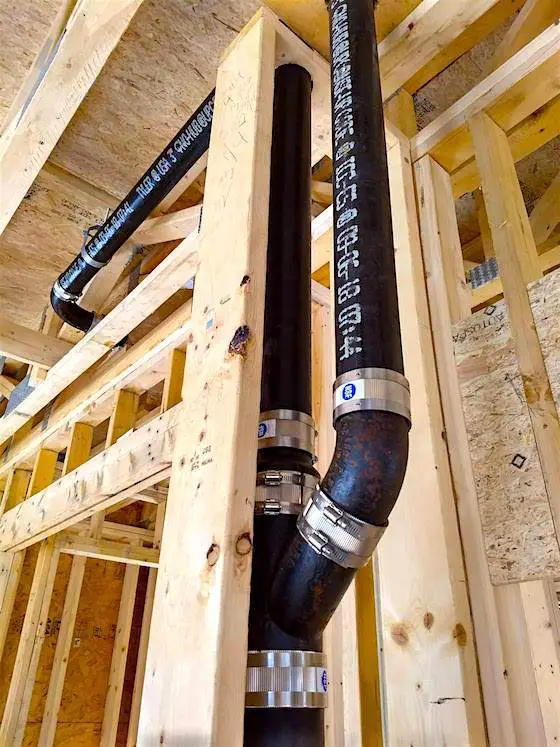
The wye fitting at the bottom of the photo is a 4x3 wye. There are two bathrooms that converge at this point and the pipe you see leaving the bottom of the photo is 4-inch no-hub cast iron. I installed this pipe in my daughter's new home on Mt. Desert Island in Maine in the winter of 2019.

Does the Pipe Thickness Vary?

The wall thickness of the plastic pipes does vary. Plastic plumbing drainpipes for a typical home are schedule 40. This is a thicker material and is designed to withstand decades of use and punishment from metal drain-cleaning snakes.

What is Cellular PVC Pipe?

Cellular PVC pipe looks just like schedule-40 PVC and it's dimensions are the same, but it's lighter in weight. It's not as strong as schedule 40 and it takes far less pressure to burst it if you're trying to build something that will requires the storage of compressed air. Here's an example of a tool made from PVC that uses compressed air. ALWAYS use schedule 40 to build one:

Be sure your local plumbing inspector allows cellular PVC to be used on your job.

What PVC Pipe is Used for Exterior House Drains?

SDR-35 is a popular PVC pipe used for exterior house drains. It's strong and it can withstand far more crushing force than some of the flimsy thin-wall plastic pipes you may see at a home center. SDR-35 is commonly used by plumbers for the drain line that extends from a house to a septic tank or a city sewer.

Give SDR-35 PVC a good look for the outside drain lines you want to install. It’s a strong pipe and the sidewalls are thinner than the schedule 40 pipe. I’ve used the SDR-35 pipe for decades with fantastic success. The last house I built for my family had over 120 feet of 6-inch SDR-35 pipe that connected my house to the city sewer.

A lighter-weight plastic pipe with holes in it will work fine for that buried linear french drain. Be sure the two rows of holes aim down. Don’t make the mistake and point them up to the sky as they may get plugged with small stones as you cover the pipe with washed gravel.

Column 1304A

May 31, 2019 AsktheBuilder Newsletter

New subscriber? Welcome! Aged (I don't mean to say you're a burnt cinder.) and seasoned subscriber? Thanks for continuing to tolerate me in your inbox!

Deck Cleaning - You Probably Do it WRONG!

Are you getting ready to clean and seal your deck now that summer is upon us?

First and foremost, you should use my Stain Solver. My guess is you're tempted to use one of these wretched machines:

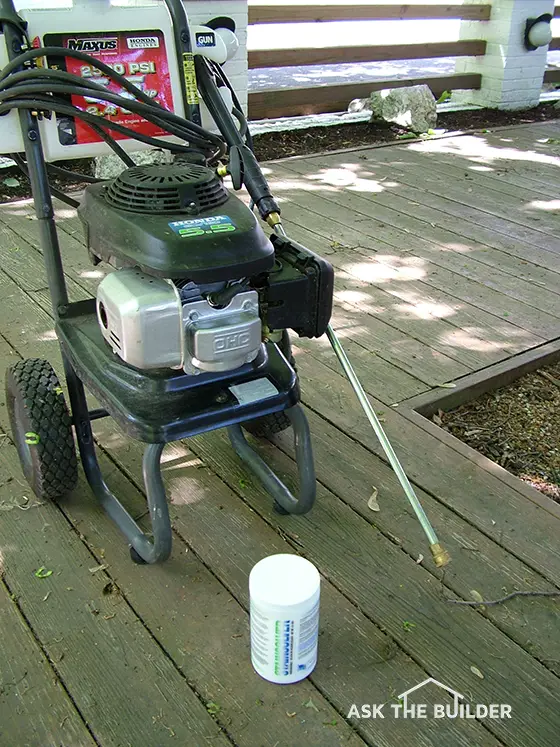
pressure washer

I know, I know this is what you see on countless HGTV shows, on other websites, and on YouTube. Pressure washers - the magic wonderful machines.

Blah blah blah. You know what they say about half truths, don't you?????

Pressure washers can DESTROY wood decks.

CLICK or TAP HERE to see what 2,400 PSI can do to the soft spring wood in your deck.

Please SCROLL DOWN into the column and watch the video of me in firefighting gear.

It was taped by Ron Fischer who worked for WCPO-TV Channel 9 in Cincinnati. I used to do a weekly segment for them and they wanted them to be a little quirky. I think I nailed it in this video.

What do you think? SHARE your feelings in the comments at the bottom of the page. I still have the helmet and turnout pants!

The BEST Wood Sealer?

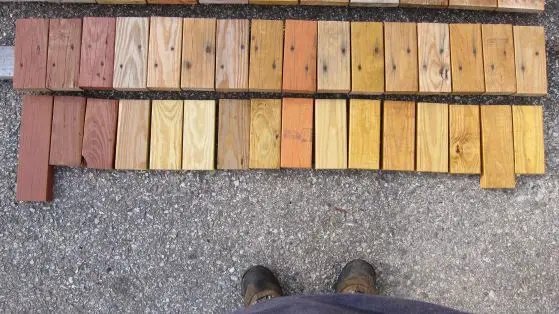
deck wood sealer
A few years back I did an exhaustive multi-year TEST of quite a few deck sealers.

You can't believe how much work it is to do this.

Some of the products are NO LONGER available, but the product that did WIN THE TEST is still available.

Would you like to know what product won the HARSH TEST?

I thought so. CLICK or TAP HERE for the free test results.

You're welcome. 🙂

Clinker Brick and Your Garden

How would you like a unique and interesting wall in your garden?

It doesn't have to be big.

clinker brick

CLICK or TAP HERE to discover secrets about clinker brick.

You'll be amazed.

Repairing CRACKS in SMOOTH Concrete

CLICK or TAP HERE to see how I'd repair cracks in smooth concrete.

You'll need to SCROLL DOWN to the second part of the column to get the tips.

That's enough for a Friday. I'm off to drive up to Bar Harbor in a few hours.

I intend to record quite a few run-and-gun videos up there on Monday. You're in for a treat is all I can tell you.

Tim Carter
Founder - www.AsktheBuilder.com
BUY Certified Organic Stain Solver NOW - www.StainSolver.com
Happy Belated Birthday Morse Code - 175 years! - www.W3ATB.com

Do It Right, Not Over!

Fantech

Fantech Video and Product Links

Here are the products you saw me install in the video. CLICK or TAP the images or text links to purchase them:

Here's the actual Fantech PB 270L7-2 270 CFM fan and the two inlets that are made to accept the LED dimmable lights:

fantech PB 270L7-2


CLICK or TAP HERE to order this at SupplyHouse.com.

CLICK or TAP HERE to order this fan kit from Amazon.com.

STOP: I'd check BOTH links above to see who has the better price. The prices change as fast as the weather in Cincinnati, OH!


Leviton Humidity Control Switch

leviton humidity fan switch

CLICK or TAP the image to have it delivered to your home.


Leviton Timer Switch

leviton countdown timer switch

CLICK or TAP the image to have it delivered to your home.

Use Clinkers to Make Interesting Things & Concrete Crack Repair

clinker brick

These clinker brick create a unique appearance. Use them on houses and in gardens. (C) Copyright 2019 Tim Carter

Use Clinkers to Make Interesting Things

QUESTION #1: Timmy, I was on a tour of the Gamble house in Pasadena, CA and saw the most unusual deformed brick in a garden wall. The brick was twisted and looked more like random rocks than brick. I want some for my own house! How are clinker brick formed and where can I buy them? Are they durable and will they last a long time? Cindy H., Tucson, AZ

I saw the same clinker brick Cindy saw when I toured the stunning Gamble house about ten years ago. I don’t know if it was the architect or the Gambles themselves that specified the use of this unique building material, but it was genius. If you ever have the chance to tour this mansion, be sure to wander through the outdoor gardens to see the walls built with this strange brick.

Clinker brick are made just like any other brick. Brick start out as clay and are put into a kiln where the temperature of the clay is raised significantly. It’s important to realize that not all clay has the same chemical composition. As the temperature rises in the kiln, the clay actually softens and melts. This changes the internal structure of the clay such that it comes out of the kiln more like a rock than a soft material you can form with your hands.

Some brick in the kiln melt and deform. These are clinker brick. Keep in mind that the odd colors you sometimes see in brick, and especially clinkers, result from the small amount of oxygen in the kiln as the brick are heated.

The absence of oxygen almost always produces darker colors such as black and even blue. You can create all sorts of different colors depending on when you reintroduce oxygen as the brick start to cool. It’s all very complex, but the key point is that clinkers can be the most colorful and unusual brick you’ve ever seen.

Clinker brick, depending on the minerals in the clay, can be extremely durable. There are many factors, but realize some clinkers transform to a material much like glass if the clay happens to have a high silica content. The odds are clinker brick will perform quite well in just about all outdoor applications, including garden walls and outdoor pillars.

You purchase clinker brick at businesses that sell brick. Not all brick suppliers stock them, but you should have great luck ordering them as the brick manufacturers would rather sell clinkers than throw them away.

No matter where you use the clinker brick I recommend you spend some time thinking about the mortar that will be used in between each brick. I recommend creating a mortar blend that contains three parts Portland cement and one part hydrated lime. If you can source a special volcanic sand that’s high in silica, that would be ideal. Otherwise, use medium or loamy sand that’s very clean.

Concrete Crack Repair

QUESTION #2: Tim, my husband and I can’t agree on the best way to repair some cracks in our concrete. We have some long random cracks about 1/16th-inch wide in our garage and basement floors. This concrete has a smooth finish. My husband wants to squirt caulk into the cracks. I feel this will look like a scar on someone’s face. How would you repair these so they look good and the repair is durable? Monica, M., Waterloo, IA

Concrete crack repair is a very common problem. I receive questions like this each week. You may not be in a battle with your significant other like Monica, but you still want the cracks repaired and you probably want them to look great.

The first thing to realize is any repair you attempt may be temporary if the concrete is still moving or moves seasonally. I live in central New Hampshire and each winter the ground freezes. The frost in the ground causes concrete sidewalks, driveways, and patios to lift. If the lift is uneven, the cracks will reopen.

Interior concrete slabs like you find in a garage and basement are the easiest to repair and the concrete rarely moves. It’s important to realize if the concrete is brand new you’ll get shrinkage cracks as the concrete loses the extra water that was used when it was mixed. This shrinkage can take up to a year so don’t try to fix a new crack as it will most likely continue to widen as the months pass by.

Interior crack repair on smooth slabs can be done using regular unsanded ceramic tile grout. This works best for cracks 1/8 inch or narrower. Unsanded grout can be bought in different shades of gray to match your existing concrete color. Match the grout color by pouring a little bit of the dry powered grout on the concrete. The grout gets much darker once you add water, but it will dry the color it is straight from the bag.

I have a series of four videos at my AsktheBuilder.com website that shows the exact process of grouting floor tile. These videos show you how to achieve a perfect match when patching a crack in concrete. I recommend you watch them. The biggest mistake you can make is using the wrong tools to make the repair and pressing too hard when you wipe away the excess grout.

Column 1303

May 27, 2019 AsktheBuilder Newsletter

Are you a brand-new subscriber? Thanks for your trust. If you've been here for some time, thanks for staying on board and opening each issue.

Memorial Day - My Dad

Today, May 27, 2019, we honor all those women and men who gave the ultimate sacrifice while in uniform so we can be free here in the great United States of America. While I can't be certain, I think this honor is extended to all those who died off the battlefield from injuries directly related to a war or any military service.

My dad was one of those. I shared the story about his WW II experience in a past newsletter. CLICK or TAP HERE to read it.

My dad had to be sent back to Heaven when I was pretty young. I was only 24 years old. I so wish he could still be here to see all that's happened. I know exactly what he'd say, but I can't type it here because he was quite profane when astonished.

You may have a loved one that died in battle or afterwards. I extend my deepest sympathy to you on this day. You and I are free and able to enjoy liberty because of their great sacrifice.

Great Vent Pipe

I recommend you watch this short video I recorded a little over a week ago up in my daughter's new home in Bar Harbor, Maine.

centrotherm innoflue

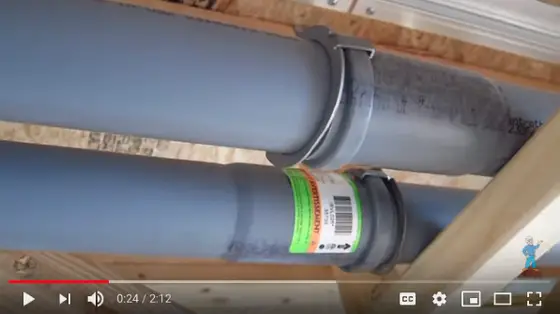
This polypropylene vent pipe is very easy to work with. It requires no glue or primer. You have all sort of time to adjust the fittings as a simple lubricant is used to join the pipes and fittings. See those metal clips? What are they?

CLICK or TAP HERE to see how easy this vent pipe is. Remember, it's FAR SAFER than traditional white PVC pipe.

Fence Post Secrets Revealed

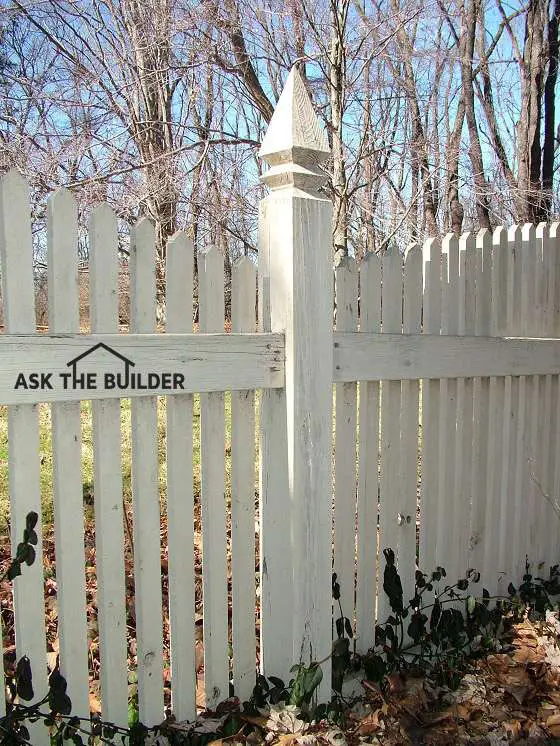
Fence Posts
Are you charged with building a fence soon?

I URGE you to check out my past column on the topic. I guarantee it will save you lots of frustration.

CLICK or TAP HERE to get free access to secret tips discovered by me from years of methodical testing.

Floor Tile Grout Videos

Perhaps you're about to tackle a floor tile job. It might even be a wall tile job.

No matter, my four-part floor tile video series will allow you to achieve PERFECT grout joints that will not crack nor crumble.

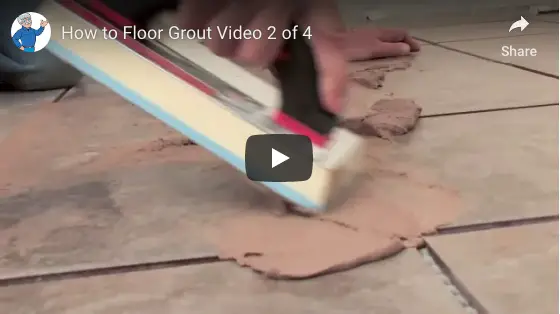
grout floor tile

CLICK or TAP HERE to view the four videos. I believe you'll save tons of time and money.

If not, I want to know why.

Amazon and This Newsletter

Pat emailed me a few days ago. Here's what she asked:

"Tim - is there any way to verify you are getting the credit for my Amazon orders? I have placed a few lately thru a link you sent and wanted to be sure it is working as it is a bit more of a bother than the direct order process."

The quick answer to Pat's question is: NO. Amazon jealously guards your privacy and does not allow me to SEE who buys what.

I can see a daily report of what was bought, but not by whom.

Pat has been using a link on my website so I get a small affiliate fee for each thing she buys.

That revenue from Amazon HELPS keep this newsletter coming to you.

I'd appreciate it if you would BOOKMARK this page and use it each time you need to order.

Thanks so much, and yes, I realize it's a little bit of a bother.

Floor Trusses - WOW! So Many Advantages!

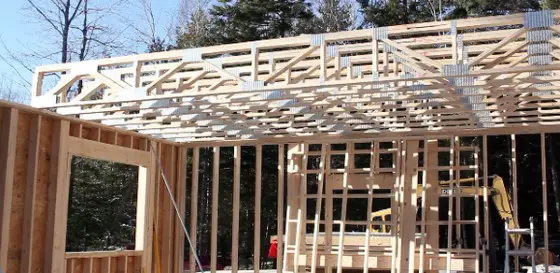
floor trusses
CLICK or TAP HERE to see a video showing the magic floor trusses used in my daughter and son-in-law's new home.

These things are the bomb! Think of all the advantages!!!!

That's quite enough for a holiday.

Tim Carter
Founder - www.AsktheBuilder.com
Certified Organic Cleaner - www.StainSolver.com
Morse Man - www.W3ATB.com

Do It Right, Not Over!

Gladiator Mobile Workstation

Gladiator Mobile Workstation

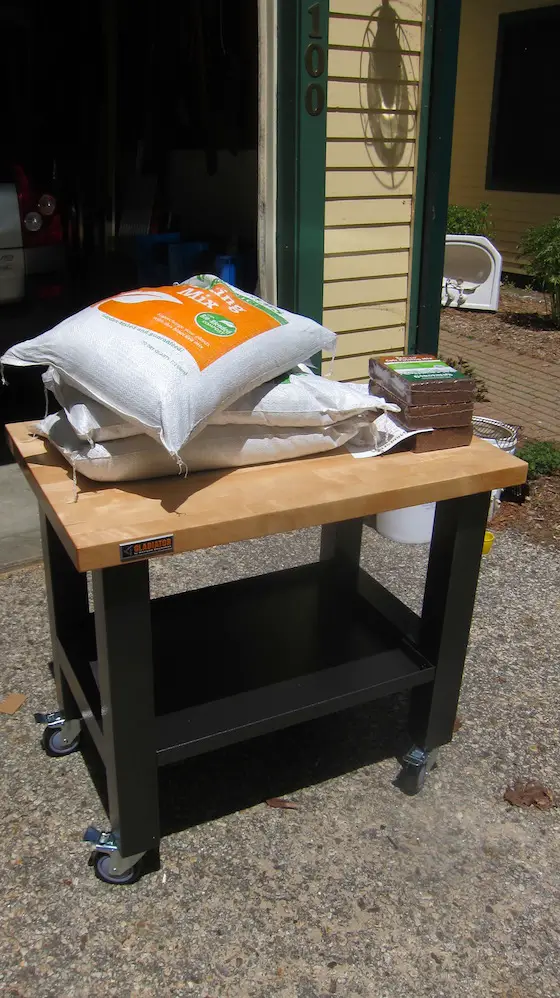
Here's the Gladiator Mobile workstation assembled and doing its first job supporting heavy sacks of potting soil. Ignore the china sink in the background. Hours before I had brought the sink outdoors after completing a master bathroom remodel. After taking this photo, I cleaned the sink up before listing it on Craigslist. I routinely sell things I take out of my home in remodeling projects that are still in great condition. I didn't want to set it on the blacktop and risk chipping or scratching it. But don't look for this workstation to be on Craigslist! No way I'd ever give up this bad boy! You'll pry it from my cold dead hands! Copyright 2019 Tim Carter CLICK or TAP THE PHOTO NOW TO HAVE ONE OF THESE BAD BOYS DELIVERED TO YOUR HOME.

Gladiator Mobile Workstation

I'm lucky and get to review new products you might use around your home.

Yesterday I had the pleasure to assemble the Gladiator Mobile Workstation.

My first impression was one of wonder as I moved the box to open it.

It was heavy. Heavy almost always means quality, durability and goodness.

What did the folks at Whirlpool / Gladiator ship me, granite rocks?

Workstation is Simple & STRONG

I opened the box on its side and slid out the few parts. Here's all that was in the box:

  • solid thick hardwood top
  • two leg sets
  • bottom shelf
  • four swivel casters
  • bolts and wrenches
  • instructions

In less than twenty minutes it was assembled and ready for use.


Gladiator Mobile Workstation

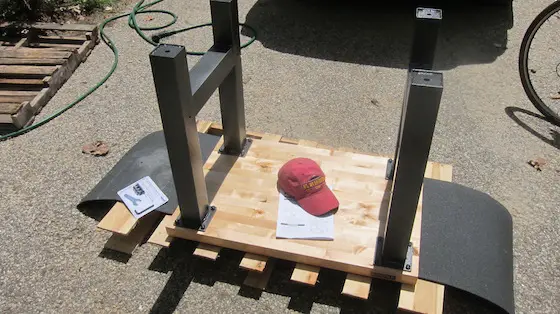
I got a little ahead of myself, but that's easy to do since it takes minutes to assemble. I put a pad down to protect the gorgeous hardwood top and then set the two leg sets on the top. It's caveman simple to assemble. CLICK or TAP THE PHOTO NOW TO HAVE THIS WORKSTATION DELIVERED TO YOUR HOME. Copyright 2019 Tim Carter


Gladiator Mobile Workstation

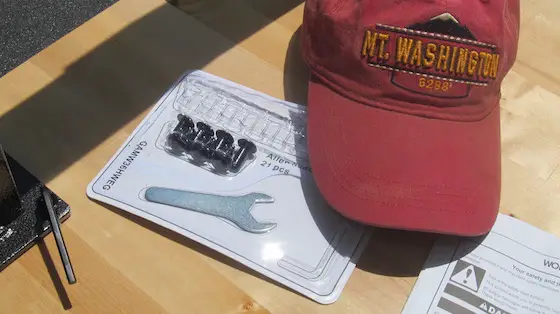
The bolts you need come in the blister pack along with the hex wrench you see in the lower left of the photo. The silver wrench is used to screw in the swivel casters. CLICK or TAP THE PHOTO NOW TO PURCHASE THIS WORKSTATION AND HAVE IT AT YOUR HOME NEXT WEEK. Copyright 2019 Tim Carter


Gladiator Mobile Workstation

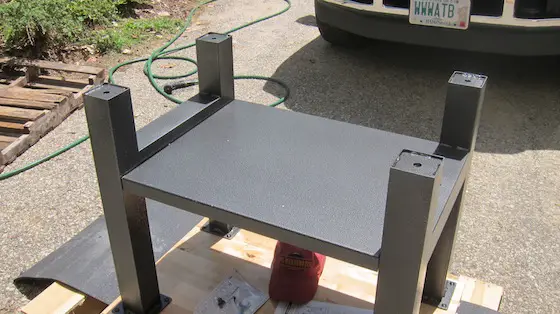
This is the shelf that fits between the legs. It's easy to install and you can have it one of two ways. I decided I wanted the small lips facing up so things don't slide off the shelf as I roll it around. Do you like my vanity license plate? Get it? CLICK or TAP THE PHOTO NOW TO HAVE THIS WORKSTATION AT YOUR HOME. YOU WON'T NEED MY HELP ASSEMBLING IT. Copyright 2019 Tim Carter


Gladiator Mobile Workstation

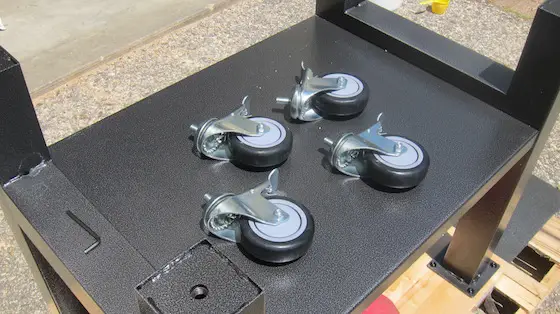
These are the four casters that screw into the legs. These things are strong enough to support a Boeing 747 coming in fully loaded with people, luggage and cargo. CLICK or TAP THE PHOTO NOW TO BE THE PROUD OWNER OF THIS MOBILE WORKSTATION. YOUR NEIGHBORS WILL BE SO JEALOUS. WARNING: YOU'LL HAVE TO CHAIN IT UP IN YOUR GARAGE BECAUSE THEY'LL TRY TO STEAL IT. Copyright 2019 Tim Carter


Gladiator Mobile Workstation

This handsome logo is on both long edges of the solid hardwood top. I'm pretty much convinced you could put lots of weight on this mobile workstation. The load capacity is only limited by the large bolts that connect the top to the legs. CLICK  or TAP THE PHOTO NOW TO ORDER THIS MOBILE WORKSTATION. SUPPLIES ARE LIMITED! Copyright 2019 Tim Carter

CLICK HERE RIGHT NOW TO BUY THIS AMAZING WORKSTATION.

Insulated Concrete Foundation Forms & Attach Wood to Concrete

house foundation

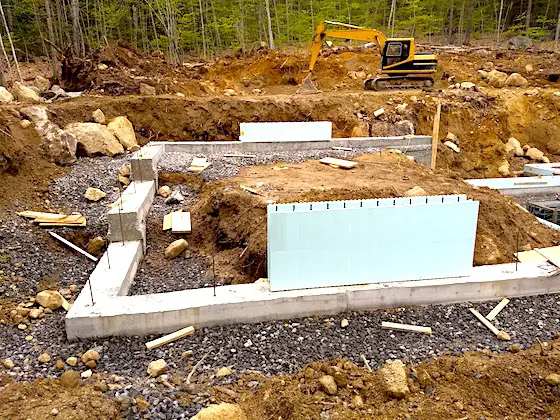
This is a house foundation that’s being built with insulated concrete forms. (C) Copyright 2019 Tim Carter

Insulated Concrete Foundation Forms

QUESTION #1: Hello, Tim. I was doing research about house foundations and came across interlocking foam forms that stack on top of one another. They assemble much like children’s plastic blocks. Does a concrete foundation poured this way work as well as a traditional poured or cast concrete foundation? What, if any, are the drawbacks from using these foam forms? Is there an alternative way to achieve a well-insulated house foundation? What about the cost of an ICF foundation? Audrey P., Mt. Desert, Maine

You may have the same questions as Audrey does if you’re researching new home construction. The insulated concrete forms (ICF) that she’s talking about have been around for several decades now. The industry has undergone some consolidation, but that’s normal.

I’ve seen these products at all the trade shows and I’ve been on job sites where they’ve been used. A large two-story building was built near my last home in the Midwest using ICFs. If you drove past it, you’d have no idea it was a solid concrete two-story building as it was covered with lap siding.

The manufacturers typically will sing the praises of their products. Not one will readily talk about the challenges of installing them, and there can be challenges. The finished ICF foundation performs structurally as well as a traditional poured concrete foundation.

It’s important to realize the foundation footing the ICFs rest on should be perfectly flat and level. The ICF blocks are precision products and will conform to whatever they’re placed on.

insulated concrete form footing footer

The footing must be perfectly level for ICFs to work well.

If the footing has humps or dips in it or is tilted side-to-side, the ICFs will telegraph all these defects. As you might imagine, it takes lots of extra time to get the footing perfect like I describe.

The footing also needs to be perfectly square so the ICFs are placed on the center of the footing with adequate flat area remaining to install any bracing that might be called out for by the ICF manufacturer. It’s important to realize that traditional concrete forms can be aligned using special screw bracing so the walls are perfectly straight. This takes minutes to do with traditional forms but ICFs might take a while longer to brace so the walls are as straight as an arrow.

Another key point is that traditional concrete foundation forms don’t require the footing be perfectly level. The concrete poured into the forms can be made level with great ease and moderate skill using laser levels, string, finish nails and chalk. Realize that you typically pour the concrete into ICFs until it reaches the top of the last row. Thus it’s super important that the top row of the ICFs is perfectly level. Since they stack on top of one another you can see why it’s so important for the footing to be level.

There are any number of alternative ways to achieve what ICFs do. The ICFs almost all use the same high-quality closed cell foam that you can purchase at building supply wholesalers or at the big box stores. These foam sheets can be purchased in giant 4x8 sheets that you glue to the sides of smooth poured walls. You and a helper could apply the foam to a standard foundation in a few hours using a caulk gun that dispenses an adhesive and a simple circular saw to cut the foam. The foam can be put on both sides of a typical foundation just as it will be on the finished ICF foundation.

I’d absolutely do a simple cost comparison. The cost of the concrete will be nearly identical in both scenarios. The ICFs use the same foam and you should be able to get giant sheets of foam for much less than the ICFs, but it depends on several factors.

I’ve seen traditional poured concrete foundation contractors set and pour fairly complex foundations in less than eight hours. Your local ICF contractor may be able to do the same with his interlocking blocks, but as Kenny Chesney said in his hit song, “only time will tell, but it ain’t talkin’.“

Attach Wood To Concrete

QUESTION #2: Help me, Tim! I need to attach some wood 2x4s to concrete in several places. I need a cave-man simple way to do this and don’t want to mess with expensive fasteners and complex methods or tools. I’ve tried using old-fashioned cut nails but they keep bending. Is there some secret method that seasoned builders like you use when homeowners aren’t looking? Thanks for anything you can share. Mike P., Phoenix, AZ

Hah! You may also wonder if builders like me have magic methods that save time and money. Well, when it comes to attaching wood to concrete, I do have such a method. My good buddy, Chuck Sallee, showed it to me one day many years ago. Chuck and I were carpenters working on a job together when he pulled out a rotary hammer drill and two simple nails.

The method Chuck shared with me all those years ago is so simple it astonished three young carpenters just this past week here in Bar Harbor where I was working on a job. I asked them how they attached wood to concrete and they told me about all the expensive tools and fasteners they use.

I said, “Would you be interested to see how to do it using two regular everyday nails?” They all responded, “Are you serious? You can do it with just regular nails?”

I got out my cordless hammer drill and inserted a 6-inch-long 1/4-inch bit. I then placed a scrap piece of 2x3 onto a vertical part of the foundation below where the driveway will be.

Then I drilled through the 2x3 in seconds and the bit started to go into the concrete. I drilled a hole about 3 inches deep into the concrete.

I took two regular 10d common nails that were 3 inches long. I placed them next to one another making sure the tips were touching and tapped both through the hole in the wood at the same time.

When they started to pass into the hole in the concrete I was careful to deliver solid blows with my 20-ounce hammer squarely on both nail heads so they both advanced at the same time into the concrete. In seconds, the nails were flush with the wood and the carpenters couldn’t pull it off the wall!

I have a video at my AsktheBuilder.com website demonstrating this method. Just click on this link - attach wood to concrete video - and watch the video!

Column 1302