July 25, 2018 AsktheBuilder Newsletter

New subscriber? I'm glad you're here!

Well-read & seasoned subscriber? Interesting issue today!

Week in week out, I do my best to help you save time and money. Every now and then, I need a little help.

Today is one of those times. I'm hoping you'll step up and give an assist. You'll see just below what it's all about as I've got two immediate needs.

I've got some interesting stuff in this issue, so hang in there till the end.

Last Weekend at the Forest Rally

I mentioned that I was going to be in NW Maine late last week up until Sunday morning. I'm now the Chief of Communications for the fabled New England Forest Rally.

We had some excitement on Friday afternoon that made the national news here in the USA. One of the race cars crashed and caught on fire.

The world-class driver, Ken Block, and his co-driver made it out without any injury. They were very lucky as the car caught fire in seconds after the car corkscrewed twice landing shiny side up.

One of my radio operators was less than 100 feet away and able to call in the emergency immediately.

CLICK HERE and scroll down to watch Ken's GoPro video to see what he saw through the windshield during and after the crash. You can't miss the video on the above page - it's a car engulfed in flames. Just scroll down or get to it as you read the article.

Need a Graphic Designer's Help

I want to create a cool patch for my radio operators that donate their time and skills to the rally. But I draw stick people.

I know exactly what I want in a patch and modern computer-controlled embroidery can make it possible. This technology has come a long way and the detail that's achievable is stunning. Look at two patches that I have:


Patch US Islands

patch joshua tree national park

Isn't the color and detail stunning? They can do this same thing on hats, shirts, you name it. The top patch is 3 inches by 3 inches. That's the size I want.

Here's a concept drawing of what I think will work. I'm pretty certain we can get this on a 3 x 3-inch patch based on the one patch you see above.

I want you to imagine the rally car spewing up all sorts of dust. They can do dust in the embroidery! Look at the Joshua Tree patch above and see how the orange and yellow are mixed on the right side.

patch-tims-comms-team

Please contact me if you're willing to pitch in to create the needed detailed artwork to make the patch look amazing. I'm more than happy to write an article about you in my radio blog and link to your website.

The article will show the above concept drawing, your final artwork that was submitted to the patch people and then a sample of the patch.

If more than one designer steps forward my guess is I'll have to flip a coin or ????? If you've created art for embroidery that's a plus. Be sure to mention that!

Haas Garage Doors

Matt from Haas Garage Doors was here two hours ago. He took measurements for some new doors that are going to transform the look of my home.

Right now I've got BLAH BLAND green doors. You'll see them in a before/during/after video I'm going to shoot about the project.

The new doors will take your breath away when you park in front of them as you arrive at my home. Haas has software that allows you to take a photo of your home and current garage doors. They then overlay on the photo what the new doors will look like.

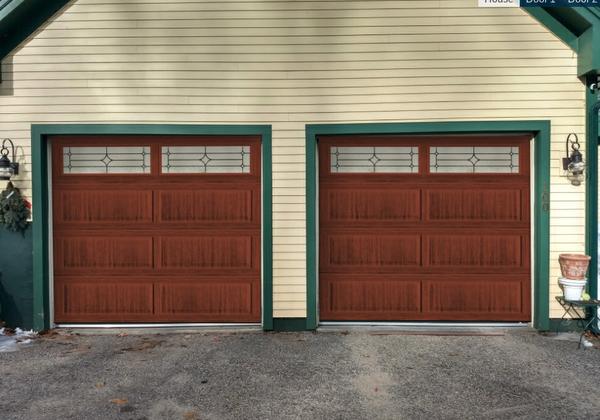
This is what my new doors will look like on my home:
garage-doors-preview
These are going to be superb insulated steel doors with the stunning emerald decorative glass. You really can't see it in the concept image, but the wood grain on the panels will be bi-directional just like if the door were made with real wood.

CLICK HERE to see how Haas Doors can transform your ho-hum garage doors into ones that your neighbors will covet.

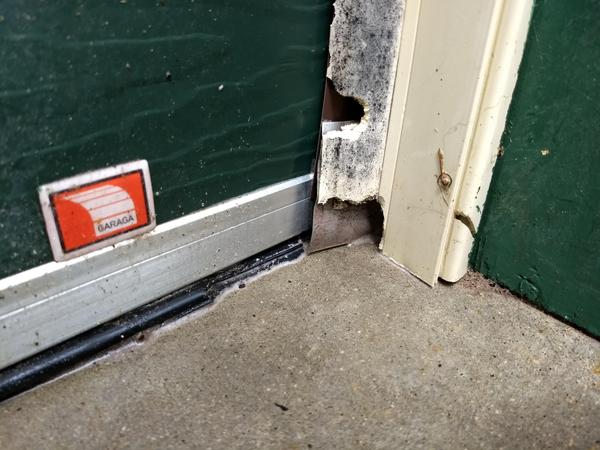
While Matt was here I gave him an idea for Haas. It's a mouse barricade. Determined mice want to get into my garage to stay warm and the little demons wreak mayhem in my garage.

Look at the holes they've chewed in the existing door weatherstripping. Does this happen at your home?

If mice try to chew their way into your garage through the weatherstripping reply to this and tell me the state where you live.

My gut tells me this is just a snow belt issue, but I've been wrong before.
garage-door-damaged-weatherstrip

Home Security - My Friend Howard

Have you been thinking about a security system for your home? Or, do you have an outdated system and want the latest technology?

Do you have questions about security you want to ask someone you can TRUST?

As you might suspect, I happen to know trusted experts in just about every field.

Rick Steinau is my go-to expert for pest control. Kathy Ziprik is my public relations expert. Steve Schaefer is my go-to expert for structural engineering. Janet Attard is my small-business expert.

I've got a list a mile long.

Howard Feldman is my go-to expert for home and commercial security. I've known Howard for fifteen years as his wife Barbara was a member of a mastermind group I was in.

Howard is tied in with ADT, the leaders in home security. Howard has been involved with home security for as long, or longer, than I've been building! You know he's an expert!

Please go watch this video of Howard and wait for it at the end is all I can say. Yes, Howard was a little nervous. He's not used to making video, but he sure knows security!!!

CLICK HERE and remember, WAIT FOR IT.

Meghan's Heat Loss Calculation

I need a radiant floor heating expert to step to the plate and help me.

I need a full-blown heat loss calculation for my daughter Meghan's new home.

It needs to be on a room-by-room basis for the purpose of creating the needed heating zones. I also need some design help.

Are you that person? Please reach out ASAP. I'm sure we can work out some way I can promote you and your business!!

Extension Cord Sizing Tips
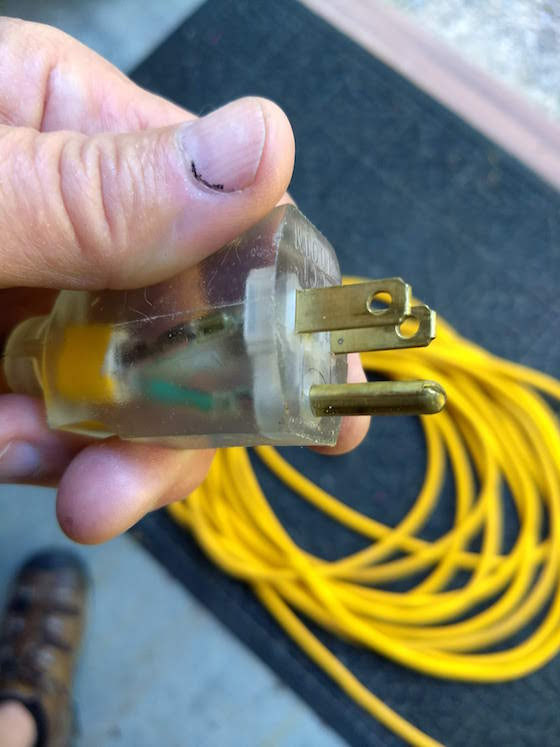
Extension Cord Sizing

That's enough for today.

I hope the rest of your week is remarkable.

Tim Carter
Founder - www.AsktheBuilder.com
Cleaning Man - www.StainSolver.com
Invisible Waves - www.W3ATB.com

​​​​​​​Do It Right, Not Over!

Stop Brick Leaks and Cut Drywall Like a Pro

mortar joint

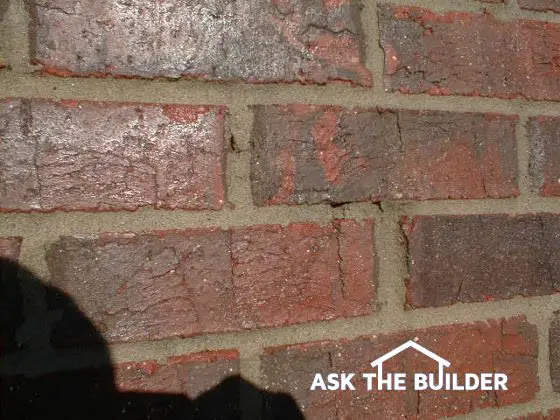
You can see the small cracks on the top and bottom of the mortar joint where water can enter a brick wall. (C) Copyright 2018 Tim Carter

Stop Brick Leaks

Question #1: Help me, Tim! When a blowing rain lashes my brick-veneer home, water streams down over the inside of my foundation in the basement. I thought brick was waterproof. What’s happening and is there a way to minimize, or eliminate, the water from entering my home? What could have been done to prevent this nightmare? Connie T., Indianapolis, IN

You may have a brick-veneer home like Connie. The brick is just a facade and offers no structural support. Unfortunately, the Three Little Pigs fable has helped foster the perception that brick homes are resistant to huffing and puffing. It’s possible to build a brick-veneer home that doesn’t allow water inside your home, but it requires a vast amount of attention to detail.

Your brick is leaking because of micro-cracks that exist where the mortar touches the brick. The shorter vertical mortar joints are much more susceptible to water infiltration than the horizontal mortar joints.

Water leakage is usually not an issue in a gentle rain shower. The wind-driven rain that pelts the brick is where the issue mushrooms. The pressure of the wind blasting the brick forces water into the micro-cracks. Each successive raindrop that crashes against the brick is like a miniature hammer that pounds the previous drop farther into the brick.

Soon water is streaming down the backside of the brick where it’s less than an inch away from the wood framing of your home! You can see why it’s imperative to have a waterproof membrane covering the wood framing to protect it from liquid water.

The water that flows to the bottom of the brick must be captured by a flashing. This water needs to be redirected to the outside of the house in a continuous pathway that’s immune from getting clogged by the mortar as the bricklayers install the brick.

Your best bet at minimizing water infiltration at this point is to inspect the brick for any large holes or crack where the mortar touches the brick. Repair those with new mortar that’s made using hydrated lime and fine silica sand.

The second step is to apply two coats of a silane/siloxane solvent-based water repellent to the face of the brick. You need a helper to do this. The helper wears a backpack leaf blower and blasts the wall with air as you spray on the water repellent. This air forces the liquid deep into the brick to help block water pathways.

I’ve got all sorts of extra brick veneer water leak tips and videos at my website waiting for you. Just go to: Brick Leaks

Cut Drywall Like a Pro 

Question #2: I’m embarrassed about this question, Tim. What’s really the best way to cut drywall? It would seem to me that a power circular saw would create a wonderful straight line. How do you cut straight lines in drywall as well as curved lines? Sam B., Spokane, WA

There’s no such thing as an embarrassing or silly question. Everyone has to start somewhere and I remember cutting my first piece of drywall.

The pros use a sharp razor knife to score one side of the paper face on a sheet of drywall. When you apply pressure to the other face of the drywall panel just behind the score mark, the sheet of drywall snaps quite cleanly in a straight line.

The key is to have a sharp razor that cuts through all the paper and into the gypsum core about 1/8-inch in one pass. Be very careful the knife doesn’t slip and cut any other part of your body that might be in the way.

A circular saw creates massive clouds of dust and should be avoided. Small handheld human-powered plunge saws are a great tool to cut curves, circles, and rectangular holes. Electric rotary saws with special high-speed bits that have cutting edges on the bits are what pros use to cut these curves, circles, and holes.

You can get special small dull plunge blades that fit on electric reciprocating saws to cut drywall on walls and ceilings. The dull nature of the blade helps to prevent cuts in hidden wires and pipes.

I’ve got great videos and extra tips for cutting drywall at my website. Go to: Drywall Cutting

July 18, 2018 AsktheBuilder Newsletter

New Subscriber? Welcome to the island!

Battle-scarred survivor? Tell the new residents how much fun we have!

Tomorrow I have to drive north and east. I'm headed to the Sunday River ski resort in far western Maine. This is the base of operations for the New England Forest Rally (NEFR). I'll be there until Sunday morning when I'll wake up early to drive back home so I can attend 10:30 mass with Kathy.

Three months ago, I was recruited to be the Chief of Communications for the NEFR. That's a fancy name for Herder of 40+ Radio-Operator Cats.

Amateur radio operators are needed along all the circuitous race routes to provide much-needed safety communications for the world-class driving teams, spectators, and all other volunteers. Believe me, there are crashes and people can get hurt.

CLICK HERE to get a grasp of why this is an intense training exercise for radio operators in the event of a local disaster. Be sure to watch the video on the page. I shot that last year as Travis Pastrana left the start line of one of the races.

Turn up your speakers and listen to the engine and turbo spin up at 0:17!!

Help My Buddy Jim

I helped launch a very secret Internet mastermind group back in 1999. It was filled with lots of smart and energetic entrepreneurs. One was Jim Kukral.

Jim's written several books and happens to be an expert on how to get people to notice your business. If more people notice your business, usually you get more sales.

Jim wrote an AMAZING book that shares simple secrets about how you can get LOTS of attention. Most of the tips are low cost. You don't need a massive advertising budget.

What if I told you that one company increased their product sales 700 percent by investing just $50? That's not a typo.

Before we go any further, you need to know that Jim was NOT responsible for the cover of his book. His publisher did the artwork.

Attention Book Jim Kukral

This is a FANTASTIC book. If you have your own company or work for ANY company big or small, this book will HELP YOU.

Here's the deal. Jim just needs to sell 65 more copies of the HARDCOVER version to regain all his rights to the content from the publisher.

I bought a copy ten days ago to help him. Can you do it too?

You have NOTHING TO RISK. Why?

Jim emailed me saying, "Tim, if any of your subscribers buy the hardcover book and don't feel it's worth it, I'll send them a check for their entire purchase price."

I pretty much know that you'll not be reaching out to Jim for a refund. You may reach out to me for Jim's email address only to THANK HIM for making you and your company more money!

CLICK HERE NOW to order a hardcover copy. Remember, it MUST BE a hardcover copy that you buy.

Getting Organized

On Monday night, James from Kenya delivered a tool chest to me. Just eleven hours before, the tool chest was in Baltimore. He drove it straight from there to my house in central New Hampshire. He arrived four minutes EARLY from the guaranteed time of arrival!

James Kenya Tool Delivery

Did you know there are several websites where you can have guys like James bid transporting just about anything to anywhere for a reasonable price? Uship.com is but one of them.

James and I rolled down a ramp the new KOBALT series 3000 stainless-steel tool chest. It's equipped with the Kwikset SmartKey technology.

KOBALT 3000 series tool cabinet
​​​​​​​Currently my hand tools are in the worst state of disarray as I've ever experienced. One reason is I keep accumulating MORE tools. I ran out of space to put them several years ago, so I now have a small mountain range of them on my workbench and others are scattered in various cardboard boxes. As the Ask the Builder guy, it's extremely embarrassing to put it mildly.

I'll be creating a video of this nightmare and how this 3000 series stainless-steel KOBALT tool cabinet is going to bring organization and LESS FRUSTRATION to my life. Watch for the video in about three weeks.

How many times have you cursed like a sailor looking for a tool? How much time have you WASTED? How GRUMPY were you?

Perhaps it's time you bite the bullet and invest in a tool cabinet. I should have gotten one years ago. When I was still building, my tools were perfectly organized in cabinets on my utility body truck. Once I got rid of that truck, trouble started and it's just gotten worse and worse.

The video is going to also feature the Kwikset SmartKey technology so you want to be sure to watch it.

Revised Columns Aplenty

I'm on a mission revising all my past columns at the website. It's lots of work, but it's rewarding.

I've decided I'm going to have to start sending out at least TWO newsletters a week to try to keep you up to speed on the revisions.

I've got a BUNCH for you today.

Change the Color of Tile Grout

Stop Water From Entering Brick

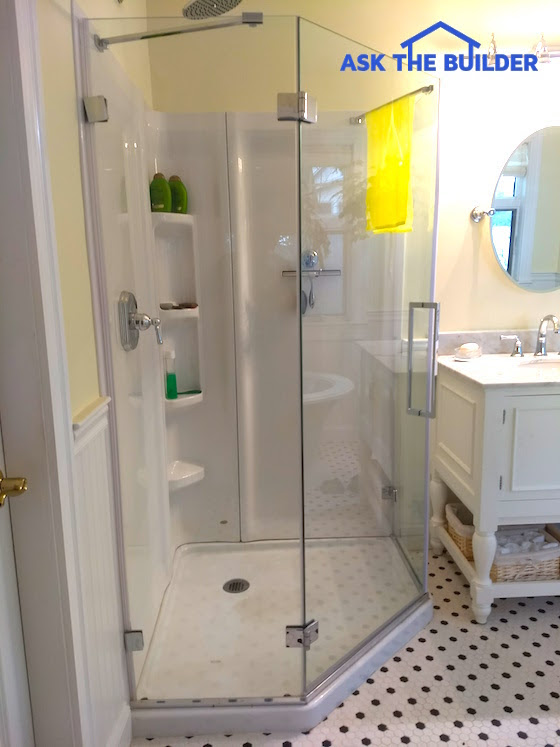
Glass Panels for Shower Walls - WOW!

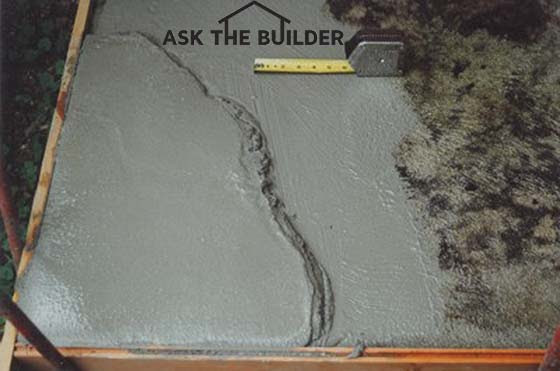
Save Crumbling Concrete - Overlay

That's quite enough for today.

I'll be back at you next week with more information.

Do you have questions? CLICK HERE and be sure to upload a few photos!

Tim Carter
Founder - www.AsktheBuilder.com
Clean ANYTHING ANYTIME - www.StainSolver.com
Create Happiness - www.W3ATB.com

Do It Right, Not Over!
New Concrete on Old and Change Tile Grout Color

Change Tile Grout Color

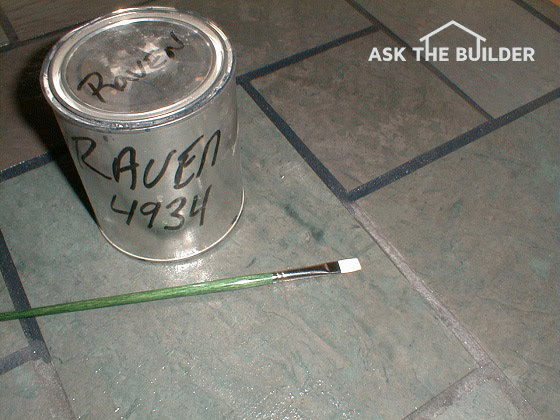
The color of this floor grout can be changed to a darker color using a penetrating liquid stain. (C) Copyright 2018 Tim Carter

New Concrete on Old

Question #1: Tim, I desperately need your help. The concrete sidewalk and driveway at my house are falling apart. The top surface is crumbling yet just below the surface the concrete is as solid as rock. It’s only a few years old. What’s causing this? Contractors have told me I need to tear it all out and start over. I can’t afford this. Is there a DIY solution or a far less-expensive alternative that a handyman can do? I’m looking for a repair that will stand the test of time. Mona G., Lexington, KY

Crumbling concrete like Mona’s is very common. You may have it at your home on your driveway, patio, outdoor steps, or even a retaining wall. The great news is you can often repair this yourself with minimal expense and tools.

There are lots of reasons why concrete spalls. Spalling is where the top surface of concrete flakes off or crumbles. In many instances, it’s traceable to workmanship errors where the concrete finisher added extra water to the concrete while putting the final finish on or he started finishing the concrete while bleed water was still up on the surface.

Mixing extra water with the concrete dilutes the amount of Portland cement in the upper surface. It’s important to realize that the cement is the only component holding the sand and gravel together. If you have too little cement, the concrete can’t withstand freezing and thawing cycles and heavy use. More Portland cement in concrete is always better. This is why the concrete abutments on railroad bridges last for over one hundred years. The railroad owners only wanted to build the bridges one time so they made sure the concrete mix had extra Portland cement added.

You can repair your concrete by installing a thin overlay on top of the old concrete. There are several important steps, but they’re all easy. The first thing is to remove all of the crumbling surface concrete. A pressure washer wand held at a low angle is perfect for this job. Remove all the old failing concrete until you get to solid material.

A concrete overlay can be as thin as 1/16th of an inch or as thick as several inches. Another key point is the size of the stone or aggregate in the overlay mixture. The size of the largest stones in the mix can never exceed 1/3 the total thickness of the overlay. For example, if you’re going to add a 1/2-inch overlay, be sure the size of the largest stones in the mix is not much larger than 1/8th inch! You need a blend of stones and sand in the mix with some of the sand being extremely small. Silica sand is the strongest sand you can use and I’d suggest you buy a bag of it to include in your overlay mixture.

The secret step of the process is cement paint. This nearly forgotten trick ensures the new overlay bonds permanently to the old concrete Cement paint is made blending cold water with pure Portland cement until it resembles latex paint. You brush this onto the damp old concrete one minute before you apply the concrete overlay.

I’ve got all sorts of extra concrete overlay installation tips, mixture ratios, videos at my website waiting for you. Just go to: Concrete Overlay

Change Tile Grout Color

Question #2: Tim surely you can help me. I want to change the color of the grout in my floor and wall tile. I’ve seen ads for miracle roll-on products and wonder if they can be trusted. Can you change the color of grout so it looks fantastic? What do you use? Is it hard to do? Don’t sugar coat the answer as I can handle tough love. Margaret R., Boxboro, MA

You may be in the same situation as Margaret. There are many reasons why you might want to change the color of the tile grout. Fortunately you can do this, however, you need to realize there are scam products out there.

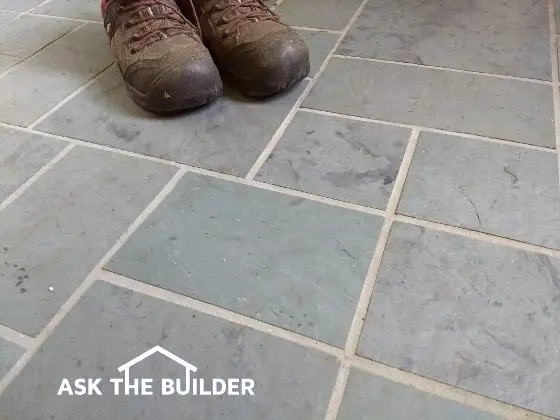
I’ve changed the color of grout before and it’s not easy. The color of the grout between the pieces of real slate in the entrance hall of my last home was supposed to be black. However, it came out a mottled dark gray because I foolishly added a grout additive to the mix. My wife hated the ugly appearance. I discovered there are liquid grout stains that are just like penetrating wood stains.

Using an expensive small square-tipped artist’s brush, I slowly applied the rich black stain to the grout lines. It took weeks of time doing this at night after I had come back from building homes all day.

Avoid using products claiming to be grout stains but are really just paint. Do NOT paint your grout. Keep in mind that you can really only go from light to dark when changing color. It’s virtually impossible to find a penetrating stain that will transform dark grout to a light color. If you put a form-filming paint on your grout, I guarantee you it will peel. Be sure the grout is perfectly clean BEFORE you start the process.

I’ve got great videos and extra tips for changing grout color at my website. Go to: Change Tile Grout Color

Drywall that Gets Wet and Sinks That Fall

Green Board Drywall

I'd use green board drywall in this room because water is not routinely splashed on the walls. (C) Copyright 2018 Tim Carter


Drywall That Gets Wet

Question #1: I need your help Tim. I’ve talked to several contractors and their advice is not in agreement. The dilemma is what drywall should be used in what areas of my house. One contractor talks about green board. Another one mentions MMR board. The third contractor hasn’t heard of either of those two. Help! Can you shed any light on what drywall should be used in my bathrooms, kitchens and other areas where water might get on the walls or ceilings? Debbie T., Boulder, CO

Last week I had a conversation with a homeowner and we wandered into the area of contractor competence. Based on the email I receive each week, I’m certain I have enough evidence to prove beyond a reasonable doubt that there’s a definite downward trend in the level of skill and knowledge in the residential contracting field.

Some of it can be traced to the vast amount of inaccurate information I see out on the Internet. There are hundreds of hobby bloggers who publish this or that on their websites yet they’ve never worked a day in a paying customer’s home. If you wander onto YouTube, you’ll be flooded with videos showing the wrong way to do things. It becomes your job to try to sort out the wheat from the chaff.

When it comes to drywall, fortunately, the answer is easy. One of the top manufacturers of drywall in the USA, USG, has published for decades the bible of drywall and plaster. It’s titled The Gypsum Construction Handbook.

If you open this incredible text, you’ll discover a collection of facts, methods and step-by-step instructions you’ll discover exactly what each drywall product is designed for, how to install it, and where not to use it.

The green board drywall the one contractor mentioned is just like regular drywall, however, the multi-layered facing paper on the front and back has been treated to resist moisture. The gypsum core of the board also contains chemicals to resist moisture. Note I’ve not said the green board is waterproof. It’s NOT waterproof.

It’s not recommended for use in areas that are subject to constant moisture. The handbook gives examples of these areas, but I maintain based on my experience that your tub and shower area would fall into this group. I’d not use green board in a tub or shower area that gets covered with tile.

The MMR board is the new name for green board. It’s an acronym that stands for mold, mildew and moisture-resistant. If you don’t want the tile to fall off the walls in your tub, shower, and kitchen backsplash areas, use a waterproof substrate like cement board or some other product that’s guaranteed to be waterproof.

I’ve got several helpful videos for you at my AsktheBuilder.com website showing the difference between the different drywalls as well as a link to get the Gypsum Construction Handbook. Just go to: Greenboard

Sinks That Fall

Question #2: Tim, we had a disaster in my new kitchen. I was washing dishes and the sink dropped into the cabinet below. It’s an undermount sink with a gorgeous granite top that overlaps the edges of the sink. How could this happen? What do you think went wrong? Can it be fixed with ease? What a mess! Krista C., Salt Lake City, UT

Distraught homeowners like Krista contact me once a month with the exact same problem. Their sinks were installed by unskilled workers who thought caulk would hold the kitchen sink to the underside of the stone tops. Oh how I wish we could rid the workforce of these dunderheads!

Professionals install undermount kitchen sinks using several different methods. My favorite happens to be small machine-thread studs that have a flat head with tiny holes in them. These are permanently affixed to the underside of the countertop with high-strength epoxy. It’s important to realize the underside of the top must be clean and free of all dust for the epoxy to work well. That could have been why your sink fell.

Some installers choose to use a non-epoxy method. A special harness that laps over the sides of the sink base cabinet cradles the sink. Special hardware that’s part of the harness draws the sink up tight against the bottom of the stone top. These systems are usually best installed before the countertop is set on the cabinets.

A professional can come to your home and repair the sink. It’s going to take two days as I’d suggest the epoxy cure for at least 24 hours before you finish re-installing the sink.

I’ve got great videos showing the epoxy studs and harness system at my website. Go to: Undermount Kitchen Sink

July 8, 2018 AsktheBuilder Newsletter

New subscriber? Welcome to the relaxed summer publishing schedule.

Been-around-the-block subscriber? Tell the newbies summer is like being in a slow-jazz club.

We just endured a six-day stretch of oppressive hot WX here in central NH. Looking at the national map it's been VERY HOT in lots of places. You could have been far hotter than me, I'm so very sorry about that!

When the temperature soars, I get LOTS of email.

If I could boil them all down to one sentence the question would be, "Tim, what can I do to cool down my attic?"

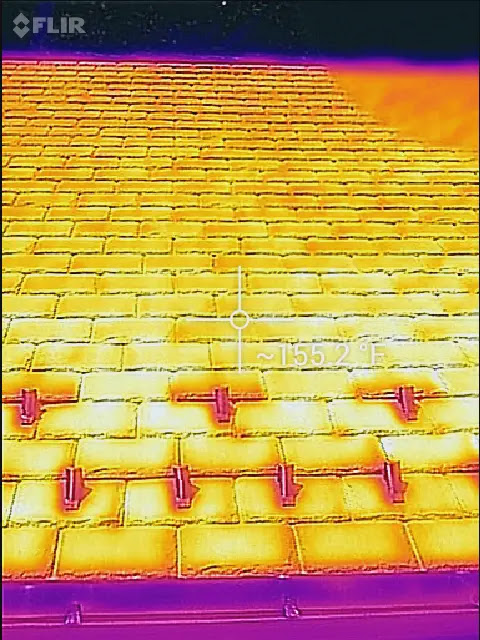
Before I answer, look at this photo and peer at the white crosshairs and the white temperature reading just below the center of the photograph. That's an infrared image of my own DaVinci Roofscapes virgin polymer synthetic slate. Want to see what it really looks like? WATCH THE VIDEO.

infrared image of DaVinci Roofscapes shingles

CLICK HERE to read what you're up against when you decide you want a cooler attic. You'll discover what I'd do if I was faced with the challenge.

My answer may surprise you.

Painting Rusty Metal

I'll bet you own something that's rusting. The past week I've been under my Ford F-250 Super Duty painting rusty steel trying to extend the life of my truck.

I've been using XO Rust spray paint because I've been painting hard-to-reach places and everything is above me. There's nothing worse than painting with the brush up above you. No matter how careful you are, gravity wins and paint drops on your arm and if you get complacent, on your face.

CLICK HERE to read why I prefer XO Rust spray paint.

I tested a remarkable new rust paint at the same time. I'm impressed with it because of the type of resin that's used to make it.

Resin is a fancy name for glue. Remember, all paint is just colored glue.

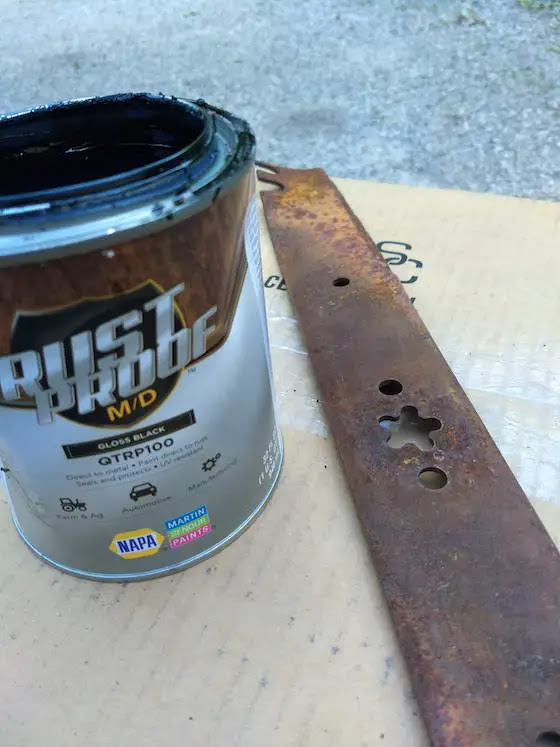
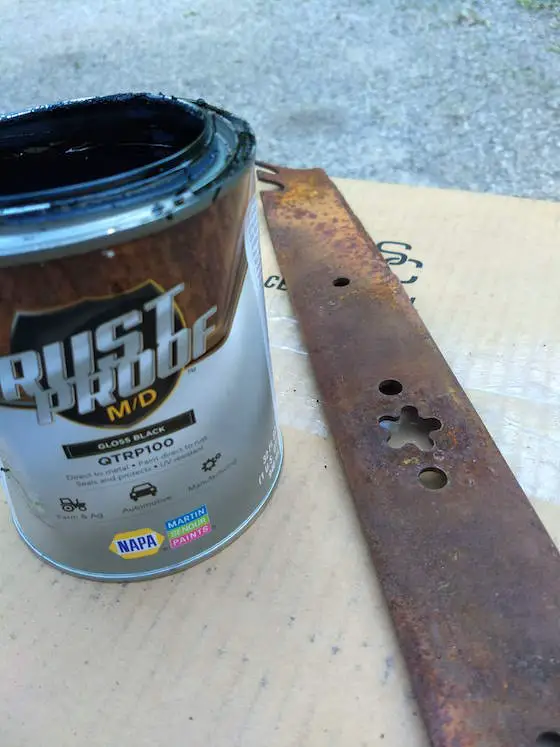
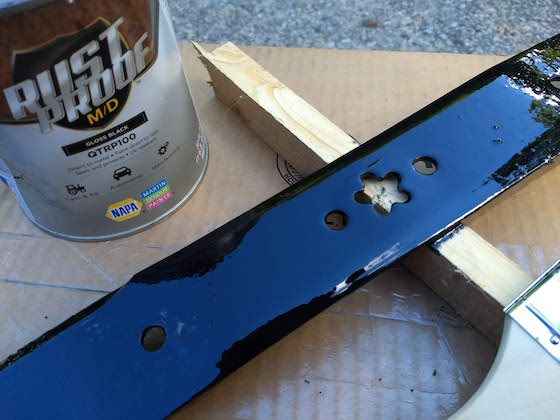
The new paint I tried was Rustproof M/D.

Rust Proof Paint Can - Mower Blade


The paint is made with a urethane resin. Urethane is one of the stickiest adhesives known to woman, man, or avatar.

CLICK HERE to see the final photo of what that lawnmower blade looked like 93 seconds after I started painting.

There was NO SANDING involved! All the questions you have about this new paint are at the column. Go ahead, CLICK THAT LINK.

Bar Harbor - MDI Meet Up

I'm going to be on Mt. Desert Island in Downeast Maine next Thursday and Friday night, July 12th and 13, 2018. I'm open to a meet up on Friday night July 13th.

If the WX is marvelous, this is what you'll see:

Mt. Desert Island Maine

If you want to eat dinner together and chit chat for a few hours, then REPLY BACK to this email. It's five days from now, so act fast.

I'll have the big beast with me, the Ford F-250 Super Duty, and you can see the fresh paint under the wheel wells. Of course, you're more than welcome to crawl under the truck to see the other painted areas.

Extension Cords - Don't Pick the WRONG One!!!

House fires are often caused by extension cords. The homeowner unknowingly chose poorly and got one that's too small.

By too small, I don't mean its LENGTH.

Take The Cord Quiz Smarty Pants

CLICK HERE NOW to see how easy it is to make sure you're using the correct extension cord for the job.

I'd only do this if you don't want your house to burn down.

P.S. Yes, that's Rustproof MD paint at the base of my thumbnail. I knew you were wondering!

HUGE Hot Water in a Box

Meghan, my oldest daughter, is getting ready to build a new home on MDI in Downeast Maine.

She's asking for my help in picking out the best products for the home. Radiant floor heating is going to keep her, Brent and the new baby warm.

What would you say if I told you that ALL of the hot water to heat the home and ALL of the hot water for showers, cleaning, washing dishes, etc. is going to come out of a smallish metal box that hangs on a wall?

I'm SERIOUS. You MUST CLICK HERE to see how this magic is possible.

Meghan's going to use a Noritz combi water heater boiler.

You'd never have thought technology could come this far. Wait until you watch the video on the above page. Holy Tomato!!!

What's the Right Drywall for a Wet Location?

Do you think you REALLY know the answer? What is a WET LOCATION?

What is a location with HIGH MOISTURE? Confused? Bwahahahahaha!!!

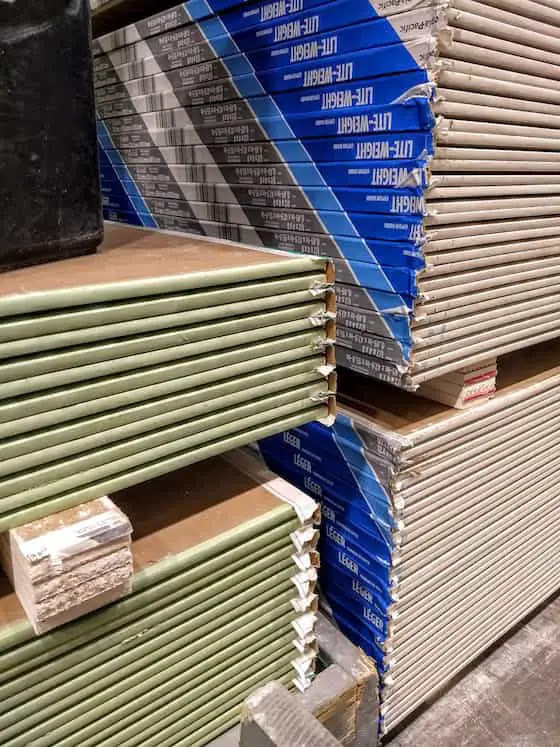
drywall in the store
I'll bet you don't know the answer to that last question.

CLICK HERE, read the column and pay CLOSE ATTENTION to the one photo.

I'm talking about the one that has a RED LINE under some words on a giant sales placard that you no doubt IGNORE when you go to the store.

That's enough for a Sunday morning. I'm getting ready for church.

What are the odds you and I will be on MDI at the same time next Friday night? I hope I get to meet you!

Tim Carter
Founder - www.AsktheBuilder.com
Cleaning Crystals - www.StainSolver.com
Happiness Waves - www.W3ATB.com

Do It Right, Not Over!

RustProof MD Paint

rustproof MD paint

Rustproof MD paint will make this rusty lawnmower blade look like new in minutes. Copyright 2018 Tim Carter

"The paint is a single-component moisture-curing urethane. Urethanes are one of the stickiest paints you can buy."

Rustproof MD Paint Checklist

  • primer and finish coat in one
  • sticks well to slightly rusted metal
  • paint steel or aluminum
  • two coats five hours apart provide the best protection
  • thin with acetone

RustProof MD Paint - Paint Rusty Metal

Rustproof MD paint is a special coating for rusty metal. Coating is a fancy word for paint.

The Rustproof MD has a very stick urethane resin, or glue, in it that allows it to bond to rusty metal like your shadow sticks to you.

Related Links

XO Rust vs Rustoleum Salt Test - DO NOT SHARE!

Magic Rust Spray Paint - Impress Your Friends

Do You Have to Remove All Rust?

No, you don't have to remove the rust. I'd get rid of the loose scale and wire brush any really rough areas. Just brush off any rust dust and apply.

Free & Fast Bids

CLICK HERE to get FREE & FAST BIDS from local painters who can get this paint.

Do You Need a Primer?

No. There's no need for a primer with Rustproof MD paint. It flows onto the rusty metal and its thick body produces a smooth finish in most cases.

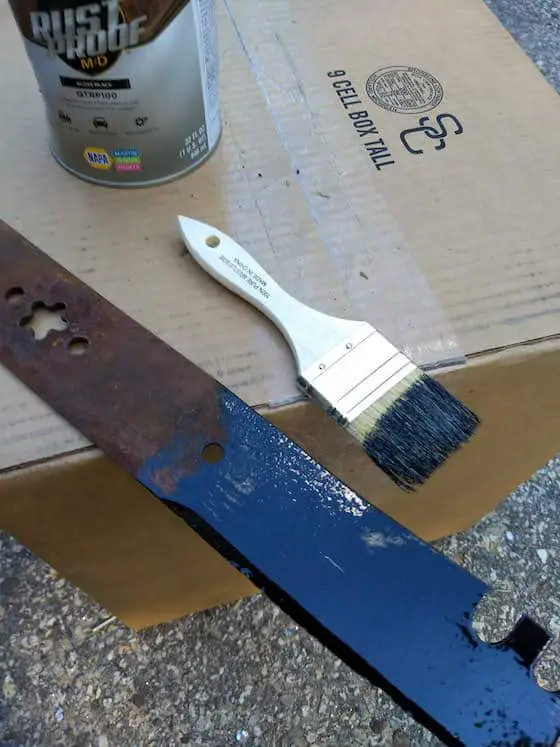
rustproof md paint

You can see the lawnmower blade is one-sixth finished. The paint flows on like lip gloss. Copyright 2018 Tim Carter

Why is Rustproof MD so Sticky?

The paint is a single-component moisture-curing urethane. Urethanes are one of the stickiest paints you can buy. The paint is so sticky that if you don't clean all the paint from the lip of the can as well as the lid before you tap the lid back on to put the paint away, you'll never get the lid off again.

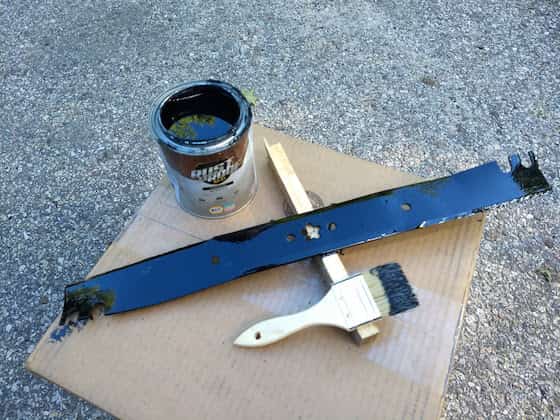
rustproof md paint

The one side of the blade is finished. You need to wait a full 24 hours before you think about flipping it over. Copyright 2018 Tim Carter

Is It Hard to Clean Up Rustproof MD Paint?

This paint is not water-based and it's more of a challenge to clean you and anything else that gets paint on it. The special solvent vehicle is but one reason why it sticks so well to the rusty metal. I used mineral spirits to clean my hands. You may want to think about using disposable chip brushes you can throw away as you may spend lots of money cleaning a high-quality brush.

rustproof MD paint

Look at how smooth the paint is! It self levels like magic. You can get pro results. Copyright 2018 Tim Carter

Will Rustproof MD Resist Sunlight?

Yes, this paint has special built-in UV resistance. Over time the sun's photons will blast apart the paint, but you might have sold the item you painted on Craigslist or a Facebook Garage Sale group.

Where Can I Buy Rustproof MD Paint?

You can only get this great paint at a NAPA Auto Parts store. Most give you a discount if you're an AAA member. Ask for it.

CLICK HERE to get FREE & FAST BIDS from local painters who can get this paint.

Stinky Garbage Disposal and LED Bulbs that Flicker

LEB Bulb

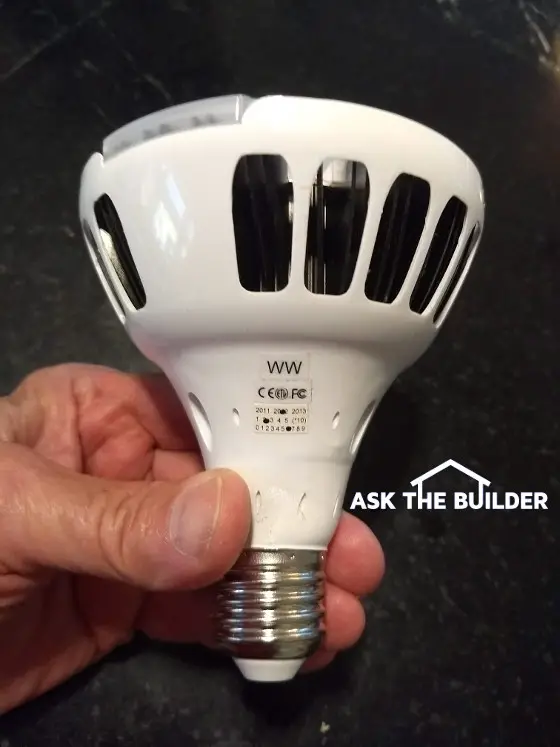
This is a LED bulb that fits into a recessed light fixture. It can become an annoying strobe light in your home. (C) Copyright 2018 Tim Carter

Stinky Garbage Disposal

Question #1: Tim, no matter what I do, my garbage disposal has a foul stink in it. It’s disgusting. What’s causing it and most importantly how can I get rid of the odor? Once the offensive odor is gone, is there some magic way to ensure it never comes back? Susanne W., Tacoma, WA

You may be one that suffers like Susanne. Smelly garbage disposals in kitchens are more common than you might think. A large number of homeowners reach out to me on a routine basis with the identical problem.

The odor in the disposal comes from rotting food. Your garbage disposal is a machine that grinds up food into a slurry. This slurry coats the inside of the cylinder chamber that contains the spinning grinding teeth.

If you have a disposer that smells like Susanne’s, then you’re not removing all of the sludge from the insides of the disposal each time you use it. What’s more, you could be creating clogs in your plumbing drain lines by the misuse of the disposal because you’re not fully rinsing out the disposal with enough water after each use to carry the sludge out to the city sewer or your septic tank.

Cleaning the disposal is not too hard, but it takes a few steps. You need to re-hydrate any dried food slurry on the side walls of the disposal. You do this by installing the stopper in the large hole at the bottom of the sink. Fill up the sink 1/3 or 1/2-way with warm water.

Leave the faucet water running, pull the stopper out and immediately switch on the disposal. The spinning grinders create a vortex of water in the disposal getting all surfaces nice and wet. Wait 20 minutes and repeat this process. The softer the dried food becomes, the cleaner the disposal will be after the final step of the cleaning process.

Wait another 20 minutes and repeat the process but this time before you switch on the disposal squirt into the water a 1/4 cup of liquid dish soap. Squirt more soap into the disposal as the water runs from the faucet so you create a spinning slurry of soap suds in the disposal.

Adjust the water flow from the faucet to a trickle so the soap suds slurry comes to the top of the disposal. Add more soap if necessary. Keep the disposal on allowing the slurry to scour the inside of the disposal.

Turn off the disposal after 30 or 45 seconds and then rinse away all the soap. To prevent future odor, you need to fully rinse the disposal after each use. Each time you finish grinding up food, fill the sink 1/2-way with clear water. Pull the stopper and turn on the disposal to spin the rinse water around the insides of the machine. This large amount of water helps flush out all the drain pipes preventing future clogs.

I’ve got great a great video for you at my AsktheBuilder.com website showing exactly how to use liquid dish soap to clean a disposal. Just go to Smelly Disposal

LED Bulbs that Flicker

Question #2: Help me Tim! I feel like I’m going to have a seizure at my home. I’ve tried three different LED bulbs in my home and all of them flicker. I’m convinced I’m getting bad bulbs, and the people at the store are being patient. Why are my LED bulbs flickering? Do you think the bulbs are bad or is it some other sinister problem in my electrical system and my house might catch on fire? Brad G., Tulsa, OK

You’d be stunned by the number of people that have the same flickering light problem as Brad does in his home. Guess what? It’s almost never the bulb. LED bulbs, for the most part, are very reliable and create consistent non-flickering light when they get a uniform current flowing through the bulb.

LED bulb flickering can be traced in almost every instance to a non-compatible dimmer switch in the lighting circuit. Modern dimmer switches create the dimming effect by switching the power supply on and off many times per second. Traditional incandescent bulbs have a glowing white-hot piece of metal that creates the light. When the dimmer switches the power on and off the glowing metal starts to cool down and the net result is the light dims. There’s no flickering.

LED bulbs don’t have glowing filaments. When the dimmer switch goes off and on many times per second, the LEB bulb becomes a flickering strobe light. In rare cases, the flickering can be some other power supply issue in case you don’t have dimmer switches. Contact your utility company in this case.

Some switch manufacturers make dimmer switches they claim to work well with LED bulbs. It’s easy to switch out a dimmer switch and this simple project might prevent you and Brad from having a seizure!

I’ve got a great video about flickering LED bulbs and a current list of dimmer switches that work with LED bulbs at my website. Go to Flickering LED Lights

June 26, 2018 AsktheBuilder Newsletter

Newbie Subscriber? Welcome!

Seasoned Veteran? Happy Summer - if you're north of the Equator!

I've got lots going on and a few balls in the air right now. That's why I didn't reach out to you last week. I've also discovered over the years, you can get busy too during the summer months.

Reading a newsletter might be a low priority for you!

Crazy Request 1974 F-100 Ford Truck

I'm starting to look for something I've wanted for a few years and you might be able to help. Within the next year, or possibly sooner, I'd like to buy an old pickup truck.

It's not just any truck. I'd love to find my original pickup truck that I bought new in 1974. I don't expect to find my exact truck as the odds are it's been recycled and could be a bunch of soup cans, a small I-beam, or several refrigerators for all I know.

I'm well aware of all the websites and services that have old cars and trucks for sale.

I'm looking for you to spot what I need perhaps in your neighborhood or town. You may know someone who's got the truck I want in their garage, driveway, barn, or ?

I'm looking for a 1974 Ford F-100 with a three-speed manual transmission on the steering wheel column. It would be ideal if it came with the 240 cubic-inch straight six engine too.

CLICK HERE to see what my truck looked like.

This is the crazy color I had. Mine had white racing stripes that went up and over the wheel wells running front to back. I don't need the truck to be orange! I'm not married to that color at all.

The one you just looked at won't do because it's an automatic and has the giant V8 engine. I'd compromise on the smaller V8, but I MUST HAVE the 3 on the tree baby!

Maybe you know someone who's got this rare truck that's not yet ready for the blast furnace. Let me know.

Klein Pocket Knife Review

I recently tested a very handsome pocketknife. The Klein 44223!

Klein 44223 Knife

CLICK HERE to check out more photos and how I felt about this bad boy.

Turn off Leaking Gas

A month ago, two friends of mine were killed instantly in a tragic gas explosion.

I shared that news with you and you may have been one who asked me how to shut off gas.

I created this fast page for you. Be sure to watch ALL THREE videos in case you happen to be someplace that has a different gas supply than what you have at your home.

CLICK HERE to discover how to safely TURN OFF natural gas or propane.

Many More Revised Columns

I've gotten far ahead of you in revised columns. I'm having lots of fun doing them.

What's super cool is I'm putting in no less than one video per column. Many columns have MULTIPLE videos. The videos really help explain what's going on.

I URGE you to at least open the following links and just SCAN what you see.

Here's why.

Just yesterday, Arlen reached out to me asking for help about a clogged sewer line. Arlen's a seasoned newsletter subscriber and he told me that once a year he had to rent a sewer cleaning machine to remove roots from his sewer line.

He asked if there was a way to stop the reoccurring madness.

Little did he know I had the EXACT COLUMN with MULTIPLE VIDEOS showing exactly how to STOP TREE ROOTS from getting into sewer lines!

Had I shared the revised column a few months earlier and had Arlen just SCANNED it, he probably would have thought, "Wait a minute! My buddy Tim has a column about tree roots in a sewer line. I'll go read it now and watch his videos!"

Oh, you want to see the Tree Roots in a Sewer Line column? I thought so after that little anecdote!

Tree Roots in Sewer Line
Grouting Tile - Water is Friend & Foe!

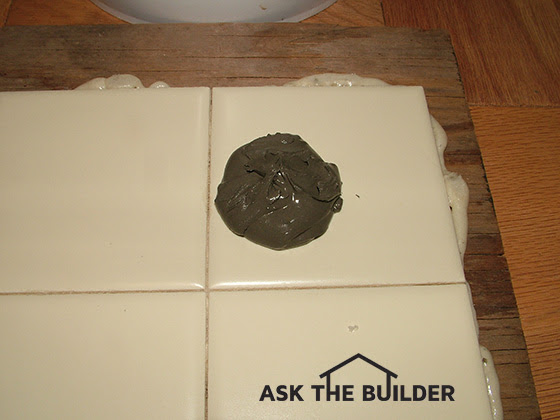
Grouting Tile

Flickering LED Bulb - ACCCKKKK!

Flickering LED Bulb

Wet Bar Ideas - Easy to GOOF UP!

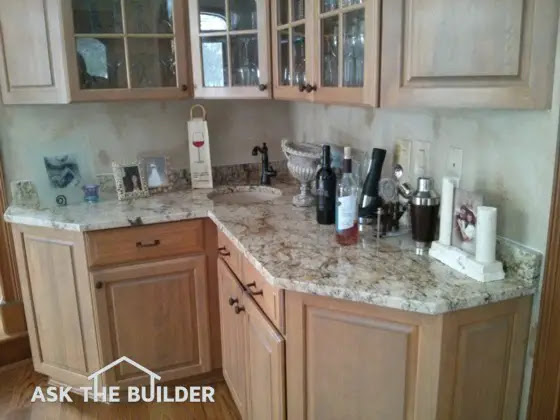
Wet Bar

That's quite enough for a Tuesday.

Oh, be SURE you OPEN the Flickering LED bulb column above and LOOK AT THE LED light I just installed at my house! It's at the bottom of that column.

You're going to LOVE, LOVE, LOVE it. It's awesome and makes me quite HAPPY because of what comes out of it besides light!!!!

Tim Carter
Founder - www.AsktheBuilder.com
Magic Crystal Purveyor - www.StainSolver.com
MHz Wave Manipulator - www.W3ATB.com

Do It Right, Not Over!

Turn Off Natural Gas

Turn Off Natural Gas

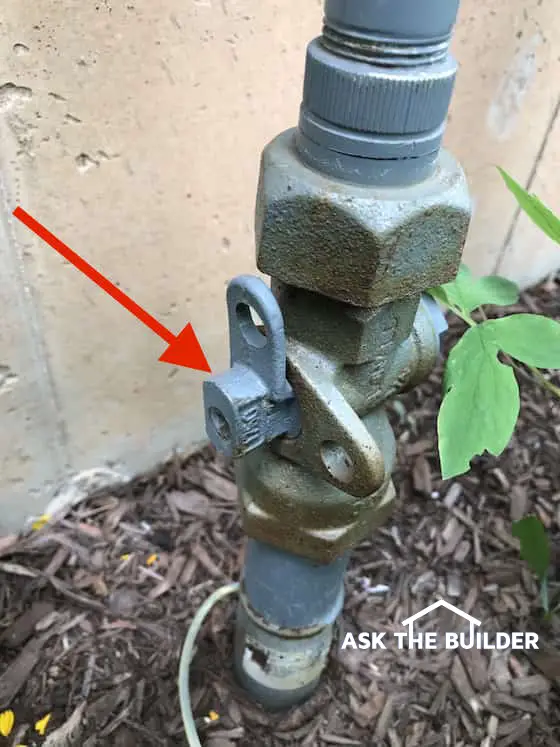
Turn off natural gas by rotating this simple ball valve 90 degrees to the right. The red arrow points to the valve. Rotate it so the hole at the top of the valve lines up with the the other hole that's in the 3 o'clock position. Copyright 2018 Tim Carter

Turn Off Natural Gas - It's Very Easy

If you smell natural gas at your home, do the following things:

Turn Off Natural Gas to House - Be Safe!

Most natural gas valves are the same. They have a ball valve on the street side of the meter. Watch this video to see how easy it is to shut off the gas:

What Wrench Should be Used to Turn Off Natural Gas?

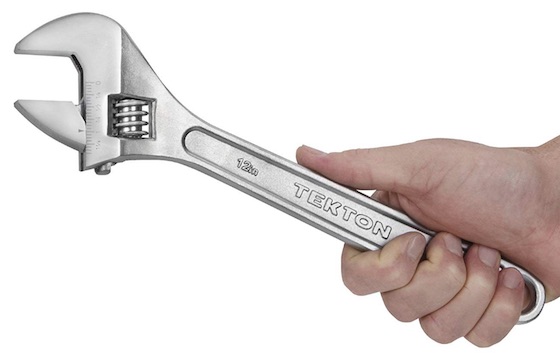
You should use an adjustable open-ended wrench or a pipe wrench. Use one that's at least 12-inches long.

turn off natural gas

This is a dandy 12-inch adjustable wrench. It's affordable. Keep it in a plastic bag out by the gas meter. CLICK THE IMAGE now to have this wrench delivered to your home.

How Do I Turn Off a Propane Tank Valve?

Watch this video to see how to shut off a propane tank valve.