January 13, 2018 AsktheBuilder Newsletter

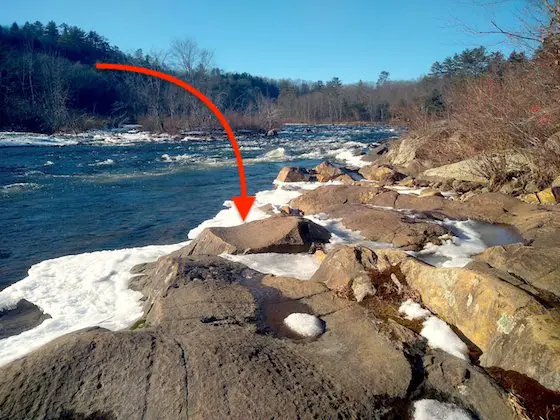
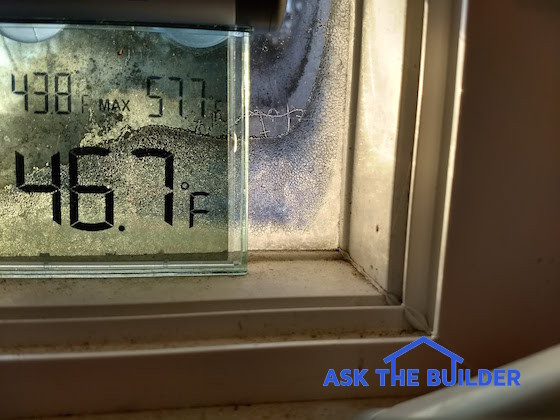
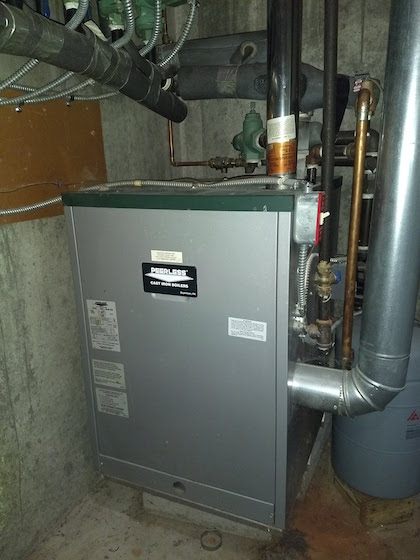
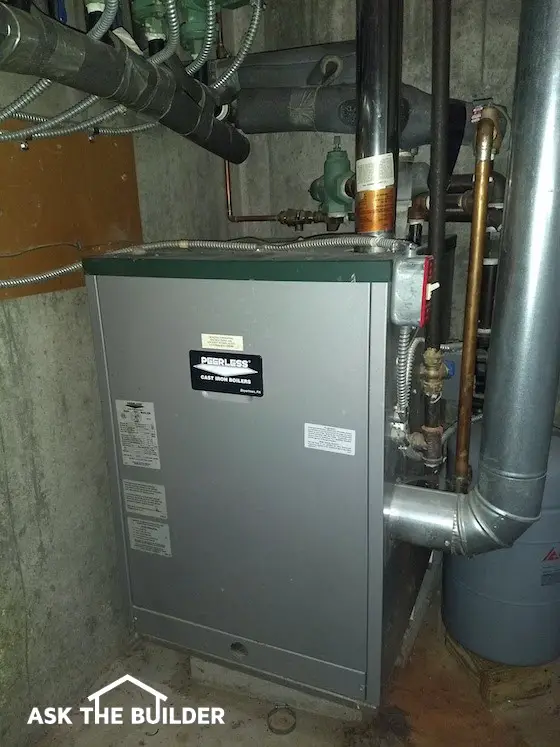
The past three days, we've been blessed with the January Thaw here in central New Hampshire. It's been a welcome relief and my boiler has finally been able to take a well-deserved break!

Two days ago, I was in Orlando, Florida getting ready to ride to the airport in my first Lyft ride. It was near 70 F and the three days I was in FL were both fun and work.

I'll bet I walked fifteen miles in two days back and forth between the two convention halls and up and down through the halls. In the rush to leave, I couldn't find my darn Fitbit!!! That would have kept track for me.

Cabs are DOOMED!!!! Using the Lyft app to get a ride to the airport was a hoot. A cab ride was over $45.00.

My Lyft ride with Alberto was $20.36. The Lyft app is so intuitive. Be sure you have your phone's GPS on when you fire it up.

The Builders Show Wrap Up

This was a very strange show for me. Tuesday was a long day. The highlight of the day was a media dinner where I was hypnotized along with five other members of the audience.

tim carter hypnotized


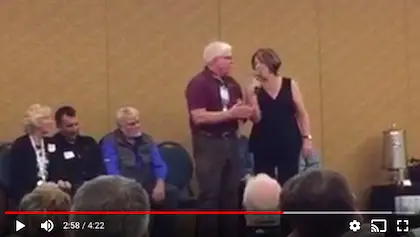
I've always wanted to be hypnotized. Let me assure you, it's REAL.

The hypnotist was a comedian and those in the audience got lots of laughs watching us do silly things on the stage. In the video screenshot above, the hypnotist told me to count my fingers, but the number SIX does not exist.

I was so confused when I got to eleven fingers!

I have NO MEMORY at all of any laughter. I thought I was out for five minutes. Several in the audience who saw me the next day said, "Five minutes? Are you joking? You were down for at least 45 minutes, probably more like an hour."

HOLY MOLY!

I was very relaxed after coming back to reality and I'd do it again in a heartbeat. If you ever have the chance to get hypnotized, do it.

The next morning got off to a very bad start. I had an early breakfast meeting with the folks at DAP. It was a total fiasco.

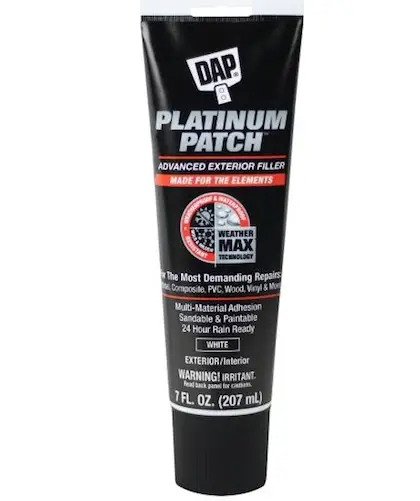
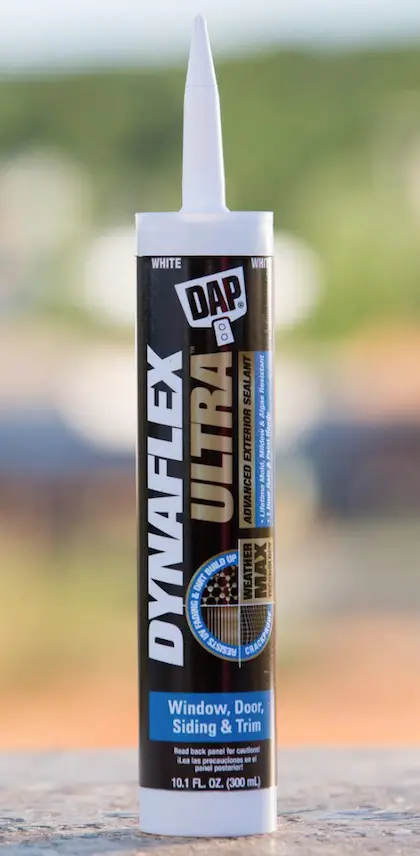
It's a very long story, but they showed me two new products they were excited about. One is an exterior spackling compound and the other is a glue. DAP is trying to go after Liquid Nail and other glue-in-a-tube manufacturers.

platinum patch

dap glue

I was introduced to the two product managers. One was a very nice young woman and the other a young man. I'd be willing to bet $100 neither was over 27 years of age.

The young woman told me all about the things outside you could use the Platinum Patch on: vinyl siding, fiber cement siding, wood, concrete, paver brick, brick, etc.

I listened politely then said, "How long does it take to cure?"

I'm pretty certain she said twenty-four hours.

I believe there was only one other media person that came to the event so a few of the DAP people had gathered around me.

"Can you tell me what happens after 48 hours when I decide to clean my patched driveway? I'll roll my 3200 PSI pressure washer out of my garage, put the 15-degree tip on the wand and aim it 4 inches away from your new filler."

No response. You could hear a pin drop.

"Wait. You mean you didn't test to see how your magic filler stands up to a pressure washer? The general public uses these destructive machines to clean just about anything. What happened when you tested the patched vinyl and fiber cement siding using the pressure washer?"

Silence. From their reaction, I felt they had not done the tests, or if they had, they were unwilling to share the results.

The young man told me about the new magic glue. He talked about how it would be excellent to use to install ceramic tile on a wall.

In fact, he had me glue a 12x12 piece of tile to a sheet of drywall that was on a display wall in the booth.

"Have you ever installed ceramic tile at a real job site?"

"No," he answered.

"Do you know how ceramic tile is installed?"

"Not really," he replied.

I proceeded to tell him how it was done and suggested that when the show opened he ask booth visitors what they did for a living in case a tile setter came to the booth.

This would save the young man from being embarrassed.

I shook my head and left the DAP booth. Believe me, they were quite happy I was gone.

Moral of the Story:

Be VERY CAREFUL about new products and use LOTS of common sense when you think about how the product may react to normal wear and tear. Ponder what may happen to the product AFTER it's installed.

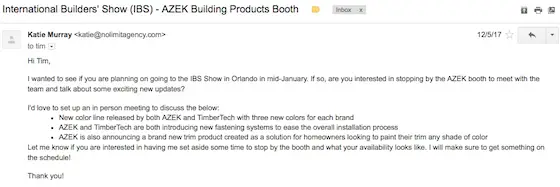
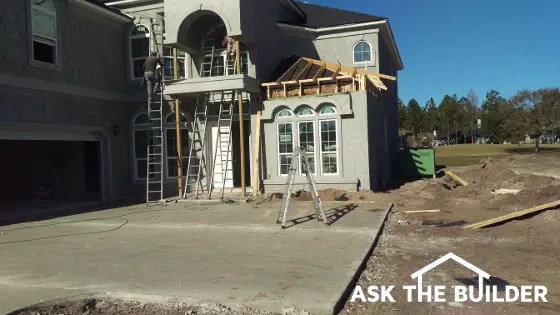
The Azek Disaster Meeting

Less than an hour after leaving the DAP booth, I found myself at the Azek booth. Azek is known for making exterior plastic trim boards and other outdoor products for your home.

I listened to their pitch about their new deluxe trim products. The wheels fell off as soon as they showed me an aluminum deck railing system.

You're NOT GOING TO BELIEVE WHAT HAPPENED.

CLICK HERE and read this story.

Please do me a HUGE FAVOR.

If you have a shocked reaction to the story after taking the one-question survey at the end, PLEASE leave a comment at the bottom of the story.

Remember, I have to manually APPROVE comments to keep SPAM and haters at bay.

After you click Submit, your comment doesn't automatically appear. Just be patient as I'll approve it when I see it come in.

That's enough for today.

Please oblige me and leave a comment at the bottom of the Azek story. Be SURE to answer the question at the bottom!!

Tim Carter
Founder - www.AsktheBuilder.com

Man Who Asks Probing Questions

Do It Right, Not Over!

AZEK Aluminum Deck Post Bolts

AZek Aluminum Deck Post

Here's a great shot of the fastening method for some Azek aluminum deck posts. The four bolts must be made from a material that will not corrode when water surrounds them and the treated lumber they pass through. Copyright 2018, Google / YouTube, Inc. Fair Use Doctrine screen capture

Published: January 12, 2018 © Tim Carter

Just two days ago, January 10, 2018, I was at the International Builders Show in Orlando, Florida. I visited the AZEK booth and was talking with an AZEK employee about bolts that should be used when installing the AZEK aluminum deck posts. (Full background story on the Builders Show in the January 13, 2018 Newsletter.

The first thing to remember is AZEK invited me to come to the booth.

Azek Booth Invitation

Here's a screenshot of the invitation to come to the Azek booth.

It's important to realize I write a syndicated newspaper column that's still published by sixty-plus papers. In addition, I have over forty years of hands-on experience working in the field in the homes of paying customers. Another key point is I have nearly 50,000 newsletter subscribers who regularly participate in short surveys.

The combination of these three things allows me to provide a unique insight as to the wants and desires of consumers and I can identify building products or systems that might not be as good as they can be.

What's more, I'm mindful of a growing and disturbing trend of young builders, carpenters and DIYrs that aren't aware of serious structural dangers when metal fasteners come into contact with outdoor treated lumber and water.

It's basic high school chemistry.

AZEK Aluminum Deck Post Bolts Can Corrode Fast

Just before leaving the AZEK booth, the AZEK team members wanted me to see an aluminum railing system they were displaying at the show. Within minutes, I got into a tug-of-war discussion with a young AZEK employee after he showed me the cast flange at the bottom of the aluminum deck post.

The conversation went something like this:

"Do you supply the needed stainless-steel through bolts, washers and nuts with the posts?"

"No," said the AZEK employee.

What followed was a brief discourse about how the entire safety of the railing system is dependent upon the through bolts never rusting or corroding.

The through bolts are a primary structural component of the deck railing system. If they fail, the railing can be pushed over with ease.

Should this happen, a person/people could fall many feet to the ground and be seriously injured or die.

Rapid corrosion of metal fasteners happens when you mix modern treated lumber, water and normal steel bolts that have a thin zinc coating. You need special fasteners that are highly resistant to corrosion when it comes to deck railings and posts.

High-quality type 316 stainless steel is the material of choice to avoid corrosion.

Expert Witness Work Provides Perspective

I mentioned to the AZEK employee that I've been doing expert testimony work for about 15 years or more and that my most recent case involved the Brazilian Ambassador's roof on the island of Antigua.

I shared with this young man the chain of events that unfolds when a building product failure becomes the focus of a lawsuit.

Should someone be injured or die because an AZEK aluminum deck post fails because of a corroded bolt(s), one of the first companies that's going to be named in the subsequent lawsuit would be AZEK.

The first thing to remember is it doesn't matter that the aluminum post didn't fail. Fasteners are required to connect the AZEK railing to the deck.

AZEK and their engineers undoubtedly know about, or should have known, the importance of fasteners and more importantly what it takes to ensure their railing system stays safe for the life of the deck.

The plaintiff's attorney would discover in the deposition phase of the lawsuit that the AZEK engineers ran tests to ensure the railing was safe. No doubt questions would be asked as to what types of fasteners were used in the test procedures.

I know this because I've been asked countless probing questions while under oath sitting at a large wood table with a court stenographer and voice recorder capturing my every word.

AZEK, by selling a deck-railing product, is expected to be knowledgeable about what it takes to create a safe product.

That's a given. Technology has really raised the bar for manufacturers when it comes to product liability and doing a better job. AZEK has the ability to set up a Google Alert for every mention of AZEK or one of its products so it stays up to date with all that's going on.

Let's assume AZEK is named as a defendant in a lawsuit where a person died because their railing system tipped over after the bolts holding it rusted. In addition, assume this happens six months from now after this column has been published on the Internet.

As soon as the plaintiff's attorney discovers this column early in the discovery process while she/he researches all that's been published about AZEK aluminum deck railing systems, it's going to be time for AZEK to open up their checkbook. I say this assuming that AZEK continues down the pathway of not supplying the best available fasteners with their railing system.

I'm no legal expert nor am I offering legal advice to AZEK. All I'm doing is sharing my own personal experiences having been a part of lawsuits where I was an expert witness.

Imagine if this hypothetical lawsuit proceeded all the way to a trial. If you want to see how the jury might vote after they deliberate the facts in the matter, be sure to answer the question at the bottom of this column and then look at the results of others who've answered before you.

Simpson Strong-Tie Ally - Corrosion is a Real Danger

"Don't you feel it would be a good idea to include stainless-steel bolts, washers and nuts with your product so you do your best to ensure that your railing system doesn't fail?"

I went on to explain that another exhibitor at the show, Simpson Strong-Tie, had all sorts of literature and experts at their booth that would explain how deck railing posts must have the highest-quality fasteners to be safe for decades.

Simpson Strong-Tie also publishes excellent documents with great illustrations showing how to make safe connections. This is not hard to do.

CLICK HERE to see an example of how to make a wood deck railing post very safe. Pay close attention to the fact that they do include the fasteners and you can pick one that has stainless steel!

We discussed the insignificant cost of high-grade USA-made type 316 stainless-steel through bolts. For a company like AZEK to purchase them in bulk, my guess is the cost per bolt, washer and nut combo would be less than 50 cents each. This means the cost of a post would have to be increased by just $2.00, perhaps $3.00 to cover the cost of any packaging for the hardware.

stainless steel bolt

Here's a typical stainless steel through bolt you might use with an Azek aluminum deck post. The bolt costs about 54 cents each. You can buy a pack of them at Amazon.com for $8.07 here in January of 2018.

Although I didn't record the conversation, I wish I had now, I'm quite certain the young man's exact response to my question above was, "Our competitors are not including the hardware and no one would pay the extra money for them."

"Would you like me to prove you wrong? I'm more than happy to do a survey of my tens of thousands of newsletter subscribers and my YouTube subscribers. Let's see what they have to say."

The AZEK employee had no interest in me doing this no-cost survey for them.

"You know what, I'm just going to do the survey on my own and I'll share the results with you. I'm willing to bet that a vast majority of consumers would GLADLY pay extra money for the correct fasteners knowing their railing system will not fail."

You don't have to have a MBA in marketing to see the huge opportunity here. Can you picture this TV or magazine ad:

"Our competitors don't include the required stainless steel fasteners with their deck posts. They just hope the contractor will use the right ones. Do you want to HOPE that your deck railing doesn't fail? Specify AZEK aluminum deck posts with included stainless steel bolts and know your loved ones will be SAFE."

But What Bolts Should Be Included?

You may think it's impossible to include the right bolts. It's not. The AZEK engineers can easily do the following:

  • develop a preferred installation method for both wood and concrete situations. Believe me after framing countless decks, it's not hard to come up with a standardized method that will work in almost all cases. CLICK HERE to see how the Simpson Strong -Tie engineers convey the best way to install their hardware.
  • for wood, show the size, number and placement of blocking pieces as you see in the video above. Also show the exact type of corrosion-resistant fasteners required to secure them to the deck floor joists. If the blocks fail, then so to will the railing no matter what bolts are used!
  • for concrete, show the correct stainless-steel stud anchors, epoxy if necessary, and the minimum distance the holes must be from the edge of concrete slabs.
  • create a short installation video showing how to install the blocks and bolts - put a sticker on the post advertising the video.

A Company That Does it Right

Just three weeks before going to the Builders Show I had the delightful experience of installing a product from a company that understands consumer wants and values their time and safety. I've installed thousands of products in my career and when I opened the box and saw all the included parts, a gigantic grin appeared on my face.

Pay close attention to the clear packaging just under the floodlight in this photo:

Ring Floodlight Cam

Here's what you get with the Ring Floodlight Cam. You even get EXTRA parts in case you're a klutz and drop something. The orange screwdriver works to tighten the white finish nuts that secure the floodlight to the galvanized steel baseplate in the photo. Copyright 2017 Tim Carter

What you see is the Ring Floodlight Camera. It's got all the parts you'd ever need, and even a few extra things in case you drop something!

Brilliant. You bet I'm willing to pay $2 more to save a trip to the hardware store! You bet I want the best screws to install the floodlight so it doesn't fall, short out and cause an electrical fire at my house killing me and my loved ones! Kudos to the folks at Ring!

Ladies and gentlemen of the jury, it's now time for you to weigh in. Answer the following question and let the chips fall where they may:

DIY Plumbing Challenges

plumbing mistakes

Here’s a homeowner’s attempt at installing a DIY toilet. He’s already made two grave mistakes. (C) Copyright 2018 Tim Carter

Plumbing Mistakes

I’m blessed. Not only do I get emails each day from readers like you, but I also get questions from the Ask Tim page at my AsktheBuilder.com website. Believe it or not, these questions are never tiring and it’s like Christmas morning when I open them. The high-resolution photos that often accompany the inquiries are like magic eye candy to me. My wife thinks I’m nuts!

Today was no different. Wayne reached out to me from Houston, Texas. He decided that he was going to do some serious DIY plumbing at his house and as he put it, “I’ve racked my brain and can’t come up with a code-approved way to make this happen.”

Wayne chose to have me help him.

He not only asked for help on the phone (CLICK HERE), but he also had me draw out on paper exactly how the pipes should be installed.

draw plumbing plans

Here's part of the plans I drew up for Wayne. I call out special fittings in many cases to help make the systems work. Copyright 2018 Tim Carter

It just so happens I’m a master plumber. I’ve been one since age twenty-nine. I did all the plumbing on most of my jobs and thoroughly enjoyed it. Designing and installing plumbing drain and vent lines is like a giant 3D puzzle to me. As crazy as it sounds, it’s fun.

I’m not going to try to transform you into a plumber with this column, but I’d like to share some pointers that might come in handy if you decide you want to do what Wayne’s trying to accomplish. If you want to leave the job to a real plumber, the tips might allow you to verify he’s using the best practices at your home.

Transporting waste water from your home to a city sewer or your own septic tank is serious business. In the late 1800s when indoor plumbing started to take hold, plumbers were treated with equal, or greater, respect than physicians of the time. Once it was understood that sewage was the cause of serious disease, anyone who was willing to pipe it away safely was considered to have a super power of sorts.

The drain and vent pipes in your home mimic what Mother Nature does on a much grander scale. The issue is most people don’t stop to ponder what they see with their eyes.

Look at how creeks, streams and rivers work. Small streams eventually connect with larger rivers. When they intersect, the angle is rarely a hard 90-degree turn but more often some gentle angle close to 45, 30 or 22 degrees.

The blood vessels in your body are designed the same way. Don’t ignore technology that Mother Nature has perfected when it comes to the best way for liquids to flow.

You should design your wastewater pipes in a similar manner for the most part. It’s a bad plumbing practice to have a hard 90-degree bend in a horizontal drain line that’s buried in a slab or otherwise hidden. If you have to make a 90-degree bend, use two 45-degree fittings and put a small piece of straight pipe between the fittings if possible.

It’s fine to have a larger-radius (sweep) 90-degree bend at the base of a vertical drainage stack where the wastewater starts to travel horizontally. It’s also a good idea to have a sweep 90-degree fitting where a drain pipe pops out of a wall for a kitchen, vanity or laundry sink.

Drain-cleaning flexible snakes can navigate around these sweep 90 bends but may drill through a plastic PVC or ABS a hard 90-degree fitting in by mistake. You can use those hard 90s all day long in your vent pipes that supply your plumbing system with much-needed air.

Don’t forget about pipe slope. Use gravity’s magic force to get your solid and liquid waste out of your home. All drain lines should have a minimum fall of 1/8 inch per foot of horizontal run. Some codes allow 1/4-inch of fall per foot.

If you slope the pipe much more than 1/4-inch per foot, you can set yourself up for future clogs as the liquids may outrun the solids in steep-pitched pipes. The solid waste may sit in the pipe and accumulate creating a clog. Avoid the temptation to create lots of fall in your horizontal drain piping.

If you’re unclear about the magic vent lines in your home, you should watch a video I taped. This video will get you up to speed so you don’t make critical venting mistakes!

Column 1231

New Home Hiccup

New Home Hiccup

A mistake in roof height was caught very late in the job. Now it’s a nightmare. (C) Copyright 2017 Tim Carter

New Home Construction Hiccup

DEAR TIM: My builder really goofed up my new home. A room at the corner of the house next to the front door had its roof installed too low. The mistake is being corrected but I’m quite upset as I don’t feel the job is being done right. They’re leaving the old roof in place and putting the new framing on top of the old! Everyone is pointing fingers at who’s responsible. What I want to know is if this ever happened to you and how did you deal with it? Who’s ultimately responsible and how can mistakes like this be avoided? Cindy D., Breckenridge, CO

DEAR CINDY: Oh my goodness! I can’t believe what I see in the photo you sent. What a shame, especially since your new home is covered in stucco. It’s so hard to match stucco, but perhaps your plasterer will conjure up every bit of skill he possesses to make it look like nothing happened.

Let me share a similar story that happened to me late in my building career just before I transitioned to building with words and electrons instead of lumber, brick and copper.

I was working on the toughest job of my career at the time. For all intents and purposes I was building a small house onto an existing house in Cincinnati, Ohio. My appetite for more challenging jobs was insatiable.

Fortunately I had a fantastic set of blueprints and specifications to guide me. In a perfect world, and it only happened to me once in my twenty-plus years of building, the plans and specifications are so complete the builder never has to ask one question of the architect or homeowner. Everything the builder needs is on the plans.

This job was very complex. The old garage was to become the new enormous kitchen. A new two-car garage with separate garage doors was part of the new structure I was tasked to build.

The exterior of the giant room addition was used brick veneer that we expertly whitewashed to match the existing 70-year-old faded whitewash. The plans called for a gentle brick arch over each new garage door.

I built the arch frames for the bricklayer and installed them at the exact height as called for on the plans. My bricklayer installed the brick and they looked fantastic.

Within a day or two the homeowner complained the arches were too low. I was perplexed because I had triple checked my measurements. I went out and remeasured and the arches were right where the architect said to put them. Everything was done exactly per plan.

But the arches were too low, so low that if you tried to pull in the homeowner’s minivan the roof would scrape the right and left sides of the arch!

Who’s fault was it? I got blamed because, “You should have KNOWN when you set the forms they were too low!!!!” Let the finger-pointing games begin indeed!

My bricklayer and I worked together to raise the arches one foot to remedy the error. The cost was split three ways by me, the bricklayer and the architect. I’m still bitter about it because the architect should have absorbed the entire cost.

Who’s ultimately responsible for your mess? It’s a tough call and many attorneys have new fancy cars because people feel quite passionate about who should pay for these mistakes on new home jobs.

When you look at the contract documents, you might discover that you’re responsible. You might have signed a contract that says you’ll pay the builder XXX dollars to build what’s on the plans and in the specs. If the plans show it the way he first built it, he did what he was supposed to.

If the plans show it at the correct height and the framers made the walls too low, that’s an easy call. The builder has to absorb the cost as he’s ultimately responsible for field checking all work to ensure it matches what’s on the plans and in the specifications.

However, it ultimately comes down to you. You can’t hope everything is going to go right on your job. You need to check, recheck and check again all work as it happens. Is this hard? Yes. Will you avoid giant mistakes like you’re facing if you get out a tape measure every few days? You bet you will.

Climate Change Myth Debunked

athabasca glacier canada

Climate Change Debate | This is the Athabasca Glacier in the Canadian Rockies. It's the poster child for the man-made climate change group. They point to this glacier's rapid retreat and melting as proof positive that man is ruining the planet. The melt rate of this glacier is minuscule compared to the rapid melt rate of the massive continental glacier just 15,000 years ago. Read below for all the FACTS about the last continental glacier. I took the above photo of the Athabasca Glacier in 2012. Copyright 2024 Tim Carter

Man-Made Climate Change is Questionable - Why? Look at the Rocks

SUMMARY: Climate change is real. It's been changing for millions of years long before man started introducing carbon dioxide into the atmosphere.

Everything that follows is a fact. I've been an expert witness in home improvement lawsuits for over 25 years. Courts and judges require me to tell the truth, the WHOLE truth, and nothing but the truth in depositions and on the witness stand. 

You need to know the whole truth to make the correct decision about any topic. What you're about to read are climate change TRUTHS that have been withheld from you by the media, many scientists, and others.

It's important for you to realize my college degree is in geology with a focus on continental glaciation. The following are facts found in any treatise on Continental Glaciation:

  • Twenty-thousand years ago the last continental glacier in the USA reached its maximum advance
  • It averaged 3,000 feet in thickness
  • This massive glacier extended from the North Pole across most of Canada, and all of New England down to New York City
  • The thick glacier extended across the upper Midwest and much of the Rocky Mountains were engulfed in deep snow and mountain glaciers
  • This monstrous glacier started to melt about 15,000 years ago
  • It retreated back to the North Pole within 7,000 years
  • The climate went from arctic to tropical in a matter of a few thousand years creating this rapid melting rate
  • There were no factories, power plants, buses, trucks, etc. spewing CO2 during this time period all those thousands of years ago
  • Mother Nature changed the climate as she did three other times in the past 2,000,000 years

Why haven't you seen the above facts that are etched into the geologic record?

Why doesn't the mainstream media share these facts?

The X post below shows that USA Today, a mainstream media member, knows all about the geologic record, but they choose not to share the whole truth with you.

usa today twitter post climate change

USA Today states man-made climate change is real. This X post says is it's not. There were no fossil fuels burning in Medieval Times for goodness sake. How was it that Greenland was green hundreds of years ago when man was creating NO CO2?

Are you on the side of the debate thinking that man-made CO2 exhaust will create devastation? If so, you better watch this video because CO2 is not the issue.

Do you think Al Gore is a climate expert? Are you aware that just about all his predictions never came true? Why is it that the mainstream media doesn't point out that Mr. Gore's predictions have not panned out?

Do you believe the world will end in 2032 because of climate change? New York Congresswoman Alexandria Ocasio-Cortez made this bold claim in a speech.

Stop and ask yourself WHY you believe in man-made climate change.

Read Dr. Robert Cialdini's Influence - The Psychology of Persuasion book. You'll discover the powerful psychological triggers of social proof, authority, and scarcity which can be used to influence how you feel about a topic, product, or political movement.

Influence Book Cover

You need to apply critical thinking to the climate change issue. It demands it, or otherwise, you could find yourself on the wrong side of history just like all those old scientists who swore the Earth was flat.

Think about that. Think how vicious that argument was hundreds of years ago and how those who disagreed with the flat-earthers were persecuted.

History Shows the Experts Can Be Wrong

Scientists hundreds of years ago preached the earth was the center of the solar system. They were wrong.

Doctors hundreds of years ago believed that blood-letting would cure many illnesses and disease. They were wrong.

Scientists hundreds of years ago stated the Earth was flat. They were wrong.

It's possible we're at one of these moments in time now. The current scientists that claim man is changing the climate may be wrong.

Climate Change Myth Debunked - Look At Rocks For the Truth

My college degree is in geology. Think about the old saying cast in stone and what it means. The true story of climate change is cast in the geologic record all over the world. The facts locked in the rocks are irrefutable.

Here are some basic geologic facts that prove man-made climate change is questionable at best:

  • vast continental glaciers have advanced and retreated in North America four times in the past 2,000,000 years
  • no CO2-belching factories, buses, cars, trucks, coal-fired power plants, etc. existed during that time
  • mountains in the Northeast USA have giant glacial scratches proving the glaciers were there
  • enormous glacial outwash deposits are scattered all over the Northeast and Midwest USA from the glaciers
  • New York State's Finger Lakes were created by the continental glaciers
  • Central Park in New York City has exposed bedrock with deep glacial striations - the venerable New York Times produced an in-depth feature about this

Geologic data contained in and on top of rocks can't be altered by scientists. Rocks, sand, and gravel tell no lies. If you want the truth, you look at geologic data. Rocks don't make mistakes but scientists can.

You can see evidence of climate change in New Hampshire geology. No humans were around creating CO2 to create this climate change.

New York City Glacial Striations - Evidence Abounds

You can spend a day or two or three examining all of the continental glaciation facts in and about New York City.

This past article in the New York Times offers you some stunning illustrations, facts, and history.

Look at this photo of a huge glacial striation in the Pemigewasset River just a mile south of Bristol, New Hampshire. The bowl-shaped groove was cut in the granite bedrock as the huge continental glacier slid over the rock using fine stones in the ice to grind the groove:

glacial striation new hampshire pemigewasset river

The red arrow points to the glacial striation. (C) Copyright 2021 Tim Carter ALL RIGHTS RESERVED

Athabasca Glacier Facts - The Cold Truth

athabasca glacier canada

This is a close-up shot of the Athabasca glacier. I was standing on it about a mile up from its terminus. While it seems enormous, it's not compared to massive continental glaciers. Copyright 2018 Tim Carter

It's important to realize the man-made climate change community points to the Athabasca Glacier in the Canadian Icefields as proof that man is to blame for climate change.

I've walked on the Athabasca Glacier. It's a very small glacier. The glacier is maybe 3 miles long and less than 1,000 feet wide at its terminus.

The Athabasca Glacier is thin. It's only several hundred feet thick at most.

Since the late 1800s, when we've been spewing CO2 into the atmosphere, the glacier has retreated less than one mile.

That equals about 37 feet 6 inches of melting per year. You can confirm this with ease. Go do it now.

The USA's continental glaciers were huge. They melted much faster 15,000 years ago than the current rate of glacier melt worldwide.

cross-bedded glacial sand in nh

This is cross-bedded sand and small gravel in central New Hampshire. It's far above the current river bed of the Pemigewasset River. The last continental glacier's meltwater deposited this sand about 12,000 years ago. I took this photo in 2017 at the Pemigewasset Valley Fish & Game Club. The credit card is for scale. Copyright 2018 Tim Carter

Continental Glacier Melt Facts

The last continental glacier was massive. It covered the North Pole and extended to Cape Cod, Massachusetts. The tremendous glacier left a nice conversation piece for you to look at.

It's called the Doane Rock - a glacial erratic boulder.

In addition, consider these additional continental glacier melting facts:

Glacial Map of Ohio

This is the glacial geology map of the state of Ohio. It shows the different geologic evidence of the massive continental glaciers. Copyright 2018 State of Ohio

Summary - Always Look At Rocks for the Truth

The massive continental glaciers were thousands of feet thick. They covered tens of thousands of square miles. The minuscule Athabasca glacier is a tiny pin prick on a map compared to the huge ice sheets.

The massive ice sheets melted at a far faster rate than the Athabasca glacier is retreating. That evidence is undeniable.

There was no man-made CO2 around during the four periods of continental glaciation that occurred in the past 2,00,000 years.

If you want the truth, always follow the money and study the rocks.

Just as history eventually showed that scientists and experts were wrong about blood-letting, the earth being the center of the solar system/universe and the earth supposedly was flat, you may live to see that man-made climate change might not be true.

Kenny Chesney wrote a great song about this. Listen.

Frost on Nails in Attic

frost on nails

This is frost on a piece of high quality insulated glass in my man cave. The outdoor temperature was minus 6 F and there's NO humidifier in this building! The same frost on nails could be happening in my attic! Copyright 2018 Tim Carter

Frost on nails in attic spaces may frighten you. It should to a degree. It's important to realize frost is in your attic for a few reasons.

Frost on Nails is Frozen Condensation

Remember the last hot and humid day you were sitting outside drinking a cold beer, iced tea, soda or glass of ice water? The outside of the can or glass had drops of water on it that rolled down and got the table wet.

Another key point is the water moments before was invisible. The water was a gas in the air surrounding you and the can or glass.  The water is the same thing that creates the uncomfortable humidity most people loathe.

This exact same process is happening in your attic during extreme cold weather. The nails that you see in your attic get as cold as the outdoor temperature. The air in the attic has water in it and it condenses on the cold metal.

A point often overlooked is that since it's winter, the water freezes on the cold nails. This is why you see the frost.

frost on nails

A tool like this shoots nails through shingles. The tips of the nails are supposed to penetrate through the wood on your roof. The nails are 0 F too as long as the roof is shaded. Copyright 2018 Tim Carter

Related Links

Turbine Whirlybirds Can STOP FROST

Frost in Attics - Mystery Revealed! and How to Eliminate It

Free & Fast Bids

CLICK HERE to get FREE & FAST BIDS from local roofers that can increase the amount of ventilation to STOP FROST.

How to STOP the Frost on Nails

At the present time, here's how to stop the frost you're seeing in your attic:

  • lower the humidity in the house
  • increase air flow through attic

It's not easy to lower the humidity in your home. Many sources advise you to ADD humidity to your indoor air to feel warmer in the winter.

It's easier to increase the air moving through your attic using roof turbine vents and other traditional roof vents.

It must be remembered you must have great soffit ventilation so the air travels through your attic as a constant breeze.

Without delay this air movement brings in drier outdoor air into the attic. The dry air evaporates the frost!

Old Houses Didn't Have Frost

A point often overlooked is old houses didn't have this frost on nails problem.

The houses were drafty and the humidity couldn't build up to cause a problem. Your modern house is much tighter and the humidity can soar.

January 3, 2018 AsktheBuilder Second Newsletter

As often happens with a special announcement, I LEAVE OUT important information in the rush to get news to you.

Within minutes of sending out the last message, James wrote:

"Can you also do a newsletter to cover frozen pipes? I'm have to deal with it this morning in one of the upstairs bathrooms. Fortunately, it has not burst and there's a slow drip. I'm heating the pipes with hair dryers and those thermal tapes. But I'm looking for a more permanent preventative measure (aside from having to leave the cabinet doors open and running a slow drip at night) ... also I want to avoid having to tear everything up as well."

What do you know?

I created a NEW COLUMN about Preventing Frozen Pipes last night before supper!

CLICK HERE to read it.

It contains UNCONVENTIONAL information you'll not usually find in columns written by people telling you to run water, open cabinet doors, install UNSAFE heat tape, blah blah blah blah.

Those are temporary fixes that sometimes work. If you want to STOP frozen pipes forever, then CLICK HERE.

Once again, PLEASE FORWARD this message to anyone you know who has frozen pipes.

Sadly for James, I've got bad news if he wants a permanent fix.

He's going to tear a few things up, but he'll NEVER EVER AGAIN have frozen pipes.

GREAT VIDEO About Staying Warm

The column I wrote two hours ago has a GREAT VIDEO in it about why your house is COLD.

CLICK HERE and SCROLL DOWN to see it.

I Didn't BUILD the House I Live In

Each time I gritch about my house I get replies like this,

"Tim, how could you install a boiler that's too small? How come you don't have more PEX tubing in the floors so you get more Btus per hour? How could you, the EXPERT, make such a mistake?"

"Tim, why don't you have a great wood stove in the house to add extra heat to stay warm? Do you want me to send you some cheese to have with your WHINE? :-)"

Guess what?

I didn't build the house I'm living in.

I've spent the last eight years correcting many mistakes, but trying to correct this heating deficiency is just way too much work. I'd be ripping out all the finished ceilings in the basement.

No way I'm doing that.

As for the wood stove on the first floor, guess what?

The DUMB A * * architect and homeowner made two fatal flaws in the living room here:

  • it's too small
  • there's no raised hearth

If the living room were five feet longer, you could put an add-on, drop-dead-gorgeous wood stove in the living room.

If there was a raised hearth, you could pipe the stove pipe into the existing metal chimney of the inefficient wood-burning fireplace we have now.

Believe me, when I do build my dream house - I'm trying to make it happen soon - it will be warm as toast if the outdoor temperature drops to -30 F or below.

Tim Carter
Founder - www.AsktheBuilder.com

Do It Right, Not Over!

Pass the Cheese, Tastes Good With My Whine!

January 3, 2018 AsktheBuilder Newsletter

Why You're Cold

Happy New Year!!!!

2018 is off to a bitter start for much of the USA.

Jim Cluett is my very good friend and amateur radio mentor here in NH. I was talking with him yesterday and we were both gritching about the cold weather.

He's lived here in central New Hampshire for most of his life. There was an eight-year period where he was on Prince Edward Island in Canada working as a TV news reporter / producer. He knows all about cold and drifting snow from up there.

"This is the longest and coldest period of weather I ever remember. Sure, we'd get damn cold for a day or two or three, but below zero temperatures night after night for ten days?"

Then yesterday just about 15 miles west of me at another amateur radio friend's house, it was minus 22 F just before dawn.

Are you COLD in your house? I am even though this bad boy below is running constantly.

house cold heat on
That's my boiler. It's running all the time. Each of the eight radiant heating zones in my house is calling for heat. I'm burning about 20 gallons of propane now per day.

Are You or Friends / Family COLD?

An hour ago, I just finished a new SPECIAL COLUMN about what's going on since tens of millions are suffering.

Are you one? Are you cold and you can't figure out WHY because your furnace, boiler or heater is running and you're still cold?

CLICK HERE NOW and read this short column.

Would you do me a favor? A big one?

Would you FORWARD this email / newsletter to any friend, family member, co-worker or ???? who is cold and upset thinking something is wrong with their heater?

I'm afraid they may WASTE MONEY calling in a furnace repair person. If the heater or furnace is running, NOTHING IS WRONG.

A service call is unnecessary.

That's enough for today.

I'll have more new columns for you this weekend.

Stay warm!!!

Yeah, Steve I know you'll not suffer today in Altadena, CA!

Alexa just told me it's going to be 74 F there today.

Happy Birthday Steve!

Tim Carter
Founder - www.AsktheBuilder.com

Do It Right, Not Over!

Size It Right And Not Suffer!

Why Is House Cold With Heating On

house cold

This is my own boiler. If the outdoor temperature drops below 5 F, the house loses more heat each hour than the boiler is able to produce in an hour. The colder it gets outdoors the colder it starts to get indoors. Copyright 2018 Tim Carter

You wake up on a frigid morning or come home from work and your house is cold, yet the heater or furnace is on.

You might mumble out loud as you shiver, "Why is house cold with heating on?"

This is the column Tim asked in his January 3, 2018 AsktheBuilder Newsletter if you would share with your friends, family, etc.

Why Is House Cold? Furnaces Can Only Do So Much

Here's why your house is cold when your heating is running non stop:

  • Furnaces, boilers and electric heaters can only generate X amount of heat per hour
  • Think how shoes, clothes and hats come in different sizes - so to heaters
  • Your builder / HVAC man installed a heater sized for an average low temperature in your city/town

Related Links

Heat Loss Explained - Sizing Heaters and Furnaces

Electric Floor Heat - Very Cozy But Can Be Expensive

Candle in a Warehouse Example

I can explain why you're shivering with this example. Imagine if you had a standard candle and you were in the middle of a large warehouse.

The first thing to remember is there's no way the candle can produce enough heat in one hour to heat up the warehouse to a comfortable temperature.

But put that candle inside a small picnic cooler container and the temperature will get nice and warm in a short amount of time.

Free and Fast Bids

CLICK HERE to get FRE & FAST BIDS from local heating companies that can install a LARGER heater.

Heat Loss Calculations - This Is The Secret

Another key point is heat loss. Your home has a distinct heat loss each hour. Imagine if your house was 70 F inside and it was 0 F outside.

If your power went out and your heater stopped working, the temperature inside starts to drop. Each hour it gets colder and colder because of this heat loss.

Your home may lose heat faster than a neighbor's home because your home has:

  • poor insulation
  • many air leaks
  • ill-fitting weatherstripping around doors and windows
  • lots of windows and doors

It must be remembered that each house has it's own heat loss per hour. A point often overlooked is that your heater, furnace or boiler also can only produce a given amount of heat per hour like the candle above!

As soon as the heat loss per hour is GREATER THAN the heat per hour the heater can produce, your house starts to get uncomfortable. As the outdoor temperature drops lower and lower, it gets colder in your home.

Your Heater Is Sized for AVERAGE Low Temperature

Your heater or furnace is sized according to an average LOW temperature in your city or town.

In other words, it would be wasteful to install a heater in your home that would produce enough heat each hour to heat the giant warehouse we discussed. That would be overkill and waste lots of your money.

Most of the time your heater keeps you comfortable because the outdoor temperature is at or ABOVE the average low outdoor temperature.

Sooner or later bitter cold weather happens and your furnace or heater just can't keep up.

How to Stay Warm in a Cold House!

cold house knit hat

This is how I'm dressed in my cold man cave! Note knit hat, fleece vest, fleece light jacket. You can't see my long underwear and wool socks! Copyright 2018 Tim Carter

It's easy to stay warm when your house is cold. Just do the following:

  • wear long underwear inside
  • put on a knit hat
  • wear wool socks
  • put on layers inside - even a fleece jacket
  • add a SAFE amount of humidity to the air inside your home

CLICK HERE to read all of my past columns dealing with humidifiers, how to set them, alternative ways to add humidity, etc.

These things retain more of your body heat and believe me you'll stay warm!

CLICK HERE to get FREE & FAST BIDS from local heating companies that can install a LARGER heater.