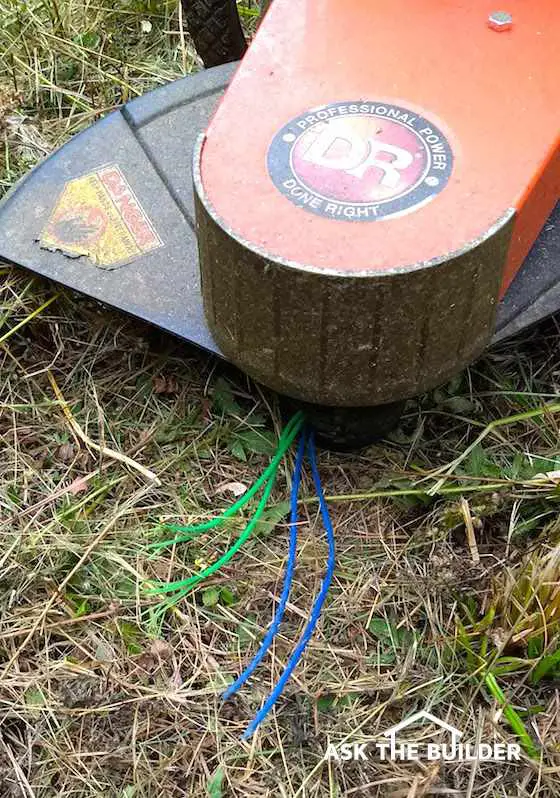
Here's my Nutone Knock ready and waiting for you to push that green highlighted button. Once you do that, the magic starts! Copyright 2017 Tim Carter
IMPORTANT NOTE FROM AUTHOR:
December 21, 2017 (see December 20, 2017 Newsletter)
The following review was originally published on November 2, 2017. Within two weeks of publishing it, my Knock stopped working. The interior doorbell was the first thing to malfunction.
A week later, the app failed to work if someone pushed the Knock button you see above.
I reached out to the public relations firm representing Nutone. They put me in touch with the product manager. After repeated back and forth email exchanges, over a period of two weeks, Nutone failed to come up with a fix.
I ripped the Knock off the wall on December 19th and it's now in the garbage can in my garage. Within an hour, I installed the Ring Video Doorbell. CLICK HERE to read the Ring® review.
My recommendation now is do NOT purchase the Nutone Knock.
Back to the original review.
I installed the Nutone Knock wireless doorbell a few days ago.
So far so good, but it was a stroke of luck that it actually brought it to life on my new Moto G5 Plus smartphone!
I want to preface this entire review letting you know I LOVE the Knock, even though I was knocking my hand on my head trying to get it to work.
I think you're going to enjoy this story.
Nutone Knock WiFi Enabled Security
The Nutone Knock is a sleek doorbell that has a camera, microphone and infrared light. It also has a speaker built into it allowing you to have a conversation with anyone at your door no matter where you are.
It works just like making a Skype phone call over the Internet.
Related Links:
Doorbell Extenders - Hear Your Doorbell Everywhere
Doorbell Stories and Alternatives
Installation Challenges
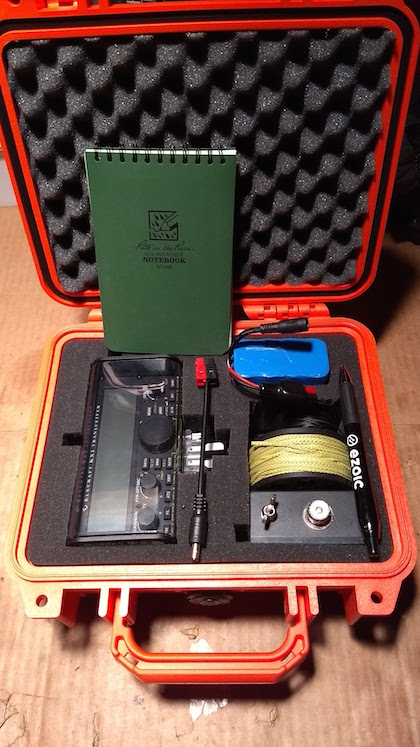
I'm an amateur radio operator and have built small radios using tiny electronic parts. This skill came in handy as the instructions require you to install a small diode in the actual interior doorbell in your home.
My guess is most homeowners would not be comfortable doing this step. It's important to note that diodes must be installed one way as they regulate the direction of flow of electricity.
Here's the inside of the actual doorbell up on the wall inside my house. The yellow arrow points to the diode. How many homeowners do you think will be able to do this without messing it up? My money is on most will shy away from this step. Copyright 2017 Tim Carter
I installed the doorbell base plate outdoors with no difficulty. A point often overlooked is the importance of following the instructions.
It's extremely important that you have the above-mentioned diode installed correctly BEFORE you connect the new doorbell to the wires sticking out of the wall at your front door!
It was easy to attach the new doorbell wires to the ones sticking out from my wall with the supplied crimp connectors.
Here's what appears on your smartphone screen a second or two after someone pushes the green button on the Knock. Don't ask me how my German Shepherd got up to ring the bell. Smart Lady the dog! Copyright 2017 Tim Carter
Downloading the Knock App
Another key point is to go step-by-step following the easy-to-read instructions. I was able to download and install the free Nutone Knock app on my smartphone in less than a minute.
Just after that is when the trouble started.
I followed all the steps multiple times to get the app to work with my new Nutone Knock doorbell.
Each time all I saw was a image of the doorbell on my screen with a nasty RED X showing the phone couldn't connect.
I'm fairly tech savvy and got frustrated. Not wanting to give up, I had my very tech savvy son give it a try.
He was unable to get it to work.
I decided to wait until the following day to reach out to the Nutone people to see what I was doing wrong.
The Monster Nor'easter
Hours later, a monster Nor'easter storm lashed central New Hampshire where I live. We lost power and Internet for 16 hours.
I have a standby generator, but the electrical circuit that powers the DC transformer connected to the doorbell is not on it.
The doorbell was dead for 16 hours.
It's (Nutone Knock) Alive!
When the power came back on, my cell phone was on the kitchen counter getting charged up. I left it there overnight.
Little did I know, but the doorbell was now working and the motion detector was sending alerts every few minutes that a leaf fell onto the front porch.
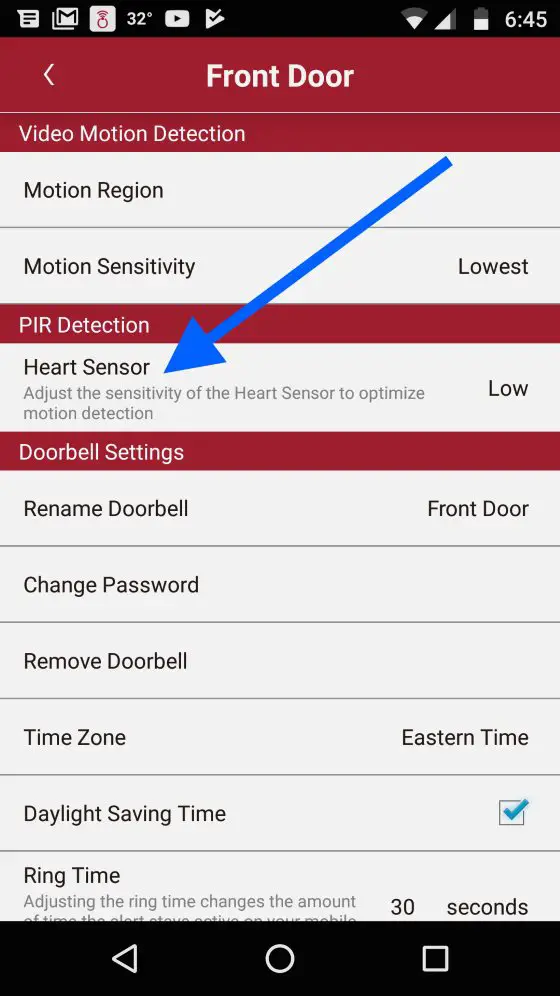
Lot of Settings
When I woke up, I was stunned to see the doorbell was working.
It was working VERY WELL!
The first thing I did was go into the settings and let the motion detector to the lowest possible sensitivity to stop the constant "bong tone" in my phone.
Suggestions to Nutone Knock Engineers
I can't prove that the doorbell needed to be powered down to make it work. But that's the only thing that happened once I had given up trying to make it work.
If that's the case, then it needs to be put in the instructions.
But there's an issue with that.
Most houses there's no indication on the circuit breaker box which circuit controls the low-voltage transformer that operates the doorbell.
Tim's Suggestions:
- The Nutone engineers need to put an on/off power switch on the Knock
- The pairing of the Knock needs to be as simple or even more simple than me activating my Arlo wireless security cameras
- A video needs to be made showing how easy it is to install the diode
- Update app to allow homeowners to prerecord messages that can play through the speaker when the homeowner is unable to respond to a ringing doorbell
- Have a person who's fluent in the English language view every warning issued by the Nutone Knock - see below screenshot.
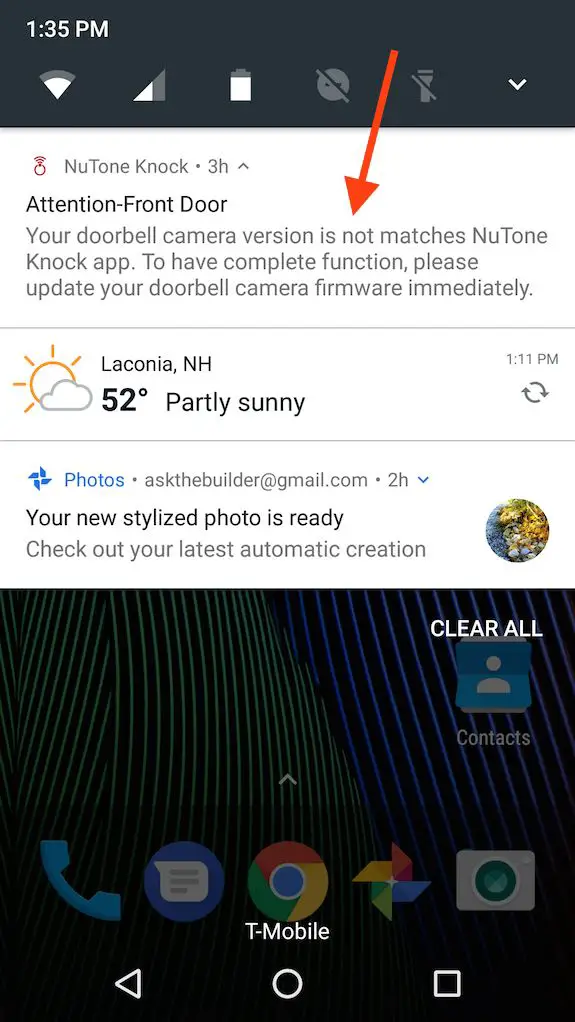
Ouch! An editor needs to check all copy of all hard-coded messages. Plus, how could a brand-new Knock that's not even readily available not have the correct firmware in it? Copyright 2017 Tim Carter
Final Rating of the Nutone Knock
I give the Knock four hammers out of five.
Once it's working it's a very nice tool to have.
But I struggled to get it working and I'm sure I won't be the last.