How to Clean Exterior Siding

Cleaning Exterior Siding

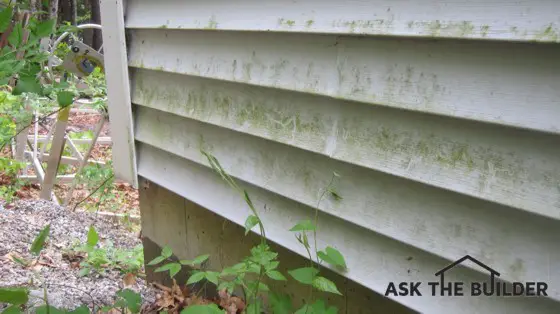
The mildew and algae on this vinyl siding can be removed quickly with a solution of oxygen bleach. (C) Copyright 2017 Tim Carter

How To Clean Exterior Siding TIPS

DEAR TIM: My primary home and a camp I own in the woods both are covered with siding. One is wood, the other is vinyl siding, and both are dirty.

In the past few years, I've been stunned to discover mildew and algae growing on the vinyl siding. I thought vinyl siding was supposed to be maintenance-free, that's why I purchased it.

What's going on? Should I just drag out my pressure washer and get to work, or is there an alternative method to clean siding on houses? Patrick O., Fryeburg, ME

DEAR PATRICK: Each week I receive emails from homeowners just like you. They share your astonishment about having to clean their vinyl siding. Many homeowners are not too happy as the salesmen's claims about no-maintenance seem to be as hollow as an old log.

IMPORTANT TIP: Maintenance-free is a myth. All exterior surfaces must be cleaned on a regular basis. They include:

  • siding
  • decks
  • windows
  • docks
  • roofs

CLICK HERE to get FREE & FAST BIDS from local handymen who can easily clean your siding.

I've seen hundreds of printed ads, heard countless radio commercials, etc. with these maintenance-free statements when it comes to exterior home improvement products.

Decking, siding, railings, fencing, etc. are often touted as requiring no future care. As you now know, it's just not true. Certain products are absolutely reduced-maintenance, but not maintenance-free.

Algae & Mildew Food

You're probably wondering how mildew and algae can survive on plastic, or vinyl siding. The mildew and algae are feeding on sugars, dust, dirt, or other things that are attached to the siding.

Many people are unaware that trees, both evergreen and deciduous, often broadcast ultra-fine aerosols of sugars at different times of years. Park your car under certain trees, and you'll discover thousands of tiny droplets of sap or sugar on the painted finish and glass.

This is yummy food for mildew and algae!

Wood Stain Food

When it comes to wood siding, the mildew and algae are possibly feasting on the actual stains and sealers you may have used to preserve the wood. Many clear and semi-transparent wood sealers and stains are made with alkyd or oil resins.

These natural oils are also delicious food for mildew and algae. Some of the sealers and stains contain chemicals that are designed to prevent mildew and algae growth, but these chemicals do breakdown when exposed to sunlight and repeated exposure to rainwater.

Spiderman® Power

I know that you may love your pressure washer because it's a cool tool, but it can wreak havoc with houses if used improperly. Pressure washers are like Spiderman® - "With great power comes great responsibility."

The water that's ejected from the tip of the pressure washer wand can be driven into cracks and crevices where water is not supposed to go. The intense water stream can and will erode the lighter-colored spring wood in your wood siding causing it to look older than it actually is.

Water Behind Siding

Water driven behind vinyl siding at lap joints and corners can cause wood rot if your house lacks a proper weather barrier under the vinyl siding. Believe it or not, this requirement was lacking from the building code for many years.

There are tens of thousands of houses, maybe hundreds of thousands, that do not have a weather barrier under the siding. The siding is nailed directly to wood sheathing.

CLICK HERE to get FREE & FAST BIDS from local handymen who can easily clean your siding.

Stain Solver

Oxygen Bleach

Stain Solver is MADE in the USA with USA ingredients that are food-grade quality. CLICK THE IMAGE to order some NOW.

Perhaps the better way to clean the mildew and algae off your house is to use a hand-pump garden sprayer, some Stain Solver certified organic oxygen bleach and a brush on a pole. I just demonstrated this method last week to a homeowner, and he was amazed at how well it worked.

Don't confuse oxygen bleach with chlorine bleach. Chlorine bleach can remove the color from wood siding, and it can kill expensive landscaping around your home.

Stain Solver oxygen bleach will not remove color from wood, and it's safe to use around plants and animals.

Easy DIY Use

To clean your wood and vinyl siding, you just mix the powdered Stain Solver with warm water, stir till dissolved and then apply it generously to the siding.

It's best to work when the siding is in the shade. Allow the solution to fizz and bubble on the siding for about ten or fifteen minutes. Scrub with the brush and rinse with clear water from a garden hose. The siding should look brand new once dry.

RV Brush Best

Use the type of brush on a pole RV owners use to clean their expensive vehicles. An RV brush will not scratch automotive paint, so you know it's perfect for your vinyl siding.

rv brush

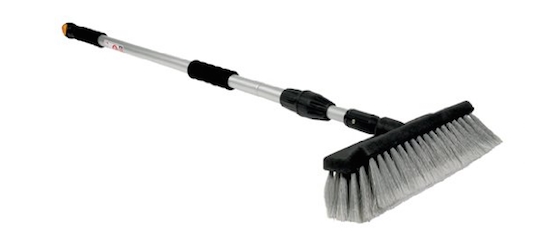
This is a perfect brush to clean vinyl siding. It's got an adjustable handle and the perfect bristles that remove dirt loosened by using Stain Solver oxygen bleach. CLICK THE IMAGE NOW TO HAVE THIS BRUSH DELIVERED TO YOUR HOME.

Apply Dry

It's always best to apply the oxygen bleach solution to dry siding. This allows the solution to soak into the wood and deep clean it. Oxygen bleach can and will remove sun-damaged wood sealers and stains from the wood. It can absolutely remove sun-damaged and oxidized paint pigments from painted surfaces.

This makes it an excellent product to use if you're getting ready to re-stain or repaint your home. You want to remove these damaged finishes before you apply new.

Clean Twice a Year

For periodic cleaning to prevent mildew and algae buildup, just wash your home twice each year with a solution of liquid dish soap, a small amount of Stain Solver and water. Remove the sugars from the siding before the mildew and algae sit down at the table to feast!

CLICK HERE to get FREE & FAST BIDS from local handymen who can easily clean your siding.

Column 987

Duct and PVC Pipe Noise

piping noise

This ductwork and plastic plumbing piping can be the cause of all sorts of noises. © 2017 Tim Carter

Duct Noise TIPS

DEAR TIM: Our new home is now three-years old. Ever since move-in day there have been annoying ticking noises in several interior walls of our home. Some of the noises start minutes after our furnace comes on.

The clicks then go away five minutes after the furnace shuts off. We also have cracking noises when someone takes a bath or shower in a second-floor bathroom. The builder says all of this is normal and nothing can be done.

We never had this problem before. What's going on and what can be done to stop these very annoying noises? Donna A. Columbus, OH

DEAR DONNA: You're a victim of simple expansion and contraction. The ticking, clicking and cracking noises are a by-product of metal ducting and pipes and plastic drain lines that are rubbing against the wood framing members of your home.

CLICK HERE to get FREE & FAST BIDS from local HVAC contractors who know about duct noise.

Heat Growth

These pipes and ducts grow in size as they're heated by the warm air and hot, or warm, water that passes through them. The expansion is a perfectly normal thing to happen, but the associated noise is not supposed to happen.

At first blush it appears your builder might be guilty of a half-truth. He could be telling the whole truth based on his reality because all his career he could have been building using practices that promote this bad behavior in building materials.

Just keep in mind that a half-truth is a whole lie.

Seasoned Subs

The reason your previous homes were noise-free could be many. Perhaps the plumbing drain lines were cast iron and experienced very little movement when hot water passed through them.

The heating system may have been different as well. The other possibility is that the heating and plumbing pipes in your old homes were made from the same materials as your new home and the tradespeople who installed them were more experienced.

These craftsmen knew how to insure the metal ducts and PVC drain pipes didn't rub up against any of the wood framing.

No Contact

Craftsmen who know that metal ducts and PVC plumbing lines move can do various things to make sure that movement happens with little or no noise. The trick is to isolate as much as possible the pipes from actually touching any wood framing.

For example, the large trunk heating duct is often suspended from the bottom of the floor joists one inch to make sure it does not touch the wood framing.

Expansion Collars

Expansion joint collars often separate the large trunk heating duct from the furnace's extended plenum metal. These collars absorb an enormous amount of the expansion and contraction that happens just above the furnace heat exchanger.

Without these collars, the movement and vibration happening in the furnace, or air handler, can be transferred to all the metal duct that extends through your home.

CLICK HERE to get FREE & FAST BIDS from local HVAC contractors who know about duct noise.

Larger Holes

The experienced heating and plumbing mechanics also know to create slightly enlarged holes for ducts and pipes to pass through. They also check to make sure a pipe can freely move as is passes through one or more studs or framing members.

If the pipe gets into a bind before it is heated and expands, it will most certainly snap, crackle and pop when it starts to grow from being heated.

PVC LOUD

PVC plumbing drain lines are notorious noise makers. Plastic has an enormous expansion contraction coefficient. The material grows in size dramatically and will crack and pop if it rubs against anything.

IMPORTANT TIP: If allowed to move freely, the PVC pipe will not make noise. This means plumbers must not allow the PVC pipe to touch any wood framing.

The PVC pipe noise is two-fold. Once the hot water stops flowing through the pipe, the PVC begins to cool and contract. It makes the same cracking noise as it shrinks back to its original size. Metal heating ducts suffer the same fate as they contract.

piping noise

A large enough hole has been cut in this joist to insure the plastic pipe does not rub against the wood. © 2017 Tim Carter

Fixing the Noise

Exorcizing these demons from your walls isn't going to be easy. You'll need to isolate and identify the exact trouble areas.

Doing this almost always involves removal of the drywall or plaster. You can then often clearly hear and see the location where a pipe or duct might be rubbing against a wood framing member. The contact zone will need to be enlarged if possible so that an air gap exists for the pipe or duct to freely move.

Holes in Wood

Don't start to cut away wood or enlarge holes in joists or studs. There are strict limits to the notches and holes that can be made in framing members. The building code covers this in great detail with respect to the maximum size, shape and location of holes in wall studs, beams and joists.

Crack or Collapse

You can compromise the structural integrity of your home if you enlarge a hole too much. Never notch the bottom or top of a joist.

If in doubt, contact your local building inspector. Many inspection agencies will gladly advise you on what you can and can't cut. They don't want you or a family member to become a statistic.

Lubricants Evaporate

Don't count on lubricants to always solve the problem. They may be a short-term fix but over time the lubricant may dissipate. Permanent noise solution comes when you isolate the pipes and ducts from the wood framing.

Lumber Shrinks

Great builders and craftsmen also account for lumber shrinkage. The lumber used to frame the house can actually shrink over time.

Openings that were fine during the construction phase may become tight only six months later. There's no substitute for experience and brains when it comes to small detail items such as this.

CLICK HERE to get FREE & FAST BIDS from local HVAC contractors who know about duct noise.

Author's Note: I've received other questions about similar problems. Here's one from Greg in Toronto, Ontario.

"I just moved into a brand new 27-story condominium and when it gets cold outside I can hear loud bangs and cracking noises. Once when I heard the cracking sound, I also felt a vibration. Is this the concrete cracking."

Here's another one from Cheryll k. of Fenton, MO, regarding either the need for a water hammer arrestor or just noisy duct work.

"We heard an extremely loud "boom" last night at 4:00 a.m. I was already awake when it happened because my son had come in our room about 10 minutes prior to this because of a bad dream. He was still in our room and awake and heard the noise too. The noise woke my husband from a sound sleep.

Anyway, the noise sounded like dropping a dictionary from a second story down onto a hard floor. The weird part ... the sound appeared to come from right under our bed, right in our room. We got up, checked things and could not figure it out. We even checked our mattress and box springs. Is there any chance the noise could have been caused by something structural that happened between the second story floor and the ceiling below it? We don't see any outward signs of damage, but I am looking for an explanation for the noise. Thanks so much!"

Column 496

Diagonal Brace Tips

Diagonal Brace

These two diagonal braces help prevent the deck from moving side to side. These were just toenailed into the horizontal beam and vertical wood post. It would have been better if they had been bolted using 6-inch-long lag bolts. © 2017 Tim Carter

Diagonal Brace TIPS

DEAR TIM: I have some building projects facing me. One's a tall deck, another is framing a garden shed, and then I need to help a friend with a room addition. I'm wondering about diagonal bracing.

I don't understand it and need to know why it's important. Is there a short cut? Can you give me the executive summary so I don't have any problems on these jobs? Randy P., Kokomo, IN

DEAR RANDY: You'll be getting the executive summary all right. Books have been written about diagonal bracing. Talk to any structural engineer and I'm sure he'll tell you that entire college courses are offered on the topic.

Diagonal bracing is a very complex topic, but I'll do my best to give you the basics so you don't have a failure on any of your projects.

Prevents Collapse

Diagonal bracing is a structural component of just about any building. It provides lateral stability preventing collapse of a wall, deck, roof, etc.

Let's talk about what happens when you don't have diagonal bracing in place so you get a better understanding. Imagine if you were to build a wall using 2x4s 16-inches-on-center and you make it 8-feet-tall.

CLICK HERE to get FREE & FAST BIDS from local carpenters who know all about diagonal bracing.

Straight Down Forces

If you stand the wall up and nail the bottom plate to the floor to hold just that in place, the wall might seem strong if you put weight on the top. The wall can support weight pushing straight down very well if the wall is stabilized.

Don't you stand on the wall to test this. It will collapse.

Sideways Force

But here's the scary test. Get on a stepladder at one end of the wall. Push on the end of the top plate as if you're trying to move the 2x4 plate forward, not side to side so as to make the wall tip over.

You'll quickly discover you can collapse the wall down onto itself with little effort like you'd close an accordion door. In seconds you can have the 8-foot tall wall folded up on itself and only inches high on the floor.

Wind Pressure

Imagine what would happen if you built a home with no, or inferior, diagonal bracing and a severe windstorm blows against the house. Without diagonal bracing, the wind would push against the walls just like you pushed against that simple wall to make it collapse.

The bottom of the walls, or house, would stay attached to the foundation, but the top would go towards the direction the wind was blowing until it collapsed.

Earthquakes

Or imagine the violent side-to-side shaking that happens when the shear waves of an earthquake hit a house.

Earthquakes create two waves that are 90 degrees to one another. The first wave to hit is called the primary, or P, wave. It makes the ground go up and down much like you see waves ripple on a pond when you toss in a stone.

But the shear, or S, waves that come a few seconds later travel sideways through the ground. They look like a snake that's moving at high speed going across the soil. The s waves are the destructive waves that cause buildings to collapse as they shake the structures sideways back and forth like a rag doll in a dog's mouth.

Preventing Collapse

Can you see how the house could easily collapse? When pro carpenters build a house, they install different types of bracing. One might be a metal diagonal bracing from the lower corner of a wall up to the top plate.

Plywood or oriented strand board (OSB) properly nailed will also provide excellent diagonal bracing. You typically only have to put one full sheet of plywood at each corner of a wall to provide the needed stability.

Old carpenters sometimes put in let-in bracing where they mortise in a 1x4 into the wall studs. This brace travel diagonally across the wall studs from the top to the bottom plate. It's time consuming to install.

Diagonal blocking can also be installed in between wall studs. These blocks start at the bottom plate and march up the wall in a straight line until they reach the underside of the top plate. The pieces of wood do double duty acting as fire blocking within a wall.

Stability Secret

The single piece of plywood or OSB works because the sheet in and of itself is rigid. When you lay a full sheet of plywood or OSB on the vertical studs and then nail through it to the studs and the top and bottom plate, the top and bottom plate can't move independently of one another as they can when there's nothing nailed to them.

The plywood or OSB transfers its rigidity to the wall.

 diagonal wall brace

See that angled board nailed to the vertical wall studs? It extends from the top right corner of the wall to the lower left corner bottom plate. It’s a temporary diagonal wall brace used to stabilize the framing while the house is built. © 2017 Tim Carter Builder

Deck Collapses

Deck collapses can also be traced to a lack of sufficient diagonal bracing. I've seen decks built where the outer support beam just rests on wood posts.

If a group of people up on the deck start dancing and a harmonic motion builds up, the entire deck can collapse as the deck starts to shift sideways. Diagonal bracing prevents this side-to-side movement.

CLICK HERE to get FREE & FAST BIDS from local carpenters who know all about diagonal bracing.

Deck Diagonals

You can get great diagonal bracing for a deck by screwing a 2x6 to the underside of the floor joists. Use 4-inch long Simpson Strong-Tie timber screws rated for outdoor exposure.

simpson strong tie timber screw

This is a Simpson Strong-Tie Timber screw. I've used them on my own home. CLICK THE IMAGE NOW TO ORDER THEM.

There are any number of ways to install diagonal bracing for a deck. One way is to put diagonal braces that connect the deck beams to the vertical posts. These braces are typically cut at a 45-degree angle. It's really important to bolt these instead of relying on nails.

Deck Underbelly

You can also install a flat 2x6 or 2x8 on the underside of the floor joists to give the decking great diagonal support. Drive no less than two 16d galvanized nails through the brace at each floor joist. Be sure the nails have the proper coating to match the treated lumber you're using to prevent corrosion.

underside of diagonal brace

You can see the two diagonal braces on the underside of the deck floor joists. Both extend to the outer beam on the left and the ledger board hidden by the white rain gutter. The brownish-orange troughs are Trex Rain-Escape keeping the lower deck dry when it rains.© 2017 Tim Carter

Roof Truss Bracing

Diagonal bracing is really important if you're working with roof trusses on that upcoming room addition. Many a carpenter has been killed or seriously injured when roof trusses suddenly collapse as they're erected. Wind can easily push them over without bracing.

Large truss roofs often come with detailed drawings that show bracing that needs to be installed in the webs of the trusses. Always be sure to reference any drawings or talk with the engineer at the truss company if you have any questions.

Code Guidelines

Be aware there are very strict building code guidelines with respect to diagonal bracing. The code almost always dictates the type of nail, length, shape of the head, special coatings, etc. The reason is simple: Diagonal bracing is mission critical to the structural stability of a building.

Square Walls Before

I've always found it best to install diagonal bracing for walls while the wall is built flat on a floor surface. With the wall down on the ground, it's easy to square it up.

With the wall square on the ground, you can temporarily toenail the bottom and top plate so the wall doesn't move while you nail on the plywood or OSB at the corners.

You can also nail on the rest of the wall sheathing if you like. When you tilt up the wall, it's already square and you can move on to the next wall.

CLICK HERE to get FREE & FAST BIDS from local carpenters who know all about diagonal bracing.

February 8, 2017 AsktheBuilder Newsletter

Column 906

February 2, 2017 AsktheBuilder Newsletter

I don't have much time. I need to scoot out the door in about 35 minutes.

This is FAST. I've been CRAZY BUSY with some amazing new revised columns for you.

The tips in these are astonishing. I'm just going to give you links below and no descriptions. I don't have time for that. The headlines should be good for you.

GREAT NEW DOOR PRODUCT - SUNDAY!

I've got an unbelievable new interior door product to share with you on Sunday. Watch for that email EARLY Sunday morning!

Paint Videos

I got the thumbs up on the two NEW paint videos to share with you!!!!! WOO HOO!

Best part: The manufacturer is going to give YOU an exclusive REBATE offer on both paints.

When I saw the rebate on the one, I about fainted. You'll be stunned too. It's that good. WOW!

The REBATE is only for AsktheBuilder.com subscribers. HOW COOL IS THAT?

Watch for those two videos on Tuesday. You're NOT GOING TO BELIEVE the one video.

New Revised Columns

Please click every one of the links below.

"What's in it for ME Tim? Why should I click?"

  • Lots of new content
  • FANTASTIC PRODUCT LINKS
  • Embedded Videos
  • Tim Carter hand-drawn illustrations
  • and much more

Brush Marks on Trim - How to Prevent ​​​​​​​

Hot Water Loops - Hot Water INSTANTLY!

How To Garage Shelving Ideas

How to Modify Wood Attic Trusses - Doable, But BIG JOB

Different Bathroom Exhaust Fans - Music and QUIET ONES!

Tunneling Under Sidewalks and Driveways

Tar Paper - Time Tested Contender

Efflorescence - Pesky Problem

Long Lasting Concrete Repairs

Matching Paint Colors Perfectly - DIY Style

Adding a Second Story - Lots of Work

Compact Fill Under Slabs For Sure

Clay Soil Water Injection System for Shallow Foundations

Recessed Lighting Problems

How To Polish Marble - DIY EASY!!!​​​​​​​

Crawl Space Vents MythBusting

No translation today

Tim Carter
Founder - www.AsktheBuilder.com

Do It Right, Not Over!

Crawl Space Vents

crawl space vents

Crawl space vents like this one are supposed to allow air into and out of a crawl space. You need many to get great air flow. © 2018 Tim Carter

"The better idea, in my opinion, is to install a high-performance cross-laminated vapor retarder over the soil in the crawl space..."

Crawl Space Vents Tips

DEAR TIM: Should I keep my crawl space vents open year round? Are they really necessary? I live in Maryland and get all four seasons and temperature conditions. What's the latest crawl space ventilation technology? Stephen King, Lexington Park , MD

DEAR STEPHEN: There are thousands of people who wonder what to do with crawl space vents. Years ago when I installed them in room addition projects I often thought about the science behind these smallish vents. The actual net free space that allowed air to pass didn't see that big.

How Much Air Flows Through a Crawl Space?

Not much air flows through a crawl space that has just a few small vents.

I'd actually be in the crawl spaces on windy days and could barely feel a puff of air come through the vents. That led me to believe to this day that there was very little science backing up the minimum building code requirements that forced homeowners to install the vents.

Related Links

Crawl space Encapsulation Holds Promise

Crawl space Ventilation Tips - More is Better

Why Do Crawl Spaces Need Ventilation?

Here is the reasoning behind crawl space ventilation. Take a clear piece of plastic and place it over what appears to be very dry ground in your yard. Put some boards around the edges to weight down the plastic so no air gets under the large plastic sheet. If you can do this on a sunny day you will get almost instantaneous results.

I'll bet within minutes you start to see a slight fog develop on the underside of the plastic. Wait longer and the fog will turn to water droplets. The soil around your house and inside of crawl spaces is constantly liberating water vapor. Sunlight, wind and natural evaporation pull this moisture from the ground.

CLICK HERE to get FREE & FAST BIDS from local contractors who deal with crawlspaces.

Where Does The Water Vapor Come From?

The moisture content comes out of the soil. Tremendous amounts of water in the soil drive this water vapor engine.

People who live in the extreme arid parts of the Southwest USA have little water vapor escaping from the soil for much of the year. But even they have a monsoon season and the soil does get wet at certain times of the year.

People who live in the Northwest, Northeast, Midwest, and Southeast have water vapor streaming from the soil year round.

Where Does The Water From My Lawn Go?

The water vapor in the soil out in your yard readily escapes to the atmosphere. But under a crawl space, this water vapor can collect and begin to condense on the foundation walls and the subfloor structure.

If the subfloor is wood, the water can create mildew in short order and eventually the wood will develop wood rot.

What Was the Theory Behind Vents?

The theory for many years was to install the crawl space vents so that outside air could get into the crawl space and lower the relative humidity.

But I'm here to tell you that I have been in many crawl spaces with plenty of open vents and I felt as if I was in a damp cave. I just feel the vents do little good to circulate enough outside air into the confined crawl space.

What's the Best Way to Treat a Crawl Space?

The better idea, in my opinion, is to install a high-performance cross-laminated vapor retarder over the soil in the crawl space in addition to the building code-required foundation vents.

This vapor retarder needs to lap up onto the sides of the foundation and be secured to the wall with treated lumber or rot-resistant wood strips. Tu-Tuf is a great vapor barrier that's been around for years and works well.

CLICK HERE to order Tu-Tuf vapor barrier now.

The best vapor retarders come with a special tape that allows you to permanently seal any seams where the vapor retarder laps over itself or is cut around objects that stick up through the ground in the crawl space.

Do You Still Need Crawl Space Vents?

These vapor retarders block the water vapor and effectively cancel out the need for the crawl space vents. But be careful: My theory may not be synchronized with your local building code if you decide to build another room addition.

CLICK HERE to get FREE & FAST BIDS from local contractors who deal with crawlspaces.

Watch the Encapsulate Video

Watch this video to see what a crawlspace looks like that's covered with the amazing plastic sheeting.

Are Crawl Space Vents a Code Requirement?

Building inspectors may make you install vents. The issue is there are local customs and beliefs that may not be grounded in science.

Each city, town, or county is it's own little building kingdom and the building inspectors are the rulers. No matter what you do, always be sure to check with your local building department and obey the building code in your area.

What About Conditioned Air in a Crawl Space?

Pumping conditioned air into an encapsulated crawl space may be a good idea.

Some local building departments have adopted code modifications that allow a variation of my theory. They permit installation of the vapor retarders as I describe and do not require any foundation vents.

But if you do not install vents, you must insulate the side walls of the crawl space and the heating contractor must pipe in a small amount of conditioned air into the space.

Furthermore, the foundation insulation must be fireproof or if it is not, it must be covered with a fireproof material.

Do I Need Vents With Encapsulation?

No, you do not need vents if you encapsulate your crawl space.

The bottom line is if you install the high-performance vapor retarders correctly, you can forget about your vents. I don't care if you keep them open or closed, it will make little difference.

The proof of concept of this method of encapsulation is widespread. Any home that's got a full basement and has had waterproofing applied to the outer foundation walls and a great vapor barrier under the concrete slab is going to have a delightfully dry basement that's not damp.

The last home I built for my family had this. My basement was as dry as the Atacama Desert. It was never damp, no water got in and there was no mold.

The high-performance plastic used in encapsulation does the same job.

Is the Code a Minimum Requirement?

Yes, the building code is a set of minimum requirements. You can always build things better than what the code says.

Crawl space ventilation is another prime example of how the building code can be argued to be a set of minimum specifications. The building code is indeed a wonderful set of regulations, but it by no means offers a builder or a homeowner the best possible way to do a task.

There are countless examples of where builders can go beyond the code and do extra work or use better materials that will produce a home that will last hundreds of years instead of perhaps 40 to 70 years.

Is Water a Serious Problem?

Water is a serious menace when it comes to residential construction. It can create havoc and misery when leaks develop or even simple water vapor condenses on crawl space floor joists, attic framing or even exterior walls.

The best defense against water vapor problems in crawl spaces is to keep the water in the soil and don't let it enter the crawl space at all. The same is true for concrete slabs poured on grade.

Always install a high-performance vapor retarder under slabs to stop water vapor from seeping through the concrete.

How Do you Stop Water Flowing into a Crawl Space?

Install one of my linear french drains around the crawlspace if you really want to keep your crawlspace dry. This is just a gutter in the ground that collects and redirects the water in the soil.

The water moving through the soil is trying to get into your crawlspace. The narrow trench with the drain tile and gravel intercepts the water and redirects it to a low spot on your land. 

Get my Linear French Drain Streaming Video to see how to install this wonderful system.

Linear French Drain Streaming Video

Do your own DIY install of a Linear French Drain with Tim Carter's time-tested methods and materials! CLICK IMAGE TO ORDER NOW!

CLICK HERE to get FREE & FAST BIDS from local contractors who deal with crawlspaces. 

Column 543

How To Polish Marble

Polish Marble

A drill, or orbital polishing tool, outfitted with a flexible pad equipped with special silicone-carbide sandpaper allows you to dry polish marble. © 2017 Tim Carter

How To Polish Marble TIPS

DEAR TIM: I need to discover how to polish marble. In my house, there is some marble flooring that has seen better days. The scratches aren’t too deep, but they look bad.

I also had to cut a piece of marble and now have an ugly dull stone edge that needs to look like the high-gloss polished finish on the top. What’s the secret? Do I need all sorts of expensive equipment? Do I need to use water? Paul H., Santa Barbara, CA

DEAR PAUL: You’re in luck. The great news is that you’ll be able to get very nearly professional results in short order.

It may take a little practice, but I think you’re going to be amazed at how easy it is to take a dull stone edge and transform it to a highly polished surface that broadcasts the natural beauty of the stone.


No Expensive Tools

Guess what? You don’t need thousands of dollars of expensive equipment to polish marble. It’s quite possible that you have a simple tool in your garage or workshop that will allow you to achieve very good results.

At the bare minimum, you need a regular drill that has a variable-speed motor. All you need is a pad that fits into the drill chuck and the sanding discs attach to the pad. Here's a very inexpensive one that will work.

Sanding Disc Kits

There are many different sanding disc kits out there like this. You can shop around at Amazon to see which one is best for you. CLICK THE IMAGE TO ORDER THIS ONE OR SEE OTHERS.

If you have access to an orbital stone polisher, that’s all the better.

CLICK HERE to get FREE & FAST BIDS from local marble pros who can polish your marble.

Dry or Wet

Understand there are at least two ways to polish marble and other stones. You can use the dry method or the wet method. It’s hard to believe, but dry polishing works very well.

Dry = Dust

This method creates a fine dust, so you need to work in a place where dust won’t ruin things. When dry polishing, you need to wear both eye and breathing protection.

It’s not a good idea to ingest stone dust into your lungs, especially stone dust that contains silica.

Silicone-Carbide Paper

Using special silicone-carbide sandpaper that’s made for stone polishing, you can cut away successive ultra-fine layers of the stone until you have a high-gloss finish.

Sandpaper can be purchased that attaches with adhesive or hook and loop technology to a flexible round sanding pad. These pads attach to a regular drill or to a special mounting base that connects to a stone grinder.

At Least Five Grits

The polishing process starts with a coarse-grit sandpaper that has a low number like 24 or maybe 60 grit. As the grit number gets larger, the size of the silicone-carbide particles gets smaller and smaller.

Grit sizes march through the double digits, triple digits and beyond. I guarantee you that you’ll be using 120 grit, 220, 400, 500, 600 and over 1,000 grit.

Coarse First

The process starts by using a coarse-grit paper and cutting away a fine layer of the stone to remove the scratches or saw-blade marks. It’s mission critical that you cut away any and all grooves leaving a surface that may be rough, but all in the same plane.

If you leave small grooves, tinier than the thickness of a piece of hair, you’ll see these as you start to achieve a high polish.

High Gloss Cons

The high-gloss finish works to your disadvantage as you polish. The higher the gloss, the more light reflects off at a different angle from imperfections. This is why you now see the scratches in your marble floor as light that hits the scratches bounces away from you at a different angle than the light that reflects off the polished areas that are free of scratches.

CLICK HERE to get FREE & FAST BIDS from local marble pros who can polish your marble.

Orbital Sander Best

When you use the tools, you need to keep them moving. By that I mean that the drill or grinder will be spinning as it’s on, but don’t keep it stationary in one spot. This is why an orbital sander is the best tool. The sandpaper automagically moves around as it should with just simple back-and-forth motions.

orbital sander / polisher

This is a superb orbital sander / polisher. You can get the needed pads that hold onto the sandpaper. CLICK THE IMAGE NOW TO BUY THIS TOOL.

If you can't afford an orbital sander and must use a drill with a sanding disc, you need to slide it constantly across the surface of the stone so the sandpaper doesn’t cut a circular groove into the stone. Moderate pressure is all you need. Let the sandpaper do the work for you.

More Grits = Better Job

It’s best to use many different grits of sandpaper as you start to achieve the polish. You may start with 24 grit, then use 60, 120, 220, 320, 400, 500, 600 and then 1,000. If you skip a grit, you may end up with tiny scratch lines that show through the polish.

You can also use dry diamond polishing pads in the same manner. They also come in different grits with some grits that are as high as 3,000.

Polish A Scrap Piece

It’s best to test your skills on a scrap piece of marble first. Try to get a piece that matches your floor marble now so that you can see what it’s like.

Use some regular sand to scratch the scrap piece and then start to see if you can polish these scratches out like a pro. Once you've achieved success with the scrap piece, advance to your floor and to the cut edge.

Wet Sanding

Wet polishing or sanding has some advantages as the water helps keep dust down and it reduces the friction of the abrasive materials allowing them to last longer.

But the downside to wet polishing is the water on the stone causes the color of the stone to naturally deepen tricking you into believing you’ve achieved success. You may feel you have a gorgeous polished surface as you’re working because the color of the edge or surface matches that of the polished top.

Practice Makes Perfect

But when the stone dries, which can take a while depending upon the porosity of the stone, a dull or scratched surface shows up. It takes quite a bit of practice to achieve professional results using wet-polishing methods and tools.

CLICK HERE to get FREE & FAST BIDS from local marble pros who can polish your marble.

Column 879

Recessed Lighting Problems

recessed light transformer kit

Recessed lighting problems solved with kit | You can solve your recessed light issue in minutes working from inside the room. No repainting, no hassle! CLICK THE IMAGE NOW TO BUY THIS GREAT LIGHT. MULTI-PAKS are available.

"There are several reasons why your recessed lights turn off by themselves."

Recessed Lighting Problems Checklist


DEAR TIM: My husband installed some recessed lights in a family room we just built. I think he goofed something up. Every time I turn the lights on, ten minutes later they automatically turn off.

Also, I feel a draft through these fixtures. Did we make a mistake purchasing recessed lights? T. G.

DEAR T. G.: No. However, your husband very likely made several mistakes during the installation. Some of these are potentially very serious and could result in a fire.

FIRE HAZARD: Do not use the lights again until you have them checked by a professional or by your local electrical inspector. By the way, the electrical inspector DID look at the lights and wiring before they were covered, didn't he? I hope your flashlight batteries are fresh.

CLICK HERE to get FREE & FAST BIDS from local electricians who specialize in recessed lights.

Can Recessed Lights Produce Layers Of Light?

Recessed lighting is a very functional type of lighting. It can be used to create a border of light in a room, flood work areas with light, spotlight pictures or sculptures, and as general purpose lighting.

Personally, I prefer to mix recessed lights with other types of lighting fixtures such as indirect lights and hanging fixtures. This creates layers of light that can be peeled from one another to create different moods. 

Is the Thermal Protection Switch the Issue?

There are several reasons why your recessed lights turn off by themselves. All Underwriters Laboratory (UL) approved recessed lighting fixtures produced since the early 1980s must have a thermal protection switch built into the fixture. This device will turn off the light if the temperature inside the fixture gets too hot.

It turns off the light so the excess heat doesn't melt the plastic insulation on the electrical wires. If that insulation melts, arcing can happen and a fire results.

After the light cools down, the sensor resets itself allowing the light to turn back on.

If this is what's happening to you, your lights are telling you there is a problem that must be addressed.

Does Ceiling Insulation Trap Heat?

Your problem may be the ceiling insulation. Some recessed fixtures are allowed to be smothered in insulation. These often are designated IC fixtures.

Fixtures without this designation must have a minimum of 3 inches of clearance between the fixture, its junction box, ballasts and any insulation.

The National Electric Code specifically states that nothing should be installed above these fixtures that will either trap heat or block free air circulation through the fixture.

Is Light Bulb Wattage Important?

The wattage of the light bulbs is important. More wattage means more heat. The fixture is rated for a maximum bulb wattage.

In your case, your husband may have installed a fixture without the IC designation. If insulation is too close or on top of this fixture, the fixture will overheat. The problem may also be as simple as the light bulb within the fixture. If it is too large (too high a wattage), the bulb is creating too much heat.

Where is the Bulb Wattage Label?

Remove the bulb and look inside the recessed light housing. You should see labeling which tells you the maximum wattage of the bulb that you can place in the fixture. Be sure to use the approved light trims for the fixture as well. Intermixing trims between fixtures can cause you to lose your UL rating.

CLICK HERE to get FREE & FAST BIDS from local electricians who specialize in recessed lights.

Am I Supposed to Feel a Cold Draft Through the Light?

The draft you feel is unnecessary. Many manufacturers now make recessed lights that are completely sealed. Using these fixtures can save you money.

A single recessed light fixture that's not airtight can allow up to 2.5 million cubic feet of air to pass through it in one year. This type of air flow could waste up to 1 million BTU's of energy loss per fixture per year!

Are There Great DIY Electric Books?

If you're looking for a great book for installing simple wall lights to running wire in new construction and in existing walls and ceilings, then Wiring a House is the book for you.

Wiring a House by Rex Cauldwell

I own this book. Rex Cauldwell makes it easy to understand perplexing electric. CLICK THE IMAGE TO ORDER IT NOW.

This book, written by master electrician Rex Cauldwell, is sure to become an indispensable reference for anyone who wants a common sense guide to residential electricity. The photos and illustrations featured in this book are clear, crisp and easy to understand. 

If you're looking for a book with invaluable information on tools and materials, detailed instructions for how to repair or replace the wiring in old buildings and bring them up to code then you need a copy of Old Electrical Wiring. This 400-plus-page book tells you everything you could ever imagine about switch layouts, troubleshooting, and design change.

It also has an extensive glossary of old wiring terms and slang. Packed with drawings and illustrations, including pictures of old devices, this practical book will tell you whether an old electrical system should be torn out or repaired. This book will really help you.

Old Electrical Wiring by David E Shapirp

If you have an older home, this is a must-have book. CLICK THE PHOTO NOW TO HAVE THIS BOOK DELIVERED TO YOU BY SPECIAL COURIER.

CLICK HERE to get FREE & FAST BIDS from local electricians who specialize in recessed lights.

Column 091

Clay Soil Water Infiltration Inject Water

Clay Soil Settlement Water Injection TIPS

  • Soil can move up and down
  • Clay soil movement can be huge
  • Keep soil constant moisture level
  • Use drain tile to inject water or gravel tubes
  • CLICK HERE to Get Tim's FREE & FUNNY Newsletter!

DEAR TIM: I recently started a room addition project that has a crawl space. My builder insisted on installing a drain tile pipe on top of the foundation footer. Since there's no basement below my room addition, I feel that the pipe is a waste of money. Would you do this on one of your projects? B. F.

DEAR B. F.:  Hah, smart builder. You should hug him! The money you are spending for this pipe is a very wise investment. I feel that you're extremely lucky to have selected a knowledgeable builder.

Dual-Purpose Tile

Foundation drain tile systems serve a very important function. They're generally installed to provide a means to channel excess water away from your footing and foundation. However, if equipped with a simple optional pipe, they can also allow you to inject water along your footing and foundation. The value of this second point is frequently overlooked.

This is very important for structures that have shallow foundations and are in soils that have a fairly high clay content.

CLICK HERE to get FREE & FAST BIDS from local Builders who can construct your room addition.

Soil 101

Most houses or room addition projects are constructed on soil, not bedrock. Soil is made up of small deteriorated pieces of rock. However, these solid pieces only make up a portion of the total space that soil occupies.

The remainder of space is comprised of void areas. These empty areas can be filled with a combination of gas, air, or water in varying amounts. The closest thing I can compare it to is a sponge.

Because of these characteristics, some soils can cause tremendous problems if allowed to become alternately dry and wet. Certain clay soils expand when wet and contract when they alternately get wet and then dry.

Secret Soil Water Injection Video

Watch this video to show you how to get water fast into clay soils using a simple soaking hose. You can use this method if your builder didn't install a water injection pipe up from your drain tile.

Some clay soils react dramatically to moisture variations. They actually shrink and swell. Parts of Texas have clay soils that wreak havoc on homes that don't have fantastic foundations that can withstand the stress.

auger bit

Use an auger like this that you attach to a cordless drill. You drill down into the soil and then put small pea gravel down into the hole. CLICK THE IMAGE TO BUY THIS GREAT AUGER NOW.

CLICK HERE to get FREE & FAST BIDS from local Builders who can construct your room addition.

Swelling Sponges

You can demonstrate this very easily with certain types of sponges. These sponges tend to shrivel up when dry, however as soon as you wet them they 'puff' up. Can you imagine how your house or room addition reacts when this happens to the soil surrounding your foundation and footer?

Trick the Soil

There's an interesting thing about these soils. When subjected to an even, constant state of moisture content, they usually don't shrink or swell. They have a strong tendency to stay the same size.

The trick is to maintain this delicate balance. Geologists have a fancy name for this condition -- dynamic equilibrium.

For those of you who have decided to stay with me on this, here's the payoff. Your drain tile system allows you to easily maintain this state of dynamic equilibrium. Here's how it works.

Add Water To Tile

During dry spells or drought conditions, you can inject water into your drain tile system. This allows you to trick the soil in contact with your footing and foundation. It will have no idea that it hasn't rained in months.

To be able to inject water easily, you must have your builder install a 'T' fitting in your drain tile system. A pipe will extend to the surface from this 'T' fitting.

This simple pipe allows you to easily inject the necessary water to saturate the soil surrounding your foundation footer.

drain tile

You should be able to figure this out. The dashed blue lines are the riser pipe that sticks up above the level of the grass or soil. © 2017 Tim Carter

Garden Hose On Low

I usually recommend that people insert their garden hose into this riser pipe, turn the water on low, and let it run overnight. If you do this once a week during drought, or very dry conditions, you generally will not have any problems. You must monitor the water flow carefully if you have a basement. If your foundation is not waterproofed, too much water might possibly cause a leak into your basement.

Soil Maps

You can check your soil characteristics by using a soil map. These maps and descriptions are usually available for free at your county offices. They're also available online in many instances.

Often they can be found in the agricultural department or the engineering and building department. These maps are prepared by geologists who specialize in soils. I highly recommend that you obtain one prior to building your next home or room addition.

CLICK HERE to get FREE & FAST BIDS from local Builders who can construct your room addition.

Column 014

Fireplace Design & Dimensions

Fireplace design

Fireplace design details can be found in this amazing book. CLICK THIS IMAGE TO GET INSPIRATIONAL PHOTOS of GREAT FIREPLACES.

"Fireplace design details do not stop on the front face of the fireplace. The firebox must be shaped and sized perfectly so it doesn't smoke."

Revised September 2018 and featured in the September 30, 2018 AsktheBuilder Newsletter.

Be sure to check Tim's (not the AsktheBuilder one) smoking fireplace, featured in the January 31, 2021 Newsletter and his email in the Fix Smoking Fireplace - You May Have to Start Over.

Fireplace Design Details Checklist

  • Sides of firebox must pinch in towards back
  • Back wall of fireplace must be straight up for first 12 inches
  • Back wall must slope towards front for remainder of height
  • Width and height of opening MUST come from table below
  • Smoke shelf up above fireplace must be sized correctly - see below

CLICK HERE to get FREE & FAST BIDS from local masons to build your new fireplace.

Why Does a Fireplace Smoke?

A fireplace will puff smoke into a room if its design is flawed. The physics of smoke rising into a chimney is complex and several things must be done right so all the smoke from the fire exits your home.

It's important to realize there are three aspects of fireplace design you should be concerned about. The first is the inner shape and design of the firebox where the fire burns (firebox), the hidden smoke shelf area above the firebox, and the flue that rises up and through the roof.

Whitewash Fireplace Brick

Here's the fireplace once finished. Maggie and her daughter did a magnificent job and the hydrated lime will look this good for decades. Copyright 2017 Tim Carter

All three of these things MUST BE done correctly or your fireplace will send billowing smoke into your home. All you need to know is below.

Is Stone the Best Fireplace Material?

Stone fireplaces can be very durable. Granite and many other dense stones can make a gorgeous outer face of your fireplace. Here's one I saw in Southwest Harbor, Maine.

stone fireplace

This is a stunning fireplace made with real stone. The colors of the stones really make it visually attractive. The mason did a magnificent job of shaping the stones so they fit like pieces of a jigsaw puzzle. Copyright 2018 Tim Carter

The second design consideration is what the fireplace looks like to those who look at it while in the room. If you need inspiration and want to see stunning photos of some fantastic fireplaces, then order Fire Places: A Practical Design Guide for Fireplaces and Stoves

Related Links

How To Build a Smoke-Free Fireplace

Fireplace Design Basics - IMPORTANT TIPS HERE

Where is Free Fireplace Design Literature?

The Brick Industry Association has three excellent pamphlets about fireplace and chimney design and construction. I recommend you read these three things:

#19 Residential Fireplace Design

#19A Residential Fireplaces, Details and Construction

#19B Residential Chimney Design

Watch this short video to see properly sloped firebox brick:

CLICK HERE to get FREE & FAST BIDS from local masons to build your new fireplace.

What are the Best Fireplace Design Dimensions?

The best fireplace design dimensions are the ones that ensure your fireplace will not smoke. The Brick Industry Association is perhaps the most respected source of fireplace design criteria in the world.

Be sure your mason builds your fireplace according to the values in the following table. All the data is courtesy of the Brick Industry Association.
.

Fireplace Opening Width 24" 28" 32" 36" 40" 42" 48" 54"
Fireplace Opening Height 24" 24" 29" 29" 29" 32" 32" 37"
Firebox Depth* See Note Below 16" 16" 16" 16" 16" 16" 18" 20"
Rear Firebox Width 11" 15" 19" 23" 27" 29" 33" 37"
Rear Firebox Vertical Height 14" 14" 14" 14" 14" 16" 16" 16"
Smoke Chamber Height 19" 21" 24" 27" 29" 32" 37" 45"
Throat Height 8" 8" 8" 8" 8" 8" 8" 8"
Nominal Flue Size 8x12" 8x12" 12x12" 12x12" 12x16" 12x16" 12x16" 16x16"
Minimum Chimney Height 18' 22' 19' 21' 15' 19' 23' 23'

*Note: The firebox depth does not include the thickness of the facing material you see when looking at the fireplace.

The firebox design is critical. Here is a photo of a new masonry firebox in my own home. The rear wall of the firebox rises vertically from the floor of the fireplace and then begins to slant towards the fireplace opening just at the top of the gas logs. The sidewalls of the firebox are vertical. Note that the firebox is not the same width front to back. It gets narrower towards the rear of the firebox!

fireplace blueprint

This blueprint is nearly 100 years old. The architect knew EXACTLY how to design the fireplace, chimney, and firebox so it would NOT SMOKE. Use this as your North Star.

Can You Mix and Match Flue Sizes With Chimney Heights?

You can mix and match flue sizes with chimney heights. To properly size a flue, you must use a Nomograph.

flue size nomograph

This is a wonderful flue-sizing tool. It's a Nomograph from the Brick Industry Association's Technical Notes #19. Copyright 2018 Brick Industry Association

What is the Best Flue Size?

It's always better to use the smaller flue size when you have two choices. When using the smaller flue size, you will be required to raise the height of the chimney.

Do Tall Chimneys Draw Better Than Short Ones?

Taller chimneys draw better than short chimneys of the same flue size.

Is the Smoke Chamber Height Critical?

The smoke chamber height and design are very critical. You generally can't see this space as it is hidden above your fireplace damper.

How High Up Should the Damper Be Above the Fireplace Opening?

The bottom of the damper should be a minimum of 8 inches above the top of the fireplace opening. This part of the fireplace is called the throat. If your damper is not at least 8 inches above this spot, you will have smoking problems for sure!

I urge you to read the pamphlets I have mentioned from the Brick Industry Association. They have excellent illustrations which will enable you to clearly see what I am trying to explain! The following table and its values are courtesy of the Brick Industry Association.

What is the Best Mortar for the Beige Fire Brick?

The best mortar for firebrick is fire clay. It's often called refractory cement and it rated for temperatures above 2,000 degrees F.

fire clay

This is fire clay. It's a fine powder that you mix with water. CLICK THE TUB to have it delivered to your home in days.

Fire clay is a fine powder you mix with water to the consistency of gravy. You dip one edge of the firebrick into a pot of the wet fire clay to coat it. You don't want large wide joints. The joints between firebrick should be no greater than 3/32nds of an inch!

Column B110

Compact Fill Under Slab

The dirt and rock in the center of the future garage has been compacted by Mother Nature for eons. But the trenches next to the new foundation require special care by the builder. Photo Credit: Tim Carter

The dirt and rock in the center of the future garage has been compacted by Mother Nature for eons. But the trenches next to the new foundation require special care by the builder. © 2017 Tim Carter

Compact Fill Under Slab TIPS

DEAR TIM: My new home is under construction. I'm in a disagreement with my builder about what's going to happen under my garage slab. Right now there's a trench around the inside on all four walls where they had to dig to install the foundation.

The center of the garage area is undisturbed dirt and rock that's been there since the dinosaurs roamed. My builder says he's just going to fill it in with the dirt he dug out and all will be well.

I think that's a mistake. What should be done? If he does use the dirt is there a special way to install it? Are there other things that can be done? What would you do? Tom M., Binghampton, NY

DEAR TOM: Un-compacted fill under concrete slabs of any type is a recipe for disaster. The slab could be for an entire home, it might be an exterior patio slab, a front porch slab, a driveway, etc. Concrete is an amazing material, but it has an Achilles heel.

CLICK HERE to get FREE & FAST BIDS from local concrete slab contractors.

Concrete Weakness

Concrete has tremendous compressive strength. This means if you squeeze it, it often takes 3,000, 4,000 or more pounds of pressure per square inch to get it to crack and fail. But the exact same concrete mix, when you stretch or bend it, engineers call this tension, has on average only one tenth the strength as it has in compression.

Soil Settles

If un-compacted, or poorly compacted, soil or fill sinks under a slab you end up with a hollow spot. If you drive on this concrete and apply pressure to it, the concrete tries to bend or stretch to conform to the hollow spot. The result is almost always a crack and the concrete slab drops down. I see photos of this unnecessary damage all the time.

Add Water to Compact

You're correct that the dirt in the center of the garage area is solid fill. Mother Nature, over time, does an amazing job of compacting soils. Rainwater plays an important part of this process. Adding water to fluffed or disturbed soil will go a long way to accelerate natural compaction of soil particles.

When I was still building on a daily basis, I would go to great lengths to water the fill soil in utility trenches and around the outside of a new home to get the soil to settle faster. Many builders don't take this extra time.

Engineering Specs

Your builder can use the soil he dug out of the ground to fill the trenches back in, but to do it right requires lots of work. A soil engineer can develop a compaction plan that speaks to the amount of soil that can go in the trench at a time, the fancy name for this is a lift, what tool needs to be used to compact the soil and how long the tool needs to be used to get the soil compact.

When fill dirt is placed in large amounts for highways and other projects, the fluffed dirt is brought in, spread out in thin layers and then compacted by large machinery designed to compact dirt and rock. The moisture content of the fill dirt is important as is every other facet of the operation. The same process can be done for smaller jobs like yours.

Your builder has all sorts of options if he doesn't want to go to all that work. Each has to be studied to see which is the most cost effective.

Concrete Block Ledges

One option is to lay concrete block up off the interior ledge of the footers to just below where the concrete slab will be. These can be spaced at 4-foot intervals around the interior foundation walls. The concrete slab will rest on these and provide solid support down to the footer. 

foundation fill

Here's a quick drawing I made showing the concrete block ledges. This is a side view showing just one of the supports. You lay block up off the footing so it comes to the bottom of the slab. You place these piers about 4-feet-on-center around the entire slab. Fill the void spaces with self-compacting gravel like the green pea gravel you see. © 2017 Tim Carter

CLICK HERE to get FREE & FAST BIDS from local concrete slab contractors.

Rebar For Sure

The slab will have to have steel rebar, no less than one-half-inch in diameter in both directions spaced at 2-foot centers to make this work. The steel bars need to be placed so they line up with the concrete block pilasters.

The slab then acts as a bridge between the pilasters and the compact dirt in the center of the garage.

This is 1/2-inch rebar. The rods are almost always 20-feet long. Hand and pocket knife for scale. © 2017 Tim Carter

Magic Gravel

The easiest fix to the situation in my opinion is to just fill the trenches with self-compacting gravel. This is what I used to do on my jobs. You may be lucky to have a gravel company that has a truck equipped with a conveyor belt that will shoot the gravel in place so very little work has to be done by hand.

I was lucky to build in an area where there was abundant rounded sand and gravel. This was created by the massive continental glaciers that covered much of the northeast USA and the upper Midwest about 15,000 years ago. When all that ice melted on it's own with no help from us, it created untold cubic yards of this wonderful rounded gravel.

Pea Gravel

I preferred to use washed pea gravel for filling trenches like this in garages. This gravel is the size of small green peas and it naturally compacts as it's put into a void space. Visit a few local gravel pits in your area to see if they have this small rounded gravel.

You can also fill the trenches with a gravel product that's a mixture of washed sand and different sizes of rounded gravel. This product requires water to get it to naturally compact and you need to install it in layers no thicker than one foot at a time.

If you have to use crushed stone, be aware that it requires mechanical compaction so the pieces of gravel interlock. This extra step is costly and it must be done correctly so your slab never fails.

CLICK HERE to get FREE & FAST BIDS from local concrete slab contractors.

Column 1102