Pex Plumbing Tips

pex plumbing

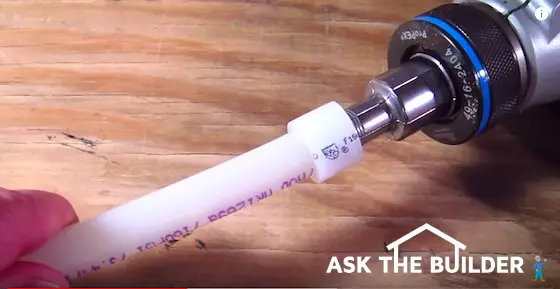
This is PEX tubing. I'm using a trouble-free UPONOR compression ring to make a connection. WATCH the video below to see it happen in seconds. Copyright 2018 Tim Carter

Connect PEX in Seconds - No Experience Needed!

This column was SO GOOD that I shared with the 31,000 subscribers who read my April 14, 2019 AsktheBuilder Newsletter.

DEAR TIM: Money is very tight in this current economy and I just can’t afford to hire a plumber to install new water supply lines in my home. I’ve seen the pex piping and feel it's the way to go as there are no soldered joints hidden in the walls.

Is it hard to install pex plumbing tubing? Can you share some secrets and tips? Am I crazy to think that I can be successful doing this? Dan G., Belle Mead, NJ

Related Links

Cut PEX Tubing in One Second or Less!

Prevent Frozen Pipes Using PEX - The Only Way to Go!

DEAR DAN: Not only is money in short supply right now for many, but I feel it's also going to get worse. This is going to cause many to jump in and do home repairs and remodeling not because they want to, but because they have to.

Free & Fast Bids

CLICK HERE to get FREE & FAST BIDS from local plumbers who can do PEX in case you're afraid.

There's lots of opportunity here - to make mistakes and to build confidence. Let's put you in the second group.

pex plumbing

It's important to realize that some cities and towns don't allow unlicensed people to work on the potable water supply systems in their homes. Keep in mind if your home is connected to a municipal water system, water, in certain situations, can flow out of your home and into the water mains outside your home.

If you've made connections to the system that allow polluted water to flow into the water pipes outdoors, you can make many sick. It's serious business.

One Practice PEX Joint and You're a Pro!

Let's assume you're allowed to do the pex plumbing installation work. I feel, with a little practice, you can be successful doing this major job. There are just a few areas where you'll need some sweet skills to ensure you don't have a leak.

Let's talk first about the many advantages of pex tubing and pex plumbing fittings. As you've already noted, since the pex piping is similar to electrical wiring, there are no joints in the pipe if you decide to install a separate pipe to each fixture from your main mechanical room where the water supply enters your house. That one characteristic of pex is an enormous time saver.

PEX Plastic Has a Memory

The pex tubing I've worked with, and had the best success with, is a special plastic that has a memory. Don't ask me how they figured it out, but when you stretch the material it fights to go back to it's original shape and size.

This property allows the piping and little compression collars to grab tightly onto the knurled surface of the male adapter fittings. This is what creates the leak-free connections between the pex tubing and a manifold or a valve at the end of a run.

PEX Expanding Tool - Just Get Hand-Powered One

To stretch the piping, you need a special tool that has an expanding cone tip. As you crank the tool, this cone expands the plastic.

pex hand expander

Here's a PEX hand expansion tool. It's hundreds of dollars cheaper than a power tool. CLICK THE PHOTO now to have this delivered to your home.

The warmer the pipe is, the easier it is to accomplish this. Cold temperatures cause the plastic to react sluggishly. This means it expands slower and goes back to its original size slower.

These special tools come in both hand powered and a sleek cordless electric tool that's very handy. You'll have to get one of these tools to do the job, so give a serious look at the cordless tool. Once you've completed the job, you can sell the tool online if you desire and get back probably 65 percent of the price you paid for it.

Connect PEX Using the UPONOR System

I have PEX in my home and it's the UPONOR system. It has these caveman simple compression collars that keep all joints leak-free. Watch how SIMPLE and FAST it is to make a connection:

Main Manifold May Stretch Your Comfort Level

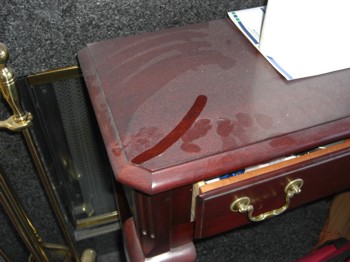
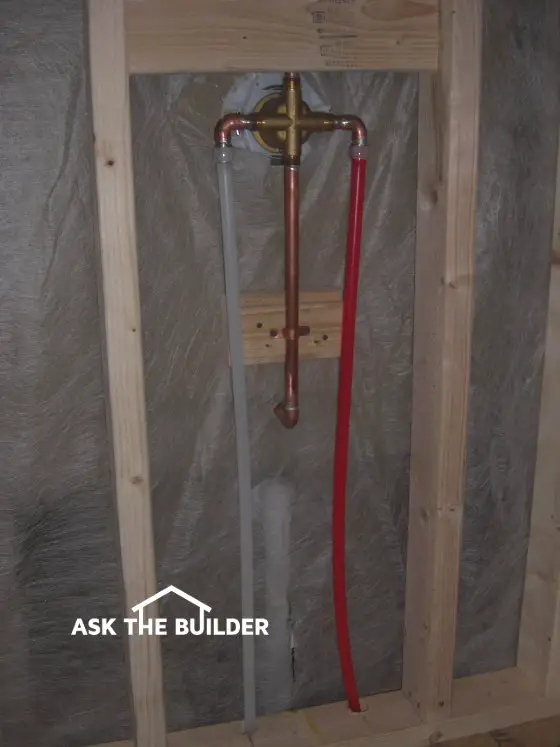
The only place I can see you having problems is installing the two manifolds in your mechanical room. These are usually made from copper and have a shutoff valve at each port where you connect a water line. You'll have to securely attach the manifold to the wall and do some great soldering to connect the manifold to your water supply.

Some plumbers are moving away from the manifolds and installing pex piping like traditional water supply lines. In these cases you do end up with joints hidden behind walls.

CLICK HERE to get FREE & FAST BIDS from local plumbers who can do PEX in case you're afraid.

If you decide to install your system like this, you need to be very conscious of water pressure and friction losses. You'll have to install a 1-inch main trunk line that eventually downsizes to 3/4 inch and then 1/2-inch pipes that supply each fixture.

Employ Best PEX Practices

Be sure you follow all best practices when working with the pex piping. I would absolutely read any and all information that the pipe manufacturer has available. Be sure you don't pinch the pipe. Drill holes that are large enough for the pipe to pass through easily.

You also need to be aware of all the limitations concerning drilling and notching structural framing members. You just can't go start drilling large holes in floor joists. You can't notch floor joists.

The building code often contains good illustrations that show you exactly what you're allowed to do without compromising the structural integrity of your home. Check what's on the other side of a wood member before drilling. You could penetrate a wire or a gas line!

Practice First With PEX - So Simple

Finally, I would highly recommend testing your skills before you advance to putting the pipe and fittings in your home. Create small test joints where you connect a pex pipe or two to actual shutoff valves.

Then connect these short test pipes to your existing plumbing system. See if you have any leaks. Be sure you understand how to completely expand the pipe, rotating the tool as you expand the plastic and then quickly install the pipe and compression collar over the male end of the adapters before the pipe returns to it's original size.

Don't hope that you have leak-free joints. Remember, hope is the emotion of last resort. You hope for something when you can't control the outcome. In your case, with practice, you can control everything!

CLICK HERE to get FREE & FAST BIDS from local plumbers who can do PEX in case you're afraid.

Column 880

April 20, 2011 AsktheBuilder Tips And Newsletter

What's in This Newsletter?

Latest News
Deck Stain Test
Water Heater Pilot Light Outages
AsktheBuilder on Facebook
Stain Solver Sale
Snow & Ice Creating Roof Noise
Boring but Necessary Stuff

Welcome if you're a new subscriber. If you like this newsletter, feel free to forward it to as many of your friends as you wish.

Latest News

If you're a new subscriber in the past 14 days, you're unaware that I was pretty sick about three weeks ago. At the end of March, I was afflicted with a nasty case of the shingles. I'm on the mend, but it really put me behind.

I want to thank you if you sent me Get Well thoughts. I got so many emails that not only did I not have the energy to respond to all, but it just was impossible to answer you personally. I hope you understand.

You may have been one to slightly scold me about the lost opportunity to advise others about the vaccine or preventative medication that's available. Bottom Line: Next time you're at your doctor, ask her/him if you qualify for the vaccine or drug. I believe there is one if you've never had chicken pox - the source of shingles, and there is a different one that can be administered if you have had chicken pox.

All you need to know is that you don't want shingles on your body. They work great on your home, but you don't want them ever on your skin.

I'm getting much better. My scalp, at this point, feels like I have a medium sunburn. It's still sensitive to touch, but the extreme pain is gone as are the debilitating flu-like symptoms.

Deck Stain Test

I'm gathering the top semi-transparent deck sealers right now preparing to create a massive side-by-side test of the top brands. This is an offshoot of the test I did last year on my dock.

This morning I met with the factory rep for Valspar, Maribeth, and she was kind enough to give me two samples of their top-of-the-line deck sealer.

So here's the BAD news. The test results will NOT be available until next May. I want to do a year-long test. I'll have the results for you next Spring. Wait till you see the photos and how I document each step of the way.

I'll be testing the products on both weathered treated lumber and cedar decking.

Water Heater Pilot Light Outages

I've been receiving a rash of complaints about water heater pilot lights going out. Two weeks ago, I went to two of the top water-heater manufacturer websites and used the Contact Form to get someone from each company to talk to me.

Can you believe that I've yet to hear from one of the companies, and the other one just called back today?

If you have a company website with a contact form, I beg you to be more responsive. If you can't respond in 24 hours, then take down the contact form from your site.

What we do here at AsktheBuilder.com is review the incoming messages each day. Complaints and media requests are handled immediately. Questions we get are put in to the queue to be answered on a first-come first-served basis.

What You Missed on the AsktheBuilder Facebook Fan Page

AsktheBuilder on FacebookEach week I try to recap what happened in the past week on the AsktheBuilder Facebook Fan Page. If you're not on Facebook getting my updates, you should be. It's FREE. If you don't want to join Facebook, no worries, you can STILL go to the link just below and read all the tips for FREE.

If you're on Facebook, all you do is go to the fan page and click the Like button to get the updates.

www.facebook.com/askthebuilder

Here's a quick recap of what happened:

  • I helped Greg put up some wall sconces in his NYC apartment.
  • Joe, who lives near Cleveland OH, wanted to know the best roof shingles to buy.
  • I did a quick review of the Bosch PS50-2A Multi-X cordless tool. Woo Hoo!
  • I upload a photo of some cool wood bead board panels that I installed on a Sub-Zero refrigerator.

I really urge you to get on Facebook and Like my Fan page. There's lots happening there that you're missing. Some of it could save you lots of time and money!

Stain Solver Sale and Distribution News

My illness has caused me to delay the annual Stain Solver Sale. Before we get to the sale announcement, I desperately need your help.

Are you a satisfied Stain Solver customer? Could you please go to www.amazon.com and search for Stain Solver?

We've been selling it there since last September and got fantastic ratings with comments. But a month ago, we uploaded all the new photos and the NEW sizes of Stain Solver.

We didn't realize that would wipe out all of the past great comments customers left. It's really hurting us not having the comments. Would you please invest just 5 minutes of your time and go there leaving us a comment and telling a short story of what Stain Solver cleaned for you? Thank you so very much for doing this.

Now here's the sale information:

Everything about Stain Solver is NEW except the magical powder in the containers. We've not touch the awesome formula that makes Stain Solver, in my opinion, the absolute BEST oxygen bleach on the market.

Stain Solver logo
But the containers are new, the logo and labels are new, the boxes are new, the website is new.

So here's the sale news. First, in all the years of selling Stain Solver, sixteen I believe, I can't ever recall a discount this big.

I'm offering a 25% off coupon in honor of the outdoor cleaning season to use on decks, patios, siding, roofs, patio furniture, umbrellas, driveways and lawnmowers.

Because the discount is so big, it only lasts until midnight on the Monday after Easter (April 25, 2011). That's LESS than a week away! I'm sure there are those on some vacation and who will not see this email until Monday morning.

To get the discount, use this Promo Code:

ENJOYYOURBACKYARD

Go here to see the new Stain Solver website and all the things it cleans. You'll regret it if you pass on this sale. If you're a subscriber that's been around for years, you know I don't do these deep discounts every month.

I urge you to buy as much as you can afford. Wait till you see the EASY-OPEN containers that we've switched to. You're going to love them.

SS02 Stain Solver Finally, we are starting to place Stain Solver in specialty stores. If you want to SELL Stain Solver in your store, it could become a nifty profit center that you don't currently have.

I've been starting to visit stores here in NH that sell red wine, pet supplies, hardware, ceramic tile, linens, kitchenware, baby clothes, etc. Remember, Stain Solver gets out just about ANY organic stain in minutes.

If you work in one of these stores or own one, you'll want to have our gorgeous 2-pound bottle with the retro metal lid right at the cash register for all to see. It puts people's head on a swivel when they see it.

Go here for details to become a reseller of Stain Solver.

Snow and Ice Creating Roof Noise?

Nicole Carey of Worcester, MA emailed me the following question:

"A large amount of heavy snow and ice built up on the roof of my 4-year-old town home.  The condominium management company never used preventive measures to remove the accumulated snow.  Now my roof creaks every time there is a strong wind.  The creaking happens across the entire second floor.  Should a structural engineer look at the roof?"

Nicole,

I don't feel there is any need to call in a structural engineer. I would expect that your roof has been constructed to the minimum requirements for your area anticipating the snow and ice load.

The noises you hear could just be the structure reacting to wind loads. That's perfectly normal. If your house is of wood-framed construction, it can actually move slightly in response to wind loads. This movement creates noise. Almost always the house springs back to it's original position.

Just start monitoring your walls and ceilings for cracking. If you see cracks start to appear and they grow, then it's time to call in an engineer.

Boring but Necessary Disclaimers and Other Stuff

I do product reviews frequently. Please read my Disclosure Policy to understand the relationship between me and the companies that make the products or offer the services I review.

PERIODIC OFFERS: This is a free newsletter filled with thousands of dollars of advice for your use and pleasure. From time to time I do offer you some of my products to help offset the time and resources I put into this newsletter. I hope that you consider this when you see me make you an offer.

FOLLOW ME ON TWITTER

Friendly Question Reminder!

If you have a question for me, don't hit the Reply button just yet. Go immediately to my web site and type in the keywords about your problem into my Search engine. The search box is at the top of every page of my web site. You could have your answer in seconds if you do this! Please pay attention to all links you see at my web site. The exact products and services you often need are right in front of you, and you might be ignoring them.

AsktheBuilder.com
100 Swain Rd
Meredith, NH 03253, USA

Apron Sink Video Part 2

Hi, I'm Tim Carter of AsktheBuilder.com. This is part 2 of the Herbeau Apron Sink Video series. This video will show you the sink installed and more importantly, how it is supported.

In case you missed it, here is the link to part 1 of this series - Apron Sink Video Part 1.

Look at this. The apron sink is installed in the sink base cabinet. This sink cabinet before we started had a solid wooden front. Then the front was marked and a "U" shaped slot was cut out of the cabinet front. This slot has to match the apron sink. This is very important and takes some time. But if you do the measurements correctly, you will have no issues.

At this point, the sink appears to be floating in midair. How is it supported? I will show you. If you look down at the back of the sink, you will see a piece of plywood. That plywood extends completely underneath the sink, and it goes completely side-to-side of the sink base cabinet.

If you look under the plywood, you will see that it is held up by a 2x4 on either side of the sink base cabinet. These 2x4s are screwed into the side of the cabinet. The plywood is 3/4" thick and cutouts had to be made for each of the sink strainers. That is the support system for the apron sink.

That is what keeps the apron sink from dropping down into the cabinet. It is not hard to do. Just need to take a few measurements to match the sink. Remember the height of the plywood is a function of the height of the sink.

In this view, you can see the top of the sink. The top is flush or just slightly below the height of the cabinets on either side of the sink. That is very important. You don't want the sink to be higher then the cabinets on either side. If you install a stone countertop, like will be installed here, that could create a void on either side and if someone puts pressure on the countertop, it could crack. So the little gap from the sink being slightly below the surrounding cabinets, can be caulked with a black silicone caulk and no one will even know they are there. In addition, this will seal the sink so water can't get under the countertop and create rot problems.

So installing an apron sink is really simple. Use a 3/4" thick plywood support board and make sure the 2x4s are securely screwed into the cabinet sides. Do this and your apron sink won't fall down into the cabinet below. Or the basement!

Synthetic Canvas Tool Bag

DEAR TIM: I want to buy my husband a tool bag or tool box to surprise him. His tools are always scattered about and he wastes so much time looking for them. I assume you've had all sorts of experience in tool organization, so can you tell me what's worked best for you? My feeling is that if it works for you, it will be a dream-come-true for my husband. What's your favorite tool bag now and why? Meredith B., Greenville, SC

DEAR MEREDITH: You hit the nail on the head alright, as I've tried just about every tool organization product known to man. In fact, I still have the gray metal Craftsman tool box that was my dad's. I estimate that box to be close to 50 years old. It still has the logo plate on it.

This is a deluxe synthetic canvas tool bag that will make you more productive. PHOTO CREDIT: Tim Carter

Let's talk about the traditional tool boxes first before I share what my favorite is. What I don't like about the traditional tool box is the lack of internal organization. Some late-model tool boxes tried to create little compartments in the tray for tools, but for me, those never worked. If you fill up the tool box with tools of all sorts, they just lay on one another and you're constantly digging out tools to find what you need.

Not only is this a waste of time, the tools start to get worn from rattling against one another. It's not much different than throwing clothes into a closet and then rummaging around the pile to find what you need. When you hang clothes up, you can see them and put your hand on that blouse or pair of pants as soon as your eye sees what you want.

Nearly two decades ago, inventors started to deal with this rumble that was resonating from the toolboxes. I can clearly remember seeing a first-generation tool organizer that fit over a 5-gallon bucket like a saddle on a horse. This organizer had all sorts of different-sized pockets for all sorts of hand tools. It was a great first step towards making tools visible and accessible.


Stop - Check this out! Tool Bag
Do you want the EXACT tool bag I wrote about in this column?

VETO PRO PAC Model LC Tool Bag

This is an affiliate link. If you purchase this item, Amazon will pay me a small commission.

The only problem with this open method was that the tools could get wet or dirty as they had no covering on them. Although this was not a deal killer for me, it was just two steps forward and one step back with respect to protecting the tools. The bail handle on the bucket was also problematic as the bucket became filled with heavy tools.

If you jump in the time machine and go back about 12-15 years, you'll discover the first generation of soft-sided tool bags that had all sorts of pockets, chambers, etc. for tool storage. One of my favorite was an actual backpack that was made to carry hand tools.

One of the latest soft-sided tool bags that I've tested really has got my attention. I'm convinced your husband will love it. It's shaped like a backpack, but it opens on both the front and the back. The flaps just zipper up and down and fold away using handy snaps so the flap doesn't touch the floor or the ground.

You can put just about any hand tool you can imagine in this deluxe synthetic canvas tool bag. They come in different sizes depending upon your husband's tool collection. I can see owning one, two or three of these bags and setting them up for each project discipline.

For example, one part of one side of this tool bag could be dedicated to electrical tools. You'd easily take up space with your linesman's pliers, wire stripper, needle-nose pliers, circuit testing tools, etc. The other half of that side of the tool kit might be dedicated to plumbing tools.

I can see one entire tool bag that's just for carpentry tools. The list of tools you might put in the little pockets is endless. Nail sets, screwdrivers of every type, chisels, plumb bobs, torpedo levels, tiny pry bars, etc.

Your husband is going to love the tool bag if you get the one I'm now using. Of that there is no doubt. I love the padded shoulder strap that comes with it. When not in use you park it next to the tool bag handle with common hook and loop connectors. This keeps the strap off the ground and out of the way.

You can look at both open and closed tool bag solutions. The open tool bags have come a long way since the simple ones that overhung a bucket. Any number of these bags have designs, both open and closed, that work perfectly for every tradesman.

For example, I know the one bag I use would be perfect for my heating and air-conditioning contractor. He has all sorts of specialty hand tools, nut drivers, and specialty tools he uses to service AC units, furnaces and boilers. The bag I use now would keep all of the tools he needs protected, dry and right where he needs them.

Electricians, maintenance men in hotels, elevator mechanics, refrigeration contractors, plumbers, etc. all need tool bags like this that help them keep their specialized tool organized, clean and protected. If you know of one of these craftsmen, suggest they look at the new tool bags to see if they don't feel it will help them in their everyday work.

Stop - Check this out! Tool Bag
Do you want the EXACT tool bag I wrote about in this column?
Get it here.

VETO PRO PAC Model LC Tool Bag

This is an affiliate link. If you purchase this item, Amazon will pay me a small commission.

Column 878

April 5, 2011 AsktheBuilder Tips And Newsletter

What's in This Newsletter?

Latest News
No Austin Meet Up
Finish Carpentry Saw Blade Test Soon
Attaching a Mantle to a Brick Fireplace
More Next Week
Boring but Necessary Disclaimers and Other Stuff

Latest News

Our bodies talk to us. But sometimes we don't listen. Well, let's say I wasn't listening. You can bet I'll pay attention next time.

Last Monday, I flew to Los Angeles to begin a 12-day business/pleasure trip. Three days ago, I was back in New Hampshire in writhing pain.

Recreating what happened, the early signs started to happen last Sunday, the day before I left. That morning, while combing my hair after my shower, I noticed some tenderness and a few bumps on the left-rear quadrant of my scalp. Big deal, maybe it was a pimple or two.

When I got to Las Vegas on the first leg of my long flight from NH to LA, I noticed my neck was stiff - more than usual. I blamed that on sleeping on the plane without using one of the silly looking pillows.

Last Tuesday, the bumps on my scalp became worse and I started to have these weird pulsating stinging pains. I thought that was just a muscle spasm due to me straining my neck while sleeping on the plane.

I called my doctor and made a mistake by answering a question wrong. I failed to really think through that all the pain and bumps were only on one half of my body. Perhaps I was already in enough pain, I missed the question. That caused a one-day delay in the diagnosis.

The following day, Wednesday, the pain was getting worse, so much so I only got a few hours sleep. I called the doctor again, as something was wrong. The stinging pains were getting more frequent and worse. The best I can describe in getting stung by 10 wasps at the same time. It happens without warning.

If you're in the health field or you've had what I have, you've already figured it out. Shingles, and not the ones you put on your house. I've got shingles. Go Google this and read up on it. You don't want this happening to you. Not ever.

By Saturday morning, I couldn't stand it any longer. My friends drove me from Las Cruces, NM to Albuquerque, NM. This was the best option to get me on a plane to get me home to NH as quickly as possible.

I'm still suffering today as I type this, but I may have seen the worst. Let's hope so, as the symptoms can continue for weeks or months.

No Austin Meet Up

I was supposed to be in Austin, TX today beginning a three-day conference. I was going to try to meet with you tomorrow for lunch. Obviously that's not going to happen. I'll get back there one day.

Finish Carpentry Saw Blade Test Soon

I just ordered three saw blades from IRWIN Tools to begin a precise test to see which blade produces the finest cuts with trim lumber where you just can't afford any fuzz or tiny splinters. I hope to have the results available to share with you very soon.

Attaching a Mantle to a Brick Fireplace

French Cleat VideoAlbert Daughtridge of Fort Lawn, SC emailed me the following question. He must have watched my French cleat video I did a few years back about this time-tested hidden method of attaching things to walls:

If the newsletter sign up form slides into the window as the video plays, wait a few seconds and an X with a circle will appear in the upper right corner of the form. Click that and it will close the window. I have a cookie set to make that NOT happen, but the cookie may have expired on your computer.

But Albert must have sneezed during the middle of the video because I clearly show you can make the cleat from metal.

Here's what Albert asked:

"How do I attach a 9 1/4"W x 3 1/2"H mantel to a brick chimney. The solution must be a non-combustible attachment to meet code.  So a French cleat will not work."

Albert, metal meets code and it absolutely will work in this case. You just need a fairly stiff piece of sheet metal, perhaps 16 or 14 gauge.

More Next Week

www.facebook.com/AsktheBuilderI've run out of energy already this morning because of these wicked shingles. I'll have more for you next week. Oh, the meet up in Montrose last week was tons of fun. I discovered much that's going to help me improve the newsletter and the website. PLEASE come out to any meet up I have if you can. If there's not one near you, would you consider coming to a one-day event? Let me know. There's a photo and short video of last week's meet up on my AsktheBuilder Facebook Fan Page.

www.facebook.com/AsktheBuilder

Time for me to go lay down.

Tim Carter
Founder - www.AsktheBuilder.com

Do it Right, Not Over

Boring but Necessary Disclaimers and Other Stuff

I do product reviews frequently. Please read my Disclosure Policy to understand the relationship between me and the companies that make the products or offer the services I review.

PERIODIC OFFERS: This is a free newsletter filled with thousands of dollars of advice for your use and pleasure. From time to time I do offer you some of my products to help offset the time and resources I put into this newsletter. I hope that you consider this when you see me make you an offer.

FOLLOW ME ON TWITTER

Friendly Question Reminder!

If you have a question for me, don't hit the Reply button just yet. Go immediately to my web site and type in the keywords about your problem into my Search engine. The search box is at the top of every page of my web site. You could have your answer in seconds if you do this! Please pay attention to all links you see at my web site. The exact products and services you often need are right in front of you, and you might be ignoring them.

AsktheBuilder.com

100 Swain Rd
Meredith, NH 03253, USA

March 29, 2011 AsktheBuilder Tips And Newsletter

What's in This Newsletter?

Latest News
Retaining Wall Design
Deck Cleaning Season
Leveling a Floor
Montrose, CA Meet Up
Austin, TX Meet Up
ATB Survey
Disclaimers & Other Stuff

Latest News

I'm typing this at 38,000 feet as I fly Southwest 897 from New Hampshire to California. I'm starting a 12-day business / pleasure trip that ends up in Austin, TX. Lisa, the humorous blonde flight attendant on this leg of the trip joked about Bearnaise sauce on my fantasy meal that I asked her about. She said it would be exceptionally good today. Three hours into the flight, I'm still making do with a small packet of Lorna Dunes while I wait on the steak and mashed potatoes on this 5.5-hour flight into LAS.

My long-sleeved tie-dye shirt must have set off the TSA profiling this morning. I was pulled from the line and screened for explosives. I passed with flying colors even though hours before I was handling ammo loading a gun. Looks like my pre-dawn shower saved me! Go Dove soap!

Too bad I don't use an iPhone any longer. If I did, I could really use the new California Essential Guide application. It's a handy travel app loaded with video content created by a subscriber to this newsletter, Veronica Hill. Veronica used to edit and publish my weekly column when she was the Features Editor of the Victor Valley Daily Press.

Veronica has transitioned from the newspaper industry to the Internet. She's become the go-to authority on California travel. If you plan to come to the Golden State to see the sights, don't do it without her new app. Hurry Veronica, make a version for my Android phone!

Retaining Wall Design

Is a retaining wall job in your near future? My retaining walls up in New Hampshire are starting to peek out from behind the snow. Remember that gravity wants to tip them over. What's more the taller the wall, the tipping force grows exponentially. Consider leaning the wall back to account for this. We call that batter.

If you're building the wall from just stacked stone, the taller the wall the larger the stones you need to use to make the wall last longer than you. Be sure to bury the first course of the wall into the soil about one-third the height of the first row.

I've got many more tips for you about retaining wall construction at my website. Take some time and read the past columns there.

Deck Cleaning Season is Here

On Sunday, Kathy and I had to drive our youngest daughter back to URI as spring break was over. It didn't seem like spring as we pulled up the driveway past piles of snow still 4-feet high.

But think about it. In just 9 weeks or so, the boats will be zipping up and down the lakes up here and everywhere for the official start to the summer - Memorial Day weekend!

If you're going to clean your deck to seal it, you surely want to consider doing it with my Stain Solver oxygen bleach. It's not toxic like chlorine bleach. It's safe for all your plants and landscaping. It won't turn the wood white like chlorine.

Here's the BEST part. We've switched to all-new packaging, sizes and pricing but I still have a few of the older, less-expensive size of Stain Solver at my AsktheBuilder.com shopping cart.

To clear those out of the warehouse, I'm having a honest-to-goodness clearance sale. If you want Stain Solver for just about the lowest price you'll ever see again, now is the time to buy it.

The quantities of each size are limited. When they sell out, you'll see the new size on the page with the higher price. There's no need for a promo code as I've already discounted them 20 percent.  Go NOW and get the last of the old containers at this amazing price.

Note: This sale is only at the AsktheBuilder.com store. If you go to www.StainSolver.com, you'll not see the special pricing. You can go to the Stain Solver website to learn all the cool stuff about it, but use this link to get the special pricing.

Leveling a Floor

Gail and John visited me yesterday to look at my refrigerator I had listed on Craigslist. Once they discovered who I was, they had a question about a basement remodel job.

The previous homeowner installed a plywood floor on flat 2x4 sleepers that he didn't shim. The floor had more humps and dips than an old country road.

John was about to tear up the flooring to start over. I suggest an alternative. What about two quick coats of water-based urethane over the plywood and then mixing up some self-leveling floor compound? The urethane prevents water from entering the plywood that could cause it to swell and buckle.

They loved the idea. See what happens when you come visit me face to face? You get personal service to your home-improvement problems!

The Montrose, CA Meet Up

I may be meeting you for the first time in person in on Wednesday, March 30th! I've already got quite a few RSVPs for the informal meet up at the Coffee Bean and Tea Leaf in the center of downtown Montrose, CA at 1:00 pm.

It's located at the corner of Ocean View Boulevard and Honolulu Avenue. Some moms are bringing their sons, so there's no excuse for you not to be there other than work, distance or health reasons. My buddy Don Vandervort said he'd show up so if you have any home-improvement question, we'll be able to help you.

The Austin, TX Meet Up

On April 6th at Noon, I'll be doing another meet up. This one will be in downtown Austin, TX within walking distance of the Hyatt hotel. I'll decide where it will be in a few days and send that out. Did I say how much fun the meet ups are? I'll post a photo of the Montrose one the AsktheBuilder Facebook fan page.

Here's what you missed in the last few days by NOT being an AsktheBuilder fan on Facebook:

We did another guessing game about a unique metal bar I took a photo of. I helped Kelly determine how fast to jack up here sinking home. Elice had a mystery clunking noise in her sump pump. We solved that together. Kristin had a wallpaper question about her new post and beam home. And much, much more!

ATB Survey

Several days ago, I asked for your help. I'm doing a massive make over of the AsktheBuilder website. I'm not removing any of the content, but I'm interested in what you want MORE and LESS of.

The early results are absolutely unbelievable. You may have taken the time to share some real gems that will really help make the website better.

To put it mildly, the survey results are highly stratified. One thing's for sure, and this is nothing new, it's impossible to satisfy everyone.

I did want to share one quick fact with you. A few people commented on the unanswered questions in the Comments section below each column. Years ago I started to answer questions there and had to stop because it was taking hours and hours of time each day.

There is now so much traffic to the website that I could spend 24 hours a day and never get a lick of work done. That's why I put the announcement pointing you to the Ask Tim page if you have a question.

A member of my staff spends all day dealing with these questions and passes off the ones she can't answer to me. We at AsktheBuilder.com appreciate your patience when you use this free service.

Tim Carter
Founder - www.AsktheBuilder.com

Do it Right, Not Over!

Disclaimers and Other Stuff

I do product reviews frequently. Please read my Disclosure Policy to understand the relationship between me and the companies that make the products or offer the services I review.

PERIODIC OFFERS: This is a free newsletter filled with thousands of dollars of advice for your use and pleasure. From time to time I do offer you some of my products to help offset the time and resources I put into this newsletter. I hope that you consider this when you see me make you an offer.

FOLLOW ME ON TWITTER

Friendly Question Reminder!

If you have a question for me, don't hit the Reply button just yet. Go immediately to my web site and type in the keywords about your problem into my Search engine. The search box is at the top of every page of my web site. You could have your answer in seconds if you do this! Please pay attention to all links you see at my web site. The exact products and services you often need are right in front of you, and you might be ignoring them.

AsktheBuilder.com
100 Swain Rd
Meredith, NH 03253, USA

Fireplace Repair Options

DEAR TIM: I have an old rock fireplace that I hate. The built-in heat-a-lator has also stopped working. I want to change the rock face to one that’s wood. I have some extensive woodworking experience, so is it possible to make these fireplace repairs myself? Can I build a wood frame over the rock and disconnect the gas log lighter that’s in the firebox? Suzanne H., Richmond, VA

DEAR SUZANNE: This fireplace restoration is an enormous job. I always say that anything is possible if you have enough resources, which sometimes includes lots of money. This job, however, needs abundant skill, time and a deep knowledge of the building code.

The homeowner wants to transform the rock face into wood. It’s a daunting task fraught with problems. PHOTO CREDIT:  Suzanne Hofer

The homeowner wants to transform the rock face into wood. It’s a daunting task fraught with problems. PHOTO CREDIT: Suzanne Hofer

The quick answer is that it’s possible to do what you want. You can transform the exterior look of the fireplace. But I’d caution you about removing the gas log lighter. A future homeowner may want this convenience.

If you’ve ever seen how many masonry fireplaces are constructed, you’d immediately think of the way cars were built before the advent of unibody construction. Cars used to be built like trucks are today. There was a chassis or frame and the body skin of door panels, fenders, quarter panels, etc. all were bolted to one another then to the frame.

Fireplaces are somewhat like this. Modern masonry fireplaces often have a concrete block center core that contains the clay flue liners and the firebox made with high-temperature fire brick. The outer skin you see can be rock, brick, wood, plaster, drywall, etc. These materials are attached to the concrete-block center core.

Your challenge is to see what’s easier assuming you have a masonry fireplace that constructed with a block core: Remove the rock facing or build a code-approved wood frame out beyond the rock.

If you decide to attach your finished wood to a wood frame that’s attached to the rock, be aware the thickness of the wood frame and finished wood skin may cause the firebox starts to get deeply recessed into the overall fireplace. There could be an aesthetic dimension here that needs to be addressed. It could also be a building code issue.

Before you do one thing, you need to visit your local building department and get a copy of the current building code. Take photos with you and meet with the building inspector or the head of the building department. Remember, these are public employees and are our servants. It’s their job to assist you and answer your questions.

You want to be crystal clear on all the clearances that are mandated in the code with respect to the proximity of combustible materials to the firebox. Don’t leave this meeting unless you completely understand what the minimum requirements are. Make drawings there and have the building inspector sign them or otherwise approve your understanding.

You’ll discover quickly that the code talks about horizontal and vertical distances to things that burn. It also may have a section that talks about maximum overhang of combustible materials.

Once you have a firm understanding of these code requirements, take the time to draw a simple scale plan of what you’re allowed to do. See if is going to look right. You want to make sure you also do a side elevation as if you’re looking at the fireplace sideways. This will be on a scale that measures perhaps 1 inch equals 1 foot. You only need to draw from the hearth up to about 3 feet above the mantel. This will give you a good idea of the mass of the new exterior skin.

As for the heat-a-lator, you’ll have to determine if the fans are bad or if it’s some other electrical problem. If there are no fans and it’s just a gravity air convection system, perhaps you can determine why there is no or little airflow as you take apart the fireplace. It could have been poorly designed from the get go, and there may be little hope of making it work without a massive reconstruction effort.

You’ll have to incorporate a new stone material that surrounds the firebox and transforms to the wood. You may choose to use a natural stone like marble or granite for this. You can also use ceramic tile. We had one fireplace at our last home that had a green serpentine marble surround that complimented the walnut wood surround. Our living room fireplace had a traditional decorative ceramic tile facade just outside of the firebox.

All of these treatments usually need perfectly smooth surfaces to bond the tile or the stone to the fireplace core. You’ll have to engineer all of this into your plan before you start the job. This may require you to tear off all the stone to get to the central core of the fireplace. Be prepared to punt frequently as you’re entering unknown territory.

If you decide to build a frame on top of the rock, I’d strongly consider using lightweight steel studs. These don’t burn. If you need to add lumber to make nailing or screwing your finished wood to the frame easier, be sure to used fire-rated lumber that’s cut to fit into the steel stud channels. You can often find commercial-grade fire-rated lumber at specialty lumber yards. It’s been chemically treated so it doesn’t support flame except under the most fierce fire conditions.

You want to do everything possible to ensure an ember that could somehow get behind the finished wood doesn’t set the frame on fire as you leave the room unattended. Steel is your best bet.

Column 877

Home Dust Control Systems

DEAR TIM: Can cellulose insulation in our attic cause dust in your house? The insulation was put in about 40 years ago. Our house is so dusty I can’t keep up with it. If it’s not the insulation, what else is the cause and what can I do to minimize it. How can I figure out what is really the problem? Too much of my time is spent getting rid of the dust! Linda B., Colorado Springs, CO

DEAR LINDA: You’re not alone in the war against dust. It affects just about everyone I know of, except those who work in labs and factories where dust can seriously affect the outcome of tests or the manufacturing of certain items. The Center for Disease Control, electronics factories, etc. all come to mind.

Look at the dust on this small table. This happened because of remodeling in the house. PHOTO CREDIT:  Tim Carter

Look at the dust on this small table. This happened because of remodeling in the house. PHOTO CREDIT: Tim Carter

I’m sure you’ve seen commercials or shows on television where the workers wear special coveralls, masks, even hooded suits to eliminate contamination. One can only imagine the massive multi-stage air filtration equipment that’s capturing all the dust around them.

You may have it bad where you live, but I feel there are others who suffer even more. Last spring I was on a road trip out West and got to finally visit the famous Monument Valley with the amazing rock formations. The hotel we stayed in was in the middle of the desert on a small butte.

As I was walking to dinner that night I looked down at the floor at an emergency exit to see a orangish-brown cone of dust where the bottom of the door closed against the jamb and threshold. I then looked at the corners of the windows in the hallway and saw the same thing, actually there were miniature dust dunes at these locations. This micro dust from the outdoors was finding tiny gaps in the weatherstripping and getting inside.

You and I and everyone else who owns a home or business fights the dust war each day. It’s huge business. I’m sure you’ve seen dust-control sprays, mops, and other tools that arm you in this battle. What a business to be in as dust is just not going away.

It’s absolutely possible that some of the dust from the cellulose is making it down from your attic through similar air leaks between your living space and the attic. There can be drafts of air that leak around holes drilled in your wall framing that were used by plumbers and electricians to get pipes and wires into your attic. These may never have been sealed.

But I suspect there are many other sources of the dust in your home. The list is endless. Let’s start with the things inside your home. Your clothes (especially lint from dryers), carpets, food, paper products, cardboard boxes, upholstery of any kind, concrete, etc. all can produce dust. Think of what happens when you use flour to bake.

If you really want to see dust in all it’s glory, use a flash light in a totally dark room. It works best with some of these bright LED flashlights that produce a narrow beam. Turn one on in a dark room and look at the dust that’s swirling about.

Now add to that all of the airborne dust that’s outdoors trying to invade your home. There’s dust from pollen, rock dust, fibers from trees and other vegetation, etc.

To determine what is causing the dust, use a 10X or higher-powered magnifying glass to inspect the dust. I prefer to capture the dust with a piece of clear tape that’s got a mild adhesive on it. Apply the tape to a dusty surface and peel it away immediately. Using good light, look through the magnifying glass at the dust. You’ll be shocked at how distinct some of the particles are. You’ll be able to clearly distinguish between clothes fibers, pollen, food dust, rock or dirt dust, dander, etc.

The best way to control dust in your home is to use a central vacuum to clean. But it’s mission critical that it exhausts outdoors. You want any ultra-fine dust that makes it past the bag or canister to get outdoors.

If you don’t have a central vacuum, then you must use a regular hand-held vacuum that has a top-quality bag that only passes the tiniest of dust particles through the bag. Just the motion of running the vacuum creates a dust storm, so it’s tough to get it all with the machine.

To prove this, operate a vacuum over your carpet in the dark while a friend holds the flashlight near the machine as you use it. You’ll think it’s snowing inside your home, because you running the machine over the floor disturbs the dust and the air passing through the bag swirls this dust into the room. This is why I prefer to use a central vacuum as it doesn’t discharge air into the room as you work.

Check all the weatherstripping on your doors and windows to ensure hardly any outside dust is getting in your home. Inspect for other air leaks. Be sure you always clean the lint filter on your clothes dryer. Realize that it’s a never-ending battle.

If you have a forced-air heating or cooling system, be sure you have excellent air filters and change them regularly. Some of the newer pleated paper filters do a magnificent job of capturing dust.

Here is an email that I received from Kuba Ober about how she handled her dust problem.

"Tim, here's a dusty first-hand anecdote. We bought our 30 year old house a year and a half ago. After moving in, there was plenty of dust settling on everything for 2-3 months. We then replaced the cheap "one per month" HVAC air filters left by the previous owner with highest grade 3M filter one could get. The first replacement was almost clogged after 3 weeks, the second one lasted 3 months, and from there on: smooth sailing with filter changes every 6 months. It looks like there was simply a dust in the ducts that was being blown around and not removed by the cheap filters. As far as I'm concerned, the cheap air filters should be taken off the market, because people don't know any better and keep breathing in the dust. Cheers, Kuba Ober"

Column 876

March 25, 2011 AsktheBuilder Tips And Newsletter

What's in This Newsletter?

Meet Me in LA
Cordless Circular Saw
Making AsktheBuilder.com Better

Last-Minute Meet Up in LA!

This is NOT a normal newsletter in case you signed up in the past 72 hours.

I needed to do a quick announcement about an upcoming trip and meet up. A meet up is a chance for you and I to just kick back and get to know one another. They're free, fun and all it costs you is your time.

I'll be in Los Angeles next Wednesday. Yesterday on my AsktheBuilder Facebook Fan Page, I announced a meet up in the foothills just northwest of Pasadena.

http://www.facebook.com/AsktheBuilder

Next Wednesday, March 30th, I'll be in Montrose, CA at the Coffee Bean and Tea Leaf store at the intersection of Ocean View and Honolulu Avenues right in the heart of downtown Montrose, CA. Let's shoot for 1:00 pm. If you don't want coffee, there's a great ice cream store around the corner we can walk to.

I'm trying to get a friendly competitor of mine, Don Vandervort, to be there as well. If I can pull him out of his office just down the street, you'll have two home-improvement experts in the room. What a deal!

You can come to just relax and chat or bring photos of a project you need help with.

Please email me back and tell me if you're coming. If too many respond, we may have to move to another venue that can handle everyone.

Great Cordless Circular Saw

I just wanted to mention that over the past month, I've been using my Milwaukee Cordless Circular Saw during my kitchen remodel job. It's a fantastic saw and cuts very accurately. What I love about it is how it has virtually no vibration.

I've decided to start a new series of videos on how I use tools. I figured these may help you in case you struggle to use certain tools or want to get professional results. You can bet you'll see this saw of mine in a few videos!

How Can AsktheBuilder.com Be Better?

It's time for an extreme makeover of the AsktheBuilder website. I want and NEED your help. After all, the website's a tool that you use and it should be comfortable, helpful and easy to navigate.

So tell me, if you could wave a magic wand and AsktheBuilder.com was yours, what would you do to make it a perfect website?

I've created a survey page that allows you to respond to questions and add comments.

The BEST part is I have a gift  for you. Complete the survey and you get a 15% discount promo code for ANYTHING at my store. The promo code only can be used once and it expires in a week. (Ending date: April 1, 2011) Use it on as many things as you want, but you need to buy them now.

Oh, reminder! If you use the promo code to get Stain Solver, note that the OLD sizes are in LIMITED supply. If you see an out-of-stock message, it just means that you'll never see that size again.

For example, one of our most popular sizes the 8-pounder - well, there are LESS than 200 of those left. I expect them to be gone forever in just days. If you want one of those, you better act now.

I'll have another short newsletter next week while I'm on the road! I may do another meet up in Austin, TX the first week of April. Anyone up for that?

Thanks for subscribing and reading my newsletter!

Tim Carter
Founder - www.AsktheBuilder.com
Do it Right, Not Over

ATB Change

Thanks for clicking on my Newsletter link. Below is the coupon code to receive your 15% discount at my Ask the Builder store.

This discount is good on any and all products in the store. The catch is you can only use it on one order and it expires April 1, 2011.

The coupon code will give you 15% each item on the order. So you can order as many items as you want and receive the discount off all of them.

During checkout, just enter the coupon code: ATBChange15

Click to go to the Ask the Builder store.

One other tip, if an account is set up in the store and you receive an email with your password, don't copy and paste it in the store log in. For some reason, the copy and pasting adds a space at the end of the password. This stops it from working. Type in the password and things will work just fine.

Thanks.