Standby Generator – Lots of Power For Your Home

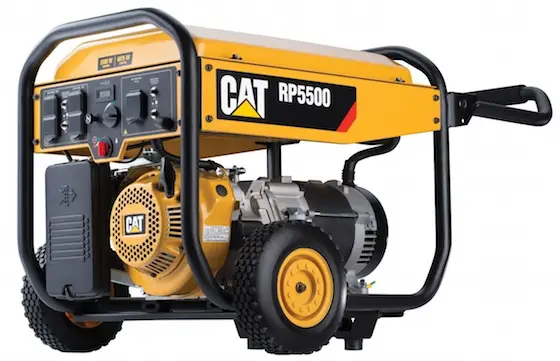
CAT portable electric generator

Standby Generator | Here's a beefy portable electric generator that produces 5,500 watts. This is NOT a standby generator, although you may be able to convert it to one. This CAT one is a portable generator that can keep you reasonably comfortable for an extended power outage. CLICK ON THE PHOTO NOW TO HAVE THIS GENERATOR DELIVERED TO YOUR GARAGE.

Standby Generator - It Starts Up Automagically When the Power Goes Out

DEAR TIM: The last major storm knocked out my electric power for days. I'm wondering if I should invest in a portable generator or a standby generator. What's the difference between these home generators? How do you determine what size electric generator to purchase? Do you think I can install a standby generator myself as I'm pretty handy? Bonnie S., Burlington, VT

DEAR BONNIE: Two months ago, Hurricane Ike ravaged Cincinnati, OH. It was a cloudless blue-sky day with fierce sustained winds. My house there lost power, and it wasn't restored for five agonizing days. The loss of electricity shredded the social fabric of the family as if it were tissue paper. Electricity is almost as important as oxygen in some respects. When it's there, you don't even think about it, but when it's gone, you get desperate in a hurry.

Why are Standby Generators Popular?

Home generators are gaining in popularity for many reasons. After this storm event, I was bound and determined to get a standby generator, especially for the winter season when vicious ice storms can create power outages for weeks in some remote areas. Read in the December 14, 2008 AsktheBuilder Special News how my standby generator worked after an ice storm.

What's the Difference Between a Portable and Standby Generator?

standby generator on hillside

This standby generator is ready to start up on its own as soon as there's a power outage. It's powerful enough to run much of a regular house. PHOTO CREDIT: Tim Carter

There's a huge difference between portable generators and standby generators. A portable generator is one you can move around. The ones most homeowners recognize are those that are the size of a medium picnic cooler and are powered by a small gasoline engine. Contractors often use these on job sites when regular electricity is not yet connected.

Can a Portable Generator Power an Entire House?

These small portable generators are not designed to power an entire house. The intention is for you to run one or several extension cords from the generator directly to the appliance you wish to power. You may connect it to a refrigerator for a few hours, then a window air conditioner, and maybe a few table lamps. Forget about connecting all of your appliances at once to a small portable generator. It simply will not work.

What is a Standby Generator?

A standby generator is a larger fixed device that resembles an outdoor air conditioning compressor. They are capable of generating enough power to keep many essential electrical devices operating at once, or you can invest in a standby generator that can operate every electrical appliance and light in your house all at once.

Can a DIYr Install a Standby Generator?

The standby generators are not meant to be installed by a homeowner. Not only do you have to connect a fuel source to it such as propane or natural gas, but you also have to hardwire the generator into your electrical system. This is fairly complex and best done by professionals. What's more, you need to install a sophisticated transfer switch with a separate electrical panel that contains the electrical circuits that will be powered when the generator turns on.

Will a Standby Generator Start Automatically?

One primary difference between a standby generator and a portable one is the standby generator will turn itself on when the primary electric to your home is knocked out. This is accomplished by the transfer switch, and can have your lights back on in as little as ten seconds. When the utility company finally restores your power, the transfer switch senses this and shuts off your generator.

Do You Need Extension Cords With a Standby Generator?

Extension cords are not used with a standby generator. All of your appliances remain plugged into their wall outlets. The electrician, with your input, decides which circuits in your home to connect to the generator. This allows you to purchase the correct-sized generator. If you decide to power just a part of your home, the other areas will be dark and off the grid. Think about what appliances and rooms of your house you can survive in until the utility company gets power back to your home.

Do Standby Generators Come with Phone Apps?

Some standby generators come with software and smartphone apps that allow you to check the status of your generator if you're not at home. This software can also communicate with you or a service company if it senses something is wrong that might cause the generator to fail in the event of a power outage. This allows you to have it repaired so that it will be working when you need it most.

Are Portable Generators Useful?

Portable generators can get you by in an emergency, but they are not in the same league as a standby generator. In an emergency, you need to drag out the portable generator, and safely string all the extension cords. You then need to add fuel to the engine on a regular basis day and night. It can be a hassle. You also need to be very careful about placing it near the partially open window or door that the cords pass through. The carbon monoxide fumes from the engine exhaust can drift indoors.

How Much Power Can a Standby Generator Produce?

My standby generator produces 17,000 watts of power. You can get these generators in much larger sizes.

The 17,000 watts isn't enough to completely power everything in my home, but it will allow me to keep my boiler in operation as well as all the recirculation pumps. My refrigerator, microwave and countertop oven, and many light circuits will also be powered. I'll even have plenty of power to operate my well pump. This means that as long as my buried 1,000-gallon propane tank doesn't run dry, I'll be able to survive for weeks.

Standby generators require periodic maintenance as they contain engines that spin the actual generator. Often you can do this maintenance yourself. If you want a company to do this, they will gladly take care of it.

Don't Need That Much Power?

Check out my column on smaller portable generators. They may handle your needs.

First mentioned in the December 2, 2008 Newsletter.

Column 752
14.4 Cordless Drill

The 14.4 volt cordless drill might be the most popular size consumers purchase. They can have great power, but not weigh too much. My favorite is the Bosch Brute Tough model 37614. It's a beauty of a tool with plenty of power. The keyless chuck and adjustable clutch makes it great for many jobs. You can use it as a screwdriver on steroids!

November 4, 2008 Special Message

What’s in This Issue

TAKE TWO - ACTION!
UPCOMING BOSTON TRIP


TAKE TWO - ACTION!

If you're a new subscriber in the last 48 hours (and there are hundreds), this is a VERY unusual newsletter blast. I just sent a big newsletter out less than two days ago and there was a BIG mistake in it. I don't want you to think my following mea culpa is what all future newsletters will be like. Read other comments in the November 12, 2008 AsktheBuilder News.

What happened is I announced my newest eBook about Energy Savings. I was really stoked (excited), because I *knew* this eBook would absolutely save everyone who read it - and implemented my advice - hundreds, if not thousands, of dollars in their home heating and cooling costs. How did I know this? Because I've done it myself. I took advice I had heard over and over and over from others and acted on it.

The trouble is I oversold the eBook. No, I didn't run out of copies, as that can't happen since it's an electronic PDF file. I did sell more copies than I expected, and hope that you were one of the people that is all set to save money.

The mistake I made is that I unknowingly created the expectation that there was this magical product or some revolutionary unheard of method that would allow you to save money.

The truth I revealed in the eBook is there's NO Silver Bullet. Just as there's no Fountain of Youth. If Juan Ponce de Leon was still around, he could tell you all about that. But I didn't reveal that in the newsletter copy two days ago.

There's a magical product, but our government, I believe, will not release the technology. I'm talking about the technology used to make the tiles on the Space Shuttle. I read an article about those in National Geographic about 15 or 20 years ago. If my memory serves me right, those tiles have an R-factor of 2000 and are about two-inches thick. Can you imagine if they made that stuff in sheets that were one-half inch thick, just like the OSB or foam sheathing we use now? We would have houses that had an R-factor of 500. You could heat that with a candle. But I digress.

My loving daughter Meghan, whom you may already know about, quickly pointed out that the title to the eBook was misleading. I had titled it:

The Real Secrets About Energy Savings

Meghan said the title should have been:

The Truth About Energy-Savings Methods

You may be one of the ten customers who complained to me about how the eBook didn't meet your expectations. If so, I'm sorry about that, and you've already received your refund.

My Energy-Savings eBook is filled with all sorts of helpful things and with one primary common-sense method that actually works. It's much like the Chicken-Soup series of books and Erma Bombeck's books. Sometimes you need to hear a message multiple times before it sinks in. I'm living proof of that! It was my intention that my writing would be the straw that broke your back - that you would finally take action.

That said, you still may have been unsatisfied as you were/are on a quest for that magic silver bullet. The bottom line is that if you want to cut your fuel bills in half, then use 50 percent less fuel. I reveal in the eBook how I do it each day and remain comfortable. But you may not have thought that was enough information for the money you spent. If so, I once again apologize.

Here are the Facts:

The eBook discusses how each year we all get pummeled with Energy-Savings tips, and how some of those messages can be very misleading. This is in Chapter One. Many things in the eBook you've already heard, but maybe never have implemented for any number of reasons. Or worse yet, you may have been suckered into doing them thinking you were saving money. But the point in the eBook was to explain what works and what doesn't and how to calculate real savings. In my excitement, I didn't make that totally clear.

The eBook contains what I have discovered is the best method that works for me, to actually save hundreds of dollars per year. I will end up saving thousands of dollars over the next few years. Once again, I had heard this method many times before, but I ignored the advice. But when I finally tried it, I was amazed at the results.

The sad thing is I get the feeling that many will ignore the advice and continue to waste money. I'm really bummed by that as I was so excited when I saw the results of my own test.

Okay, enough said. I've changed the title and revised the sales copy at the shopping cart making it clear what's in the eBook. I want to remind you that the Satisfaction Guarantee still stands. If you purchased the eBook, didn't like it, didn't think it was worth what you paid, but were reluctant to contact me, please do so immediately. I want you to be totally happy.

If you're a new subscriber and want to discover what all this craziness is about, go here.


UPCOMING BOSTON TRIP

On November 19, 2008, I'll be in Boston all day at a Green Conference. If you want to get together, I'll have the details for you in a few days.

Index of past newsletters.

Patio Repair

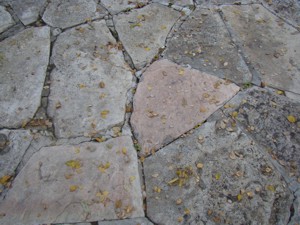
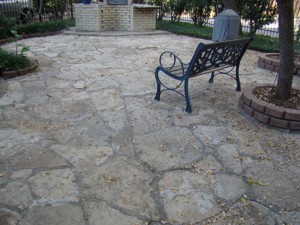
DEAR TIM: I have a patio-repair job at my house. The irregular pieces of limestone are fine, but the mortar joints between them are failing. In some places the stones have lifted up. The patio is about 20-years old, so I think that this patio crack repair is not an indication that I have to start over. Is this patio mortar repair something I can handle? What is a good way to ensure the repair lasts for a long time? Is it possible the stones are set just on sand? Albert Jacob, San Antonio, TX

DEAR ALBERT: You have one great patio there! Not too long ago, I played golf in an exhausted limestone quarry in San Antonio, TX. Perhaps the stone from your patio came from that location. In any event, I would not consider taking up the stone. Based upon your photos, I can see that a few days of patio repairs will have that outdoor space looking like new.

It's possible that the stones were laid on a sand base. Since you rarely have extended periods of freezing weather, I see no issues with a sand base. What concerns me more would be movement in the soil beneath the sand caused by expansive clay soils. Parts of Texas have extensive amounts of clay soil that shrink and swell as the moisture content in the clay goes up and down. This movement is enough to crack foundations, so it can easily move your thin patio stones up and down.

I would recommend that you chisel out all of the old mortar between the stones. You can do this by hand, or you can rent a demolition hammer from a tool-rental business. These electric tools are simply miniature jack hammers and will quickly pulverize the mortar. You just have to be careful not to crack the limestone.

As you're removing the mortar, save it in a pile. This will help you estimate how much new sand and cement you need to purchase to do the patio repair. You absolutely want to buy plenty of sand from the same batch and plenty of Portland cement from the same manufacturer. Doing this will ensure that the color of the new mortar joints is the same. If you mix batches of sand or buy different types of cement, the color of the mortar can be quite different. Be sure to purchase coarse sand for this job.

This stone patio has failed mortar joints. The repair is not complicated, but does require working on your hands and knees. PHOTO CREDIT:  Albert Jacob

This stone patio has failed mortar joints. The repair is not complicated, but does require working on your hands and knees. PHOTO CREDIT: Albert Jacob

After all the old mortar is removed from the cracks, you need to adjust the height of the stones so they are reasonably flat. If this means lifting them up and taking sand out from some stones or adding sand under others, do so. You can use the old mortar you removed as a base under stones that are low.

To prevent any future movement caused by the soil, I have a little secret you can try. Get some scrap one-half-inch diameter hard-copper tubing from a plumber. Cut it into short lengths that are one-half-inch longer than the thickness of the patio stones. Tap these little pipes somewhat randomly in the spaces between the stones. Try to have at least one pipe section for every six square feet of patio area. The top of the pipe should be flush or slightly lower than the top of the stones.

Carefully install the new mortar. Mix it using three measures of clean sand, one and one-half measures of Portland cement and enough water to make the mixture similar to bricklaying mortar. This means that the mortar will be stiff enough so it can stand up about one and one-half inches on a trowel. Try to work on overcast days or when the patio is in the shade. Cool, damp weather is the best to work in. Sunny, hot and windy days are the worst as the new mortar will dry too rapidly.

The joints between the stones must be dust free before you add the new mortar. Be sure to use a spray bottle filled with clean water to mist the sides of the stone and the sand base just before you add the mortar. This small trick will help the mortar make a good bond between the stones.

Only mix enough mortar as you can install in one hour. Never add additional water to mortar that starts to get hard. Be careful not to put mortar inside the open copper pipes that are sticking up. Once the patio-repair job is complete, these pipes will allow rain water to get under the patio to keep the soil moist. If the weather gets bone-dry, then you want to use your hose or sprinkler to get water into the little pipes so the soil stays moist all year long. By doing this, the soil will not shrink and swell, and your patio repair should last for a very long time.

When installing the new mortar, you can use a large trowel that has a fair amount of mortar on it and use a smaller trowel to slide mortar from the bigger trowel into the joints between the stones. Hold the bigger trowel so its long edge is parallel with the joint keeping the trowel about an inch above the stones.

Try avoiding getting the fresh mortar on the top of the stones. If you do, just scrape it off immediately. Don't worry about the mortar smear on the stone. After one month, you can remove the mortar smears with a solution of muriatic acid and water. Mix one part acid to ten parts water. Get the stones damp with clear water then pour on the acid solution. Allow the acid to bubble for ten minutes then scrub the area with a scrub brush. Wear goggles and rubber gloves. Follow all safety instructions on the acid label.

Column 751

November 2, 2008 AsktheBuilder News

What's in This Issue

FIRST eBOOK FROM YOUR SUGGESTIONS
A VERY GOOD CAUSE
SETTING YOUR HEAT TOO LOW
NEW ADVERTISING SOFTWARE AT ASKTHEBUILDER.COM
SAVE MONEY BUILDING GIFTS
THANKSGIVING STRESS - ACCCCKKKKK!
LATEST COLUMN AND VIDEO


FIRST eBook FROM YOUR SUGGESTIONS

Editor's Update: This eBook is currently out of print.

Moments ago, I just finished the first eBook based upon the feedback you gave me about the short help guides. Energy savings was the top vote getter. That makes perfect sense for any number of reasons.

Your comments pointed out that saving energy is a really Green thing we can all do.  I couldn't agree more, and my geology degree taught me that Mother Nature is a wonderful provider, but she can only work so hard. We're using up many of her resources faster than she can create them for the ever-increasing population.

The number two reason is that we all need to conserve cash in these harsh economic times. What if I told you that my new The Real Truth about Energy Savings eBook will save you hundreds and probably thousands of dollars this heating season? It's absolutely possible. I'm doing it myself in my own home.

I had several of my colleagues read and review the eBook as I was going through the final edits in the last 36 hours. They particularly liked the section where I discuss the psychological tricks salespeople use to part you from your money. One of my friends said that she was amazed at how practical the information is and easy to implement.

My favorite part in the eBook is where I reveal what often happens in the media world when companies that make energy-savings products hire public-relations companies. You're going to be shocked at what I have to say, and I'm quite confident several PR people who are friends of mine are going to be quite upset at the kiss-and-tell chapter in this eBook.

This eBook, in my opinion, is really going to save you huge money. My friends said it's a great value and to sell it for $27.00. I've decided to offer it to you for just $9.97 for the next seven days. After that, the price is going to go back up to $27.00.

This eBook is an Instant Download .pdf file. This means you get it in your computer moments after you purchase it. You then have the option of printing it out if you want. As with all my products, it comes with an Unconditional Guarantee. If you feel, after reading it, that you'll not save at least ten bucks on your energy bills, just email me. I'll give you all your money back. Heck, I don't care what your reason is. If you don't like it, just tell me and I'll give you your money.

Remember, the price is just $9.97 for the next week. After that, the price goes up.


A VERY GOOD CAUSE

Pat Lithglow is a subscriber to this newsletter. About ten days ago, she reached out to me asking me for help. Google is sponsoring a competition.

After you watch that video and get ramped up about the good we can do, then go watch this 30-second video. All of us have time to do this. Your small investment of time can make an enormous difference.  Please watch this video. I LOVE the child's Australian accent.


SETTING YOUR HEAT TOO LOW

John from Lapeer, Michigan emailed me the following:

"I am preparing to leave for Florida for 3 months during the winter months. I have reviewed all your suggestions regarding winterizing, however, I plan to leave the furnace on at the lowest setting recommended. I do not know how low this should be. Is there a point where it is too low (other than 32 degrees F.)"

My response to John was that he should be very careful about setting the temperature too low, especially if he seals the house up tightly and then the temperature of the surfaces inside the house drops below the dew point of the air in the rooms.

Sound confusing? Well, each day in your bathroom you're doing the same thing when you take a hot shower. After you step from the shower is the mirror fogged? If so, the same fog might be on any surface in the room that has the SAME temperature as the glass in the mirror. But you can't easily see the fog or water vapor on the walls, ceiling or wall paper because of their non-glossy texture.

If the water in the air condenses on the cold walls, furniture, carpet, etc. in John's house because he turns down the temperature too far, he could have massive mold blooms over just about everything in the house. That will cost far more to clean up than spending the money to keep the house at 55 F. The mold spores are already in your house and John's. The food they eat is also there. All they need is liquid water to start to grow.


NEW ADVERTISING SOFTWARE AT ASKTHEBUILDER

With the economy in a tailspin, you need every possible advantage you can get in this market. Do you work for a large or small business that sells anything that is home-improvement related? Maybe you're a roofer in El Dorado Hills, CA, or own a small hardware store in Burlington, VT, or your employer owns a replacement-window company in Scranton, PA. I think you get the point.

In just a few days, we will finish installing new software at my website that will allow me to do something never before possible. What if I told you that you could run an ad about your business at my website that will show your ad just to people who you sell to? In other words, if you own a small plumbing business in Tyler, TX, I can show your ad only when a person from Tyler is on my website. What's more, the ad will only appear on pages that have to do with plumbing!

In addition, you that you could name the days of the week when you want the ad to run? How about if I told you that you could also call out the times of day you want the ad to appear?

This kind of power now allows you or your employer to reach the exact audience in your marketplace as never before. It's absolutely amazing. If you want more information about this, contact AsktheBuilder. You will see a link there that asks you to fill out a form.


SAVE MONEY BUILDING GIFTS

A few days ago, I got this fantastic new tool kit. It's a pocket-hole jig that allows you to build a ton of projects that look professional. I'm not kidding here. All you need is a couple of saws that allow you to make precision cuts and this jig kit to do it.

You have plenty of time to build some Christmas gifts that will be cherished by those who receive them. Your effort will be forever remembered if you give someone a simple bookcase, footstool or anything that requires you to join two pieces of wood with a strong joint.

This pocket-hole jig is made by Kreg and is called the Kreg Jig. I could write for another ten minutes, but feel the video at their website says it all.


THANKSGIVING STRESS - ACCCCCKKKKKKKKKKKKKKKK!

Ellen has worked for Kathy and I for nearly 15 years. She spearheads the Stain Solver business. There's a good chance you've talked to Ellen on the phone if you've called in with a question or ordered over the phone.

Well, Ellen and Kathy have reminded me that Thanksgiving is less than a month away. If you're hosting your family and friends at your house, then you're probably going to start cleaning soon. Right? What happens if your kitchen floor is tile and the grout is grungy? Well, my Stain Solver will make that grout look like new with minimal work.

Then what about the actual celebration on Thanksgiving Day? I got a letter from a customer several years ago that brought a smile to my face. The woman wrote that she had just installed white carpet days before Thanksgiving so her house looked amazing for her guests.

You know what happened don't you? Yes, someone dropped a glass of red wine onto the spotless carpet. In normal situations, there would have been mountain loads of stress and anguish. My customer told the guest to relax and keep eating. She said, "We have nothing to worry about. I have some  Stain Solver. I'll worry about that tomorrow morning." And she wasn't kidding!

So to promote a stress-free holiday for you, why not get some Stain Solver to help you clean and have on hand in case someone spills cranberry juice, red wine, red soda pop or whatever or your carpet or cherished table cloth?

Ellen and Kathy have authorized a massive 25 percent Promo Code to enable you have a Stress-Free Stain-Solver Thanksgiving.

The promo code expires on Saturday November 9, 2008. Use it or lose it. Act now before you forget.

Go to Stain Solver. Here's the promo code:

25thanks


LATEST COLUMN AND VIDEO

Are you thinking about vinyl-siding installation? Some people will be attempting this job since money is tight.

Watch me perform some magic to make a blacktop driveway crack disappear. I'll bet you a chocolate malt from Aglamesis that you haven't seen this trick.

Index of past newsletters.


October 28, 2008 AsktheBuilder News

What's in This Issue

CHAIN-SAW FUN
PEDESTAL SINK QUESTION
NEW SPADE BIT
THE ECONOMY, YOU AND I
LATEST COLUMN AND VIDEO


CHAIN-SAW FUN

Two weeks ago, I became the proud owner of a Craftsman 18-inch Professional chain saw. It has a 40cc engine and is remarkably lightweight. Many moons ago, when I was a much younger man, I used chain saws frequently. My father-in-law owned a 240 acre tract of land that was heavily forested. He and I would go there to cut down trees for firewood and to open up the view to the great North Bend of the Ohio River. President William Henry Harrison is buried just a mile from this land.

I needed this new saw to cut up some trees here at my New Hampshire house that the previous owner had foolishly left piled up for over six years. These were magnificent oak trees that the owner had abandoned and left to rot. Some had trunks that were 20 inches in diameter! Luckily I was able to salvage them for firewood.

The Craftsman saw brought back lots of memories. First, how dangerous these tools can be if you don't follow all the safety instructions. Secondly, I had a vivid recollection of how heavy the old saw was I used 30 years ago. It was a marvelous Stihl saw, and had the same length bar and chain and a similar engine as my new Craftsman saw.

It's amazing how advancements in technology have taken out so much weight with no sacrifice to cutting power. I'm really impressed with this new saw, even though I frowned when I first took it out of the box. It was so light I thought it was a toy saw.

I plan to do a basic video about this saw in the next week. It cut through the oak logs like a hot knife through cold butter. My guess is that one could do about 30 videos on how to use chain saws. In fact, you could probably make a two-hour movie showing all aspects. But I'm going to do the view from 35,000 feet. I'll announce it here when the video is complete.


PEDESTAL SINK QUESTION

Donna P. from Weston, CT wrote me asking, "I have a pedestal sink to be installed and I don't understand why the plumber wants to open the wall up to put wood blocking across for support when the instructions that come with the sink say you can just drill into the sheetrock and install appropriate toggle bolts. Why would it need the extra support of blocking if the sink is on the pedestal as well?"

Donna, that's a fair question. The plumber may not have had great luck in the past with wall anchors, and is nervous about the sink moving. You need to understand that it's not good for plumbing fixtures to move as the connections to the water lines and drain can fail. Also, if the drywall gets soggy the anchors will fail. But if you have soggy drywall, you have more serious issues.

I agree with the written instructions and have used toggle bolts successfully with pedestal sinks. Just get the right size and put in your contract that you assume all responsibility if someone yanks the sink from the floor and throws it out the window like in the ending of One Flew Over the Cuckoo's Nest.

By the way, this is the type of questions and answers you will see in the new website I'm working on. The visitors to that website are going to see hundreds, and eventually thousands, of one-on-one email Q & As, chat sessions and even videos of me answering questions.

I'm really getting excited about this new website. I had a major epiphany about it ten days ago when my oldest daughter Meghan talked to me about the concept. She simply said, "Dad, what people really want is just answers to their questions. They are busy and don't have time to sift through multiple websites, some of which are filled with questionable solutions, to get an answer. Your subscribers are going to love this new site where they can get a specific answer to a question either from you or someone else who is an active member of the community you will be assembling."

You know what? Meghan is spot on. If you agree, let me know. Each person that sends me an email with constructive comments and suggestions about this new website AND has the Subject Line say "Meghan Rules" will get entered into a drawing. When I launch this new website, ten winners - selected at random - will get a free scholarship/subscription to this website for life. Remember, the Subject Line of the email MUST say:  Meghan Rules. Spell it correctly!


NEW SPADE BIT

A few days ago, I received in the mail a sample spade bit. You may yawn thinking big deal and mumble to yourself, "Who cares about spade bits?"  These bits are really fantastic when it comes to drilling larger holes through wood. Traditional spade bits I used years ago were flat, had a round shaft, had a sharp point and low-angle cutting edges.

Bosch sent me an amazing spade bit called the DareDevil. This bit has a full-cone threaded tip that pulls the bit through the wood, spurs and reamers on the cutting edges, a contoured face on the paddle that aids chip removal and the end of the shaft has a hex shank! This means that when the bit hits a knot, it still keeps spinning as the chuck of the drill would have to be very loose for the bit to stop while the drill continues to spin.

I haven't used this new bit yet, but it has all of the things that are needed to produce large holes in wood with minimal effort.


THE ECONOMY, YOU AND I

I subscribe to many magazines, and one of them is Forbes. They put out a special edition last week that dealt with all of the scary economic news. Kathy and I have put the new-house project here in New Hampshire on the shelf until things sort themselves out. No doubt you have put the brakes on projects and purchases in your home as well.

The lead article, How Capitalism Will Save Us, in this special edition was written by Steve Forbes, who I believe is the son of the founder of Forbes magazine. In the article he does an autopsy of the current economic situation and compares it to the other "two big economic disasters of the 20th century" - the Great Depression and the great inflation of the 1970s.

In the article, Forbes says that those two economic horrors and our current situation were/are being blamed on greedy corporations and "economic royalists". He makes a pretty firm argument that in fact all three situations were caused by government mistakes - in other words our Congress let us down as they are the legislative branch of our government. Be really careful about blaming the Executive Branch - am I glad I remember my Boy Scout Citizenship of the Nation merit-badge facts! Keep in mind Congress does the heavy lifting when it comes to getting stuff done at the Federal level.

Forbes says that the Great Depression was directly caused by the passage of the Smoot-Hartly Tariff of 1929-30. This law imposed massive tariffs (taxes) on countless imported items. Other countries responded by enacting high taxes on our exports. The global trading system collapsed leading to capital or cash flow being restricted. The Great Depression resulted from this mess, not the collapse of the stock market. Remember, the stock market is an emotional betting game played by multiple players at the same time. If you want the real story, always look at the hard-core economic indicators.

I could go on and on, but you would be bored to tears. What I did discover from the article is there is crystal clear proof that lower taxes on ALL people plus businesses lead to enormous economic growth. This makes perfect sense when you stop and think about it. The article is long, so be sure to click through to all the pages.

Yesterday, I had coffee with that local politician who was trying to get my vote. I asked her, "Kate, tell me the last time you were really happy with the way the politicians at ALL levels were spending your hard-earned money you send them each week." She couldn't answer, but agreed that it would be best if MORE taxpayers money fueled the local economy as she rarely sees Federal and State taxes flow backwards into our town.

I urge you to read the article in Forbes. My guess is that you will be enlightened and think about politics in a entirely different manner. It just makes sense that if you and I have more money to spend the way we want, we will buy and invest in things that will help us and the businesses we support. That builds a vibrant economy at all levels.

Oh, if you're a new subscriber, you need to know that I served over ten years as a government official. For eight years, I was an appointed member of my Village's Planning Commission and I was elected to two terms as a Councilman. So I have personal first-hand experience as to how government can waste vast sums of money. I resigned from my second term of office because of enormous frustration in working with some people who refused to stop the wasteful spending of precious tax dollars.


LATEST COLUMN AND VIDEO

Mentioning my Boy Scout years brings back memories of campfires. You can have your own fire pit that allows you to spend quality time outdoors!

Millions of people have septic systems - I'm now one of them - but maybe have no clue what this mysterious system of tanks and pipes looks like that's buried in your yard. And what's with a leach field? A bunch of blood-sucking insects in your yard? No way! You MUST watch this video. Seriously. I show you a septic system before it's buried.

Index of past newsletters.


Blacktop Driveway Crack Repair Video

Blacktop Driveway Crack Repair Video Transcript

Oh hey, how are you doing? I’m just bringing out the last tool to start my blacktop crack repair job. Great weather today, blacktop’s dry and that's exactly what you need when you get ready to finish a blacktop repair job.

Here's what we've got. The first thing we need to do before we get started in case the safety police are watching. It's time to get on the new cool safety glasses. Oh yeah.

What do you think about that?

Now what we got to do, the first thing that it says on the instructions on the caulk or the repair sealant that we're going to use is you got to clean out the crack. I like to use a regular broom. It works really well. Just go ahead and sweep it out. Get all that loose debris and loose sand out of the way.

Oh yeah, simple as that and once again remember the blacktop’s got to be nice and dry. So let me show you what I've got what we're going to use today. We've got this nice crack and this particular crack is kind of like a v-shape. Because it’s v-shaped it's really pretty hard to install a backer rod that sometimes you have to use when you install a crack sealant with blacktop.

Use a backer rod when the crack is shaped more like this where the sides of the crack are pretty parallel. You'll get those cracks very frequently in a blacktop driveway but not this particular one.

So what we're going to do first is all you have to do is start with this compound. It's an asphalt repair sealant. Check this out says it right here asphalt repair.

It's got all the nice instructions and it looks like it's just like really caulking and simple all you do is go ahead and start to squeeze it out being really careful that you don't put too much of the material too high. Because you would have a real mess on your hands.

You can see how easy that comes out. it just flows out of the tube and one of the reasons it flows really well is because I made sure it wasn't too cold out here. The outside temperature right now here is about sixty sixty-five degrees. This material flows just beautifully out of this tube and you can see that now, check this out, get a little closer, I want to show you something.

I'm coming up to a really big wide area and I want to fill that up but not too high and you'll see in a minute why. And there's another one coming up right next to it. Oh yeah look at this right here you can see a big area I kind of put the sealant in there making sure it's not too high.

All right now, here's what I want to show you the next step is I've got this cute little stick it's actually from a piece of mulch. Check this out. You can see it's about a quarter-inch

wide and I found it in the mulch actually right next to the blacktop drive. I just use that, come down here close, I want to show you something.

I actually want to spread this sealant so that it smears on the blacktop on either side of the caulk and I'm also making sure that the caulk sealant is not too high and this makes for a really really good bond so that the crack sealant material will not come out.

Come down here where it's really really wide. Before I started the job I went around and I found some of the rocks that had actually come out of the blacktop drive. What you do is actually put these rocks right in the sealing compound. I know it sounds crazy but this actually helps it helps disguise the crack for one and it helps make the crack sealant work a lot better because it makes it stronger.

And you just push those rocks down into the sealant and then you push the material up against it so that the cracks and so that the cracks fill up with material and it sticks well against these little rocks.

The final step in the process is to actually take some of this magic compound that I have in this can next to me. Oh-ho, wait till you see this trick! A lot of people don't do this. This is one of the secret Ask the Builder tricks.

Before I started the job I went to the sides of the driveway and I found some sand and some of the sand came from the stones and the rocks around the driveway. But actually matches perfectly some of the rocks that are actually in the blacktop. And you go ahead and just sprinkle this sand on to the fresh compound.

Look at that.  Simple as that and this sand does two things. Number one it will prevent tracking in case somebody makes a mistake and walks on this material and prevents it from it spreading onto the driveway. It does that, that's really important.

But number two it's actually going to help disguise this crack so that the crack looks more like the actual blacktop on either side of the crack. It's that simple to patch a blacktop crack. I'm Tim Carter for Ask the Builder dot com. If you want to discover more home improvement tips, go to AsktheBuilder.com.

Related Links

How to Repair Driveway Cracks

Driveway Erosion Repair - Don't Let it Get Out of Hand

CLICK or TAP HERE for FREE QUOTES  from local asphalt crack-repair contractors.

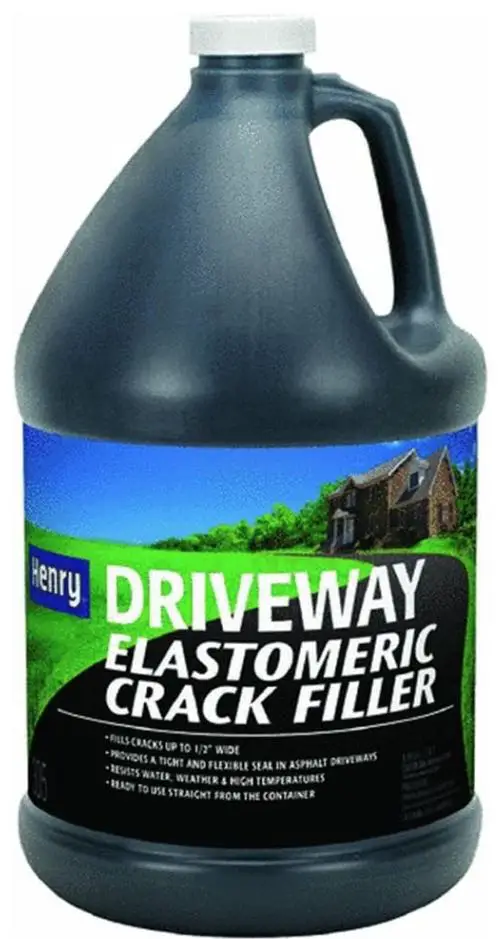
Buy This Great Blacktop Crack Filler

blacktop crack filler

This is a quality crack filler you pour into cracks. CLICK the photo to have it delivered to your home.


Septic System Anatomy Video

Am I glad you are here today! Guess what I discovered? I found a septic system that is being installed and it hasn’t been covered over with dirt. The inspector is coming tomorrow, so it is a great opportunity for me to show you the basic components of a septic system. The septic system consists of the septic tank, the distribution box and the leach field.

This is the actual septic tank. It is a precast, concrete structure that a crank lowers into place. This particular one is about 750 to 1,000 gallon capacity. The waste water from the house comes directly into this tank. The tank has lids that allow you to inspect the inside of the tank. They also serve a very important service. Every three to four years, you need to have a company come in and pump out all of the solids, that have collected inside the septic tank.

The distribution box takes the waste water from the septic tank and directs it out to the leach field through four different pipes.

The leach field in this system looks a little weird because of all the concrete covering. This leach field will actually be underneath the road leading to the house. The waste water enters the leach field from the distribution box. The leach field consists of a foot thick layer of sand. The waste water filters down through the sand, where it gets cleansed of all the bacteria and pathogens. And then it flows back into the water table.

That is how simple septic systems work.

Author's Note: We've received other questions with similar problems or questions. Here's one from Howard Stein of Oklahoma City, OK, regarding his home septic system.

"We have ten inches of snow and the temperature is near zero Fahrenheit. It will stay like this for several days.  Is it safe to use our washing machine (doing regular laundry) in this frigid weather since we have a septic tank and fear that the "arms" cannot properly dispose of large volumes of water into the ground?  Many thanks for your help."

Howard, typically in most septic systems, the tank and drainage fields are located well below the frost line.

Tim Carter

October 21, 2008 AsktheBuilder News

What's in This Issue

SMOKING GUN - DOWNSPOUT DRAIN PIPE
SATURDAY MEET AND GREET
BROKEN LINK IN LAST NEWSLETTER
SWINGING DOORS
NEW HAMPSHIRE PHOTO ALBUM
MEETING THE CANDIDATES
LATEST COLUMN AND VIDEO


SMOKING GUN - DOWNSPOUT DRAIN PIPE

This morning, I was on the phone with Greg. He had purchased one of my 15-Minute Phone Consults. Greg had a damp basement issue. When he first purchased the consult, I asked him about the problem and then requested he send me photos of the outside of his house as well as the inside basement walls.

Bingo! When I got to the seventh or eighth photo I saw one of the major issues. At least one of the roof downspouts was dumping water just feet from Greg's foundation. I wrote a column about this and actually did the calculations as to how much water comes off the average roof. Read the column and you'll be amazed!

The bottom line is that once Greg pipes all his roof water to the lowest spot of his property and he installs one of my super-duper Linear French Drains, his basement is going to be much drier.


SATURDAY MEET AND GREET

I had a great response to getting together with you at a local hardware store. I'm all set for this Saturday rain or shine. Let's you and I meet at the Aubuchon Hardware store in Concord, NH at 1:30 p.m. Here's where it's located:

Aubuchon Hardware Store #141
80 South Main Street
Concord, NH 03301
603-228-5500

Rod Hunt gets the honorary award for Person With the Most Desire to Attend. He lives in Australia and wrote to me that he would love to come, but it's a bit of a trip. I also heard from many others who had conflicts or it was too far to come. Thanks for contacting me telling me of your interest. I'm trying to figure out a way to do these on a regional basis. At the very least as I travel to conferences and other events, I'm going to plan these realizing that not everyone lives close to me.

One of the things I'll be talking about this Saturday, while in the store, are ideas I have that will allow you to drastically cut your heating bills this winter. I've been testing some things and the results are very promising. I'm also going to debunk some myths.

Remember, the cost to attend this event is nothing. You just have to get to the hardware store in Concord.


BROKEN LINK IN LAST NEWSLETTER

One of the links in the last newsletter was broken. I hate when that happens. It was a mistake on my part. The link will take you to an Eco Starter Kit that allows you to become part of the Green Movement and helping you to save the environment. You can purchase a kit that has things that can make you greener than a seasick person on a ferry boat crashing through 20-foot seas. Now don't take that to mean this product will make you sick. It was a pun!


SWINGING DOORS

Kathy from Milwaukee wrote to me today saying, "I would like to install a swinging door between my kitchen and dining room.  I can not find these types of door anywhere.  How do I install this type of door?  Is it just a regular wooden door without the handle (with window) and special hardware?"

That's an easy one! Kathy, those doors are just solid doors that come with no hinge mortises nor any cuts. These pristine doors are commonly called slabs. It's best to get a solid-core door for this, but hollow-core can work. If you want glass in the door, you'll have to go to a real lumber yard and order the door from a catalog. There are websites that sell these special doors.

You then need special hardware that creates the top and bottom hinge points. This is available from real hardware stores that sell an assortment of door locks, hinges, cabinet knobs and all sorts of decorative hardware.

Finally, the door edge that is on the hinge side needs to be milled with rounded edges instead of square edges. This needs to be done to prevent the door from rubbing against the jamb. You can do this at your house with a router and a round-over bit.


NEW HAMPSHIRE PHOTO ALBUM

I created a public photo album on Google Picasa to share with you some of the things I've been seeing over the past month. Autumn is my favorite season, and here are some photos that should explain why I moved here. Pay attention to the captions as they help explain where the photo was taken. All the photos that don't have me in them were taken by yours truly. Brent Walter took the photos where you see me.

If you're driving around New Hampshire, start paying attention to license plates. You may get behind me, and if so, honk! People up here seem to have a love affair with vanity plates. The one I got serves double duty. See if you can figure both of the things it stands for. I'll tell you in the next issue.

Editor's Note: The link to Google Picasa no longer works. Google has dropped Picasa.


MEETING THE CANDIDATES

In today's mail, I got a postcard from a candidate running for state representative here in New Hampshire. Her name is Kate Miller. On the card was her phone number and email address. Kate said on the card, "Call her at XXX-XXXX to let her know what issues are important to you."

So by gosh I called. I got her answering machine, but several hours ago she called me back. We talked for about ten minutes and I asked if she was going to have any public appearances where I could see her face to face. Kate said, "Why don't we just meet at the Village Perk near the Town Hall for a cup of coffee?" Bingo! We're getting together on Monday.

I only bring this up to urge you to get involved. I realize you and I can't meet every candidate, but there are usually websites that list who the candidates are and where they stand on an issue. Many candidates have their own websites. Educate yourself before the election and please vote. Election day is right around the corner. You must make informed decisions that day or suffer the consequences.


LATEST COLUMN AND VIDEO

Do you have cracks in your blacktop drive? Would you like some secret tips to fill and hide them? I thought so!

If you have a lot of logs to split and not much time or muscle, you may want to watch my latest video on hydraulic log splitters.

Index of past newsletters.


Fire Pit

DEAR TIM: Last night I sat around a fire pit at a friend's house. Everything about this magical outdoor fire pit, including the occasional puff of smoke, was enjoyable. I've decided I want to build a fire pit. What's involved? Is it a good idea to have a patio fire pit or should I consider a garden fire pit? Do you have to have a fire-pit ring? Valerie C., Brant, MI

DEAR VALERIE: You and I, and thousands of other people, were doing the same thing last night. It was a glorious autumn evening and I watched the last rays of sunlight wash the trees across the lake from my house with my back to the fire. Unfortunately the previous owner of the house I moved into made several mistakes when he built my backyard fire pit. I think he was a victim of carbon monoxide poisoning from all the gas that washes over you as you sit in front of my fire pit. Next spring I intend to move mine.

The first thing you need to do before you get out your shovel and order the material to build your new fire pit is to check with your local officials. There are many communities that are starting to restrict outdoor fires for all sorts of reasons. At the very least, there may be zoning regulations that control if you can build an outdoor fire pit, and if so, its size and where it can be located on your property. Don't overlook this important step.

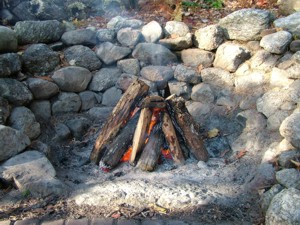
This fire pit, while attractive, was built in the wrong location by a homeowner who didn't orient it to the view and prevailing wind direction. PHOTO CREDIT: Tim Carter

This fire pit, while attractive, was built in the wrong location by a homeowner who didn't orient it to the view and prevailing wind direction. PHOTO CREDIT: Tim Carter

There are countless fire-pit designs. Some are as simple as the traditional campfire surrounded by a ring of rock. A friend of mine built a fire pit in the middle of his patio and had a welder make a five-foot diameter steel fire pit ring. This homeowner set the top of the steel fire pit ring flush with his brick pavers for a very sleek look.

When I relocate my fire pit in the spring, I'll use large rounded boulders that currently form the back wall of my fire pit. These rocks will be about 9 inches higher than the surface of my patio. The inner diameter of my fire pit will be no less than 5 feet and there's a good chance I'll make it 6 feet in diameter.

The previous homeowner who built my fire pit made two enormous mistakes. The first one was to ignore the natural view. In my case, the patio is immediately adjacent to a very large lake. The fire pit is on the house side of the patio and your back is to the magnificent lake view when you look at the fire. I plan to move the fire pit so that you can see the fire easily and view the lake to the left of the flames.

The second mistake that was made was failure to orient the fire pit with respect to the prevailing winds. More often than not when you are sitting at my fire pit you're bathed in smoke as the patio is downwind of the fire. I can't believe the owner made this basic mistake. The new location will allow the smoke to drift over the lake and away from my patio most of the time. There will be occasions when the wind will shift, but for the most part I'll be smoke-free sitting on the patio.

Consult with your local fire department's fire-prevention officer. She/he may be able to offer some great tips so that you don't set your house on fire, your neighbors' and/or the woods around your home. Be sure you assemble some basic fire-fighting tools and supplies to have at the ready when you do decide to have a roaring fire. A charged garden hose is a must if it's available.

I prefer to build a fire pit that's recessed in the ground about 9 to 12 inches. It's best to construct a gravel-lined drainage ditch away from the bottom of the fire pit to a low spot on your property. This feature prevents standing water from laying in your fire pit. The last thing you want is to have to bail out black ash-laden water some evening when you want to build a fire.

As the trench leaves your pit you can install a drainage pipe to channel the water. Be careful if you choose to use plastic pipe. Don't extend the pipe into the fire pit as the heat of the fire and the coals will melt it in short order. I plan to use a cast-iron pipe in my fire pit to eliminate the possibility of problems.

If you decide to build an outdoor fire pit and you have neighbors who live nearby, you can maintain friendly relations with them if you take the time to burn only very dry wood. Wet wood creates vast amounts of smoke that pollutes the air and irritates neighbors. Dry wood releases far less unburned combustible material into the air.

Never burn garbage, plastic or anything other than wood in your fire pit. Different man-made objects can release very toxic gases as they burn. You can poison yourself, your friends or neighbors.

Use common sense in dry weather when there is a possibility of wild fires or forest fires. Follow all outdoor fire bans in dry weather or periods of low humidity and high winds. The seemingly simple fire in your outdoor fire pit can kill people and cause millions of dollars of damage in very short order if conditions are favorable.

Column 749