Shed Plans


"The first thing you should consider when looking for wood-shed plans, garden-shed plans or any storage outbuilding plans is function, not form or looks. In other words, you need to make sure that the building is going to be big enough for the things you need to store."

Shed Plans Checklist

  • Layout items to be stored in the shed on grass
  • Be sure to have open space to get to all things
  • Use treated lumber for floor joists and shed floor to prevent rot
  • A six-foot-wide overhead garage door is best for access

Shed Plans Are Mission Critical - Don't Hope Shed is Big Enough

Related Links

How To Build a Shed in Days - SECRET TIPS - Do NOT Share.

Use a Ramp to Get Into Your Shed

DEAR TIM: I'm in desperate need of shed plans because the clutter in my garage has become unbearable. What should I be looking for when I consider storage-shed plans? Is it really necessary to have detailed shed building plans if I am going to do the work myself? How would you construct the shed to be both easy to build and long-lasting? Johanna C., Woodbury, NJ

DEAR JOHANNA: Three years ago, I took back ownership of my garage for my vehicles. When I first moved into my home, we could easily park my truck and our car in the spacious garage. But over time, we accumulated too much stuff which forced the cars outside. When I showed my wife a set of shed plans that matched our Queen Anne Victorian home in every detail, her only question was, "How soon can you have it completed?"

Free & Fast Bids

CLICK HERE to get FREE & FAST BIDS from local shed builders.

What Should Plans Focus On?

The first thing you should consider when looking for wood-shed plans, garden-shed plans or any storage outbuilding plans is function, not form or looks. In other words, you need to make sure that the building is going to be big enough for the things you need to store. You can make the outside of any storage shed look like any style you desire. It is easy to make a storage shed match the style and character of your existing home.

Garden Shed

This L-shaped storage shed was constructed using plans created with computer software. IMAGE CREDIT: Tim Carter

What is the Most Basic Part of Shed Plans?

The most basic component of your shed plans is the two-dimensional floor plan. This tells you how long and wide your shed will be.

All too often people think a storage shed will be large enough on paper or when they see a pre-built one in a home-center parking lot. But reality soon sets in when they start to cram all of the things in the new building.

How Will I Know My Shed Will Be Big Enough?

The way to ensure your new shed will be large enough is to take the things you want to put in the shed outside on your drive or lawn.

Once all of the things are outside, arrange them in a way you would like to see them in the shed. Be sure there is enough room around the items so you can get to each thing without having to crawl over other something. If you make a mistake and make your shed too small, you will be grouchy each time you have to pull out three or four things to get to something way back in the shed.

How Much Detail Must My Plans Have?

The needed detail on the plans is a function of what may be required by your local zoning and building department. Some communities have strict rules as to how a shed must look, the size of the building with respect to the size of your home, and even which direction doors must face. You should absolutely visit your local government offices to discover what guidelines you must follow before you purchase shed plans or even draw your own.

CLICK HERE to get FREE & FAST BIDS from local shed builders.

What Do Great Shed Plans Look Like?

Great shed building plans have lots of detail. Here's a page from the plans I used to build my own two-story shed in New Hampshire.

Sample Shed Plans

I feel it is a good idea to have detailed storage-shed plans even if you plan to build it yourself. The plans will help you produce an accurate material list so you only buy as much material as you need.

Can I Buy Your Amazing Storage Shed Plans?

Yes, you can buy and download instantly my deluxe two-story storage shed plans. CLICK HERE to get the shed plans now.

Another benefit of well-thought-out shed plans is minimal waste. By taking the time to think through modular design and economical building, it is possible to build a shed with virtually no waste. This is a green-building practice all should do no matter what the project might be.

What is the Best Material for a Storage Shed?

For ease of construction, you should probably lean towards using wood. Masonry storage sheds require a unique skill set as does working with metal. Many people have simple tools to cut and assemble wood.

The floor of the shed can be made just like a wood deck that hugs the ground. Use treated-lumber for the support posts, floor joists, and the actual floor.

You can buy treated-lumber plywood. This is what I have in my own shed, and I never have to worry about driving my wet or snow-encrusted tractor into the shed.

Water is the biggest enemy of a wood storage shed. There should be at least 6 inches of space between the soil and any wood that is not treated for rot. Water that splashes on the sides of the shed can cause rot over time. The best way to minimize this is to create generous 16-inch overhangs on the roof and use gutters and downspouts to collect and redirect roof water.

Can I Use a Narrow Overhead Door For a Shed?

Instead of using cumbersome swinging doors for access, consider purchasing a 6-foot-wide overhead garage door. These are economical, practical, attractive and easy to assemble. Traditional swinging doors can be problematic on windy days, and they can be difficult to build from scratch if you are a rookie do-it-yourselfer.

garden shed garage door

Garden shed plans are easy. This garden shed features a 6-foot-wide overhead garage door. Copyright Tim Carter

It is a good idea to install several skylights that allow abundant natural light to stream into your shed. If possible, try to incorporate a steep roof. This will allow you to create some bonus storage space above the floor of the shed. You can't have too much storage space in a storage shed!

CLICK HERE to get FREE & FAST BIDS from local shed builders.

Column 724

Trench Drain

DEAR TIM: Do you think a trench drain or a French drain will solve my soggy yard as well as the chronic leak in my basement? Many of my neighbors suffered from the recent heavy rainfall, and we all are tired of dealing with water in and around our homes. Will a trench drain really work, what is proven design and how does one go about installing a French drain? Robin R., Dawson Springs, KY

DEAR ROBIN: I know for a fact that a trench drain will solve your swampy yard. If you install this trench or French drain correctly, it will also stop the water from entering your basement. Thousands of people have used a trench-drain design I perfected years ago to redirect water that was coming from my neighbor's yard. It worked so well, I started using the same system on all of my jobs where customers had poor drainage and needed relief.

My college degree is in Geology, and I had a special interest in hydrogeology. This is the study of groundwater. To understand how to drain land and keep your house dry, one needs to understand the movement of water after it enters the soil. Many people believe that water travels straight down through the soil on its way to the water table. It can in certain areas, but often as it moves to a layer of porous rock, it travels sideways through the soil. This is especially true in areas where the top layers of the soil horizon have a clay composition. Clay is a highly-effective water blocker, and as such acts as a great liner for lakes and ponds.

This is the outlet for a trench drain. Since the ground slopes and the trench is kept nearly level, the pipe eventually pokes through the soil to daylight. PHOTO CREDIT: Tim Carter

This is the outlet for a trench drain. Since the ground slopes and the trench is kept nearly level, the pipe eventually pokes through the soil to daylight. PHOTO CREDIT: Tim Carter

Top soil has a very open structure, and is filled with lots of air voids when the soil is dry. As rain falls from the sky and enters this top soil, it enters this network of interconnected air spaces. If the water travels down under the pull of gravity and hits a dense clay subsoil, the water starts to move sideways along this clay zone moving down slope as the ground slopes toward creeks, streams and rivers.

A trench drain installed on the high side of your land can intercept this water as it is moving directly towards your home. The trench drain acts exactly like a gutter on a roof by collecting the water and redirecting it to another location. The water enters the trench drain and flows through it because the design of the trench drain offers much less resistance to flow than the water moving through the soil.

My trench-drain design is simple. You dig a 6-inch-wide trench about 2-feet deep. The bottom of the trench stays parallel with the top surface of the ground on the high side of your land and as it passes on either side of your home. Once the trench passes your house, the bottom of the trench should be made nearly level with a minimal slope. As the ground slopes from your house, the bottom of the trench gets closer and closer to the surface until it pokes through to the surface much like a horizontal mine shaft.

The trench contains rounded washed gravel and a perforated 4-inch-diameter drain pipe. The pipe is simply a high-speed conduit that acts like an underground river in times of heavy rainfall. You install 2 inches of gravel on the bottom of the trench then the pipe. The pipe is then covered with additional washed gravel to within 1 inch of the surface. You can then add soil or sod if you want to hide the location of the trench drain.

There is no need to install a geotextile sock around the pipe or use it to line the sides of the trench. These materials are designed to stop silt from clogging gravel or drains. This is needed when you install fluffed dirt over drainage systems. In my design, the small amount of soil added to the top of the gravel will not be a factor.

Water flowing through soil does not contain silt except in the situation described above. In virgin soil or compacted soil, silt is a surface phenomenon. Creek water in a storm is muddy because of dirt that is eroded from the surface and carried overland to the stream, brook or river. Proof of this is the crystal-clear water that flows into wells and out of surface springs. You will also see clear water flowing from the outlets of your trench drain once you install it.

To stop water from entering basements, a trench drain is but one part of a system. The water from roofs and all paved surfaces like patios, sidewalks and driveways must not be allowed to discharge or collect near the house. This water must be collected and piped to the lowest part of the building lot away from the house.

There has to be positive drainage away from the house foundation. The building code, which is a MINIMUM standard, states that in the first ten feet of horizontal distance away from a foundation, the grade must drop 6 inches. This is not enough in my opinion. It is better to have at least 12 inches of drop. What's more, I frequently see landscapers or homeowners who pile mulch around foundation plantings. This mulch creates dams and can cause ponding of rainwater around a foundation.

A trench drain can be installed with a powered ditching machine and some strong boys who can cart away the soil and bring back gravel to fill the trench. If you want to use powered equipment for the whole job, visit a tool-rental business. There are wonderful miniature loaders that can move both soil and gravel with minimal disturbance to your yard. Be sure to have all underground utilities marked before you dig.


Author's Notes:

You may wonder if my advice is worth anything. Well, read what Jim Sanders wrote to me when he was at the end of his rope:

"Hi, I just wanted to write to give you the results of my "Trench Drain". I have had a wet crawlspace for 15 years. Water would fill the crawlspace at times, so we actually had to drill weep holes at the base so that it would enter the basement and eventually, the sump pump.

I have tried everything. Several contractors said that the only thing we could do was to bring the water into the house via drainage tile and let it enter the sump pump. That would work, but because I live on a 6' elevation, there is no reason that I should have water problems. It became like clockwork...when it rained, we would rush home from the lake or wherever we were vacationing so that we could be prepared to start the backup generator, in case the power failed. We even had our alarm company put a sump alarm on our system, so they could notify us if we had a power failure. Battery backup was not an option, because sometimes we lose power for days and during any rain, our sump would run every 7 minutes...just like clockwork.

I found your site and read the article on the trench or French drain. At first, it sounded a bit like "holistic healing" to me. I failed to understand why a 2 ft. deep trench, 4 ft. away from the house would do any good. How could this simple thing correct an extreme water problem that has plagued me for years, cracked my foundation, settled my garage floor and ruined almost every vacation?

The Linear French Drain trench running from the house. PHOTO CREDIT: Jim Sanders

The Linear French Drain trench running from the house. PHOTO CREDIT: Jim Sanders

I decided "what the heck". I had to dig by hand using a trenching spade and a pick-ax, because the builder back-filled our property with brick and blacktop. It took quite a bit of time. Because the ground level varies so much on that side of the house, I was not able to achieve exactly 2 ft. deep. It varied from 18" to 30" in spots, but the slope was downhill. The trench is about 80 ft. long. At times, I thought about filling it all in, because I just didn’t believe that it would work.

I stoned it, put tile in, and filled it with #1 round stone. I socked the pipe just for safety measure and I also used geotextile fabric on top, so I could cover with dirt and grass. I also ordered some clay and pitched from the house to the drain.

After a short rain, water is running away from the house. PHOTO CREDIT: Jim Sanders

After a short rain, water is running away from the house. PHOTO CREDIT: Jim Sanders

Result? For the last month, we have had 7 or 8 torrential rains, the worst of which was last night. It rained so hard, that our lawn washed out in spots because of the high clay content. Our sump pump, that normally ran every 7 minutes during and after rain, has not turned on for 4 weeks. The silt at the bottom of the sump well is now dry and cracking. Our crawlspace has not shown a trace of water or even moisture.

Since I couldn’t see correcting the foundation cracks or the garage floor settling and tilting until I corrected the problem's source, I waited to see if the trench drain worked first.

This week, I had a company come in and perform sort of a "mud-jacking" technique on the garage floor, which worked perfectly. Also, during the past few weeks, I parged the cracks in the foundation.

A dry sump pump. PHOTO CREDIT: Jim Sanders

A dry sump pump. PHOTO CREDIT: Jim Sanders

I just wanted you to know how this worked. I stressed for many years over this issue and the solution was nowhere near as difficult as I thought it would be.

As a side note, I went to the end of the drain tile during a hard rain to see what was happening. Water was running out of the drain tile in about the same exact volume that it previously ran out of the weep holes in my crawlspace. This winter will be interesting, because last year, the ground next to the house was so saturated that during a thaw, my sump would run constantly. I'm guessing that the ground between the trench and the house will probably be drier now going into this winter."

- Jim Sanders, Upstate area - New York

CLICK HERE to get FREE & FAST BIDS from local drainage expert contractors.

Column B339

Column 721

Gutter Protection Video

Important Author’s Note Update: Since this column was written, I have discovered at least two other gutter guards that sport the micro-mesh filtration screen. Testing of these Micro-mesh guards began early Spring of 2008. The results of the test are in! After 10-years of testing various types, a winner has been declared! Click for the gutter guard I installed on my house - Gutter Guard Test Results.

gutter guard installed

This is the best gutter guard I've ever tested. A stainless-steel micro mesh prevents any pine needles from getting into the gutter. Copyright 2017 Tim Carter

Good morning from the roof of the AsktheBuilder World Headquarters. It is early spring, and Tim met the inventor of a really cool gutter protection system. This system has a very fine mesh covering. That is important because in all previous tests of gutter guard systems, in the spring most of the systems fail. The small debris that trees produce, like seeds, blossoms and little pieces of bark, clog up other gutter protection systems and even work their way down into the gutter.

Free & Fast Bids

CLICK HERE for FREE & FAST BIDS from local companies that can install micromesh gutter guards.

Consider purchasing a micromesh product from Amazon.com and having your local handyman install them for you. CLICK the photo below for just one of the micromesh products I discovered on Amazon:

inspecting gutter guard

There are many micromesh gutter guard products. You can save LOTS of money putting them on yourself. CLICK ON THE IMAGE to see how low-cost they can be.

These gutter guard systems have been tested on the AsktheBuilder’s roof. The first one ever installed was a plastic protection system with diamond shaped holes in the covering. It has been installed for about eight - nine years. It allowed water from a garden hose to sprayed into the gutter to clean out the small debris. But the holes would get clogged up with those little helicopter seeds and the lacy blossoms from the oak trees. This system is being removed and replaced with a newer system.

The new system looks like a very large bottle cleaning brush or pipe cleaner. According to the inventor, you just put it in the gutter. When it gets clogged, and it will, you just pull it out, shake it clean and place it back in the gutter. Not sure if that will work, but it will be installed and tested for the next four to five weeks during the spring season.

Check back later for the next video showing the results of Tim’s testing of this new gutter guard system at the AsktheBuilder World Headquarters.

Ceramic Floor Tile

Ceramic floor tile can be repaired with the right tools and some patience. PHOTO CREDIT: Tim Carter

Ceramic floor tile can be repaired with the right tools and some patience. PHOTO CREDIT: Tim Carter

Ceramic Floor Tile Installation

DEAR TIM: I have ceramic floor tile in my kitchen. We removed a wall to open up the floor plan, and now I must replace the cut tiles with full ones to make the ceramic tile floor look perfect. Lucky for me my builder left behind a box of the original tile, so I have the pieces I need.

Can you tell me how to install ceramic floor tile in this situation so it looks superb? I am worried about matching the height of the existing tile and getting the grout to match. Alicia R., West Fargo, ND

DEAR ALICIA: Laying ceramic floor tile can be challenging, but repairs to existing tile can really be a test for a seasoned pro. You are going to need a large bucket of patience as well as a few simple tools to heal the wound in your floor. Lady Luck is already with you since you have the original tile on hand. That is a good omen of what is to come.

The first step in the process is to carefully remove the old cut tiles. There are any number of ways to do this, but I discovered long ago, that you must remove the grout around a tile so you do not crack an adjacent ceramic tile. You can chisel out the grout with a hammer and a small cold chisel, or you can try to use a powered grinder to help cut away the grout. Be very careful as you work near the ceramic tile you want to save. Never chisel towards tile you want to save. Chip away from the tile.

Once the grout is removed, you can try to pop the cut tile from the floor using a wide stiff putty knife that is driven at a low angle under the tile. Start the knife under the cut edge that was against the old wall. Tap the putty knife with a hammer. If you are lucky, the entire tile will lift at once. You may end up shattering the tile and it will come out in pieces. That is fine, just be careful you do not cut yourself as ceramic-tile shards can be very sharp.

When the old tiles are removed, you need to scrape off any adhesive. If the original installer used an organic mastic similar to cake icing, you may be able to use an adhesive remover to soften the old glue. If the adhesive is cement thinset, you will need to chisel or grind it off with a power tool. Use a wet-dry vacuum and pipe its exhaust outdoors as the thinset will produce silica dust which is not a good thing to breath into your lungs.

The space where the old wall was needs to be brought up to the level of whatever underlayment was used by the installer. If the tile was installed on a concrete slab, you may have to do nothing. But often a ceramic tile floor is installed over wood. You may have to install a strip of matching underlayment made from cement board or a gypsum-based underlayment. The new product you install must be at the same level as the rest of the underlayment. Under no circumstances can it be higher than the existing surface immediately beneath the adjacent ceramic tile.

At this point the hard work is complete. Laying the ceramic floor tile in this small area is no different than doing an entire floor. You apply an adhesive to the same thickness as the original and set the tile into it. Use a straightedge or a level that rests on the existing tile and the new ones to ensure the replacement tile are not high or low with respect to the full tile already in place.

Matching the tile grout may be slightly problematic. Even if the builder saved some grout, it may not be usable as it could have hardened in the bag after several years. To match tile grout you must clean the existing grout well to see what its color really is. You can clean ceramic tile grout fairly easily using a solution of oxygen bleach. This is a powder you mix with water. Once mixed, you apply the solution to the grout, let it soak for about 15 minutes and then scrub with a stiff brush. Years of dirt come up with ease.

Once the grout is clean, let it dry well for two days so you can start to match it. Ceramic-tile stores usually sell many different grouts and matching a color is not too hard. Your existing grout must be dry to get a perfect color match. Remember not to fret when you mix the grout you buy. When wet, it always looks darker, so you may think the color is way off when in fact it is just right. Mix up some test grout and let it dry before you grout your replacement tile.

You can ruin the grout by adding too much water in the mix. The wet grout should be the consistency of wet clay. You should be able to form the wet grout into a ball with ease and it keep its shape without sagging.

Remove all excess grout from the tile as you grout. Use a damp sponge to do this making sure all water is squeezed from the sponge as you wipe across the tile. Wipe with very light strokes to make sure you do not remove grout from the joints. Change the rinse water frequently so you are not leaving a grout haze on the tile.

Message from Tim:

Years ago while researching a column about cleaning decks, I discovered the wonders of Oxygen Bleach. It is perhaps the 'greenest' cleaner I know of as it uses oxygen ions to break apart stains, dirt and odor molecules. There are no harsh chemicals, and it works on just about anything that is water washable.

I decided to create my own special blend using ingredients made in the USA. In fact, the raw materials in the active ingredient are food-grade quality registered with the FDA. I call my product Stain Solver. I urge you to use it to help with cleaning your tile grout. You will be amazed at the results!


Column 720

Kitchen Cabinet Remodel

DEAR TIM: My kitchen cabinet remodel job has turned into a disaster. I contracted the job through a national home-center chain who demanded I pay in advance for the entire job. There are numerous issues, and the granite top is sagging in the middle of my sink. My complaints are going unanswered. The installer will not come back, and my calls to the home center are getting me nowhere. Is it time to call an attorney? Should I sue to get my money back? What went wrong as I trusted the large national company? Andy E., Lexington, KY

DEAR ANDY: If I had a nickel for every letter and email I have received like yours, I would have my own private jet. The Better Business Bureau statistics echo this as complaints regarding home building and remodeling are always make the Top-Ten List of consumer issues. Let's put on the rubber gloves on and do an autopsy to discover what went wrong. It's important to find the cause, so this never again happens to you.

You undoubtedly had lots of anxiety going into this project as you indicated that trust was a major factor in your decision who to hire. My guess is that you did not know exactly what needed to be done on the job, so you wanted to go with a large branded company you thought would make your life easy. This, in my opinion, is a huge mistake. You always need to investigate what is involved, how things work and how to spot a pro from the get go. This way you protect your interests at all times.

A granite top like this must be installed on kitchen cabinets that are level and sturdy.  PHOTO CREDIT: Tim Carter

A granite top like this must be installed on kitchen cabinets that are level and sturdy. PHOTO CREDIT: Tim Carter

The actual cause of death was you making the payment in full at the beginning of the job. When you do this, the only leverage you have to make sure your kitchen remodel dreams come true is hope. You "hope" that all goes well and you "hope" you get what you paid for. Never again pay the full amount in advance for any remodeling job. It is unnecessary, and it puts you in grave financial risk.

It is reasonable to have to pay some money up front in rare situations. Your kitchen-remodeling job is one of them. If the cabinets you ordered were custom ones that are not normally stocked by the home center, then it is reasonable for them to request a 50 percent deposit to order the cabinets. It is reasonable for them to ask for a similar 50 percent deposit for the granite top as it will probably only fit in your kitchen. You should not forward any monies for installation labor - never. You only pay for labor once it is complete and satisfactory.

When you have the money in your possession, you have the power to get results. You can create a fair payment schedule that distributes a certain amount of money as the work progresses. If this means you have to make smaller payments every three or four days on smaller jobs, it is worth the inconvenience.

You said the home center demanded payment in full before the work progressed. I don't doubt that, but the marketplace is so competitive, it is possible you might have negotiated special terms that allowed you to make staggered payments as the work progressed. Use the economic law of supply and demand to your favor whenever possible. There are many other smaller professional remodelers who would have agreed to take your money as the job progressed.

As for calling an attorney, you can do that as a last resort. I believe you will discover that you will have to pay the attorney's fees no matter what happens. It is entirely possible you will spend thousands of dollars to get the same results as that you might do on your own by becoming the squeaky wheel that ultimately gets the grease.

Start by contacting your local Better Business Bureau to see if the national home center is obligated to enter into arbitration. Then contact the headquarters of the home center, fill out online complaint forms at their website, contact any local consumer reporters at your media outlets, visit websites where consumer complaints are lodged, etc. In other words, don't look like a doormat or otherwise you will become one.

When you decide to remodel your kitchen or any job for that matter, you can use professionals who will not demand full payment up front. They don't require this as they know the job will turn out fine, and that you will be satisfied with their work.

The key is to spell out in the contract what monies are due when. You must always hold back enough money to be able to finish the job at any point. If you give the contractor too much money, you loose your leverage. Imagine what might happen if the contractor gets injured on your job and you have to bring in another company to finish. You must always have that money needed to finish in your possession.

It is critical that you make timely payments when you say you will. This is paramount to the two-lane trust bridge between you and the contractor. You are trusting that the contractor will do great work and do it on time. The contractor trusts that you will do your part and make the correct payments on the day they are due. Remember that excuses are reasons for failure. Do not fail your contractor and he will not fail you.

Column 719

Hydronic Heating Manufacturers

Hydronic Heating Books / Publications / Information

OK, so you want hydronic heating information, books, and what not? Get ready! The absolute best book on the subject is called Modern Hydronic Heating - For Residential and Light Commercial Buildings, 2E by John Siegenthaler, P.E. This 575 page hard cover book is one of the best construction books I have ever seen. If you read it cover to cover you will probably discover more about the topic than you could imagine.

It is simply a MUST read if you want to incorporate ANY type of hydronic heating in your next home. I have a copy of this book that was sent to me by the publisher. After reviewing it, I would be willing to pay for the book - it contains SO much invaluable information. It is available from Amazon.com and from the Radiant Panel Association. Visit their online store.

Here are some other publications that might interest you that are stocked by the Radiant Panel Association, PO Box 717, Loveland, CO 80539:

RPA Guidelines for the Design and Installation of Radiant Panel Heating and Snow/Ice Melt Systems
Intended for reference use by code officials, designers and installers. Deals with both hydronic and electric floor, wall and ceiling applications.

Radiant Precision 2007
Intended for those who have a basic knowledge of such systems, but seek to expand the design capabilities.

Radiant Basics Section 1 to Radiant Basics Section 9
Downloadable PDF booklets covering various aspects of radiant panel heating systems.

Hydronic Design Studio Software
This is also by John Siegenthaler and an associate author. This is a MUST have if you are going to design a hydronic system. Heat loss calculations and much. much more.


Hydronic Heating Equipment Manufacturers

Now here is an industry that is experiencing rapid growth. There is great interest in hydronic heating. The problem with this is that newer companies can sometimes get into financial trouble by growing too fast. You need to ask questions about how long a company has been in business before you invest lots of cash in a system. Where known, I have listed what the company makes and whether. Association membership is preferred if you are making a purchasing decision, but it is not absolutely necessary. Check the companies to determine if they are member of associations like the Radiant Panel Assocation.

In all likelihood, the components of your hydronic system will come from a variety of sources. You may purchase a high quality boiler or hot water heater from one company, the controls and valves from another, and the water tubing or coils from yet another. It is a highly fragmented business. The trick to making intelligent choices lies in getting an education about hydronic heating. You need to read about the topic and then ask the right questions to the potential installers.

Amtrol Inc.
401-884-6300
www.amtrol.com
Hydronic Accessories

Bradford White
215-641-9400
www.bradfordwhite.com
Water Heater / Space Heating

Buderus Hydronic Systems
603-898-0505
www.buderus.net
Boilers / Radiators

Burnham Radiant Heating
717-397-4701
www.burnham.com
Boilers

Calorique
508-291-4224
www.calorique.com

Central Boiler
800-248-4681
www.centralboiler.com
Boilers

ComfortPro Systems
800-968-8905
www.comfortprosystems.com
PEX tubing / controls / manifolds

Crown Boiler Co.
215-535-8900
www.crownboiler.com
Boilers

Danfoss Inc.
410-931-8250
www.us.refrignet.danfoss.com
Hydronic controls

Delta - Therm
800-526-7887
www.delta-therm.com
Hydronic tubing / Elec. cable

Dunham-Bush
703-434-0711
www.dunham-bush.com

Dunkirk Radiator
866-847-6656
www.dunkirk.com
Boilers

E - Beam Services
877-41E-BEAM
www.ebeamservices.com
Electron Beams

Easy Heat Inc.
877-656-6331
www.warmtiles.com
Electric Floor Heat

Electro Plastics
314-781-2121
www.electroplastics.com
Electric Heating elements

Embassy Industries
631-694-1800
www.embassyind.com
Hydronic heating products


Are you one of the manufacturers listed above? Do you want your company name to be a link to your website? Click here.


Environmental Technology
800-234-4239
www.networketi.com
Controls for floors and snow melt

Flow Design Inc.
800-275-3569
www.flowdesign.com
Controls

Glow Core A.C., Inc.
214-330-8852
www.glowcoreac.com
Stainless steel exchangers

Grundfos Pumps
847-549-8950
www.grundfos.com
Water circulation pumps

Hacker Industries
800-642-3455
www.hackerindustries.com
Gypsum Underlayment

Heat Transfer Products
508-763-8071
www.htproducts.com
Water heaters / Heat exchangers

Heat Timer
973-575-4004
www.heat-timer.com
Controls / valves

Hydro-Temp Corp.
800-382-3113
www.hydro-temp.com
Ground source heat pumps

Hydronic Technologies
800-365-6746
www.hydronictechnology.com
Injector pumps / controls

IPEX
866-473-9462
www.ipexinc.com
Metal - plastic piping / fittings

ITT Fluid Handling
847-966-3700
www.bellgossett.com
Pumps and Controls

Lochinvar
615-889-8900
www.lochinvar.com
Boilers

Maxxon Corp.
763-478-9600
www.maxxon.com
PB and PEX tubing / elec. cable

Monitor Products
800-524-1102
www.monitorproducts.com
Room heaters

NuHeat Industries
800-778-9276
www.nuheat.com
Electric cable for floors

Orbit Manufacturing
215-257-0727
www.orbitmfg.com
Electric cable for floors

Panel Radiator (Rittling)
800-346-8823
www.rittling.com
Wall and ceiling panels

Peerless Boilers
610-367-2153
www.peerlessboilers.com
Boilers

PFG Industries
206-463-1267
www.radiantec.com
Plastic module floor system

Raypak, Inc.
858-571-7883
www.raypakboilers.com
Copper fin boiler

Rehau, Inc.
800-247-9445
www.rehau.com
PEX tubing / controls/manifolds

Roth Industries
315-755-1012
www.roth-usa.com
PEX tubing / manifolds

Runtal, Inc.
800-526-2621
www.runtalnorthamerica.com
Wall and ceiling radiators

Sioux Chief Mfg. Co.
800-821-3944
www.siouxchief.com
Manifolds and Headers

Slant/Fin Corp.
516-484-2600
www.slantfin.com
Boilers

Spirotherm
630-307-2662
www.spirotherm.com
Air separators

Taco Inc.
401-942-8000
www.taco-hvac.com
Hydronic circulators

Tekmar Controls
250-545-7749
www.tekmarcontrols.com
Solid state controls

Thermal Ease
360-779-1960
PEX tube / controls/manifolds

Trianco-Heatmaker
781-961-1660
www.triancoheatmaker.com
Steel boilers

Triangle Tube
856-228-8881
www.triangletube.com
Heat exchangers

Utica Boilers
866-847-6656
www.uticaboilers.com
Boilers / indirect water tanks

Viega
800-775-5039
www.viega-na.com
PB and PEX tube / manifolds

Water Furnace
800-GEO-SAVE
www.waterfurnace.com

Weil-McLain
219-879-6561
www.weil-mclain.com
Cast iron boilers

Hydronic Heating

So, are you intrigued by hydronic heating? It seems to be the rage. The industry has definitely seen fantastic growth and new products within the past years. For any number of reasons, there appears to be a renaissance in progress. This rebirth of the industry will enable you to purchase corrosion resistant water tubing, highly efficient boilers, decorative radiators (if you choose to use those), and sophisticated controls that deliver heat to as many zones as you wish to create in your new home.

Hydronic Cooling Too!

Don’t think that hydronic systems are limited to just heating. You can also cool your home if you have access to a lake or river nearby that has some very cold water in it. A loop of tubing is submerged in the lake or river. The water within the loop picks up the heat from your house and transfers it to the lake or river. As it does this, it gets chilled and this cold water is circulated through a coil inside your house. Think of hydronics or hydronic systems as simply water "trolleys" or transportation mechanisms. That is what they do best. They simply move heat from one point to another.

Complicated

I have told homeowners on more than one occasion that heating and cooling systems used in home construction are one of the most important and complicated aspects of building a home. Heating and cooling systems create and maintain an artificial environment inside your home. If you have weather extremes on the other side of the walls, it is vitally important that your system be designed and installed correctly. If it isn’t, you will be miserable and/or waste significant money in fuel costs.

Modern hydronic systems are some of the most complicated of all! This means that you and your installer must be on your toes. The arrangement and design of separate heating zones is critical. Pumps, controls, friction loss in tubing, boiler sizing, expansion tanks, fittings, etc. are all important. If you have one mistake the entire system will suffer.

I am not trying to scare you away from hydronic systems. On the contrary, I am trying to convince you to do your homework. You must educate yourself on the manner in which a system works so that you can talk intelligently with an installer.

Different Types

Are you remodeling a bathroom? Do you hate cold, tile floors? Why not put in some electric cables or an electric mat beneath the floor tile? It is possible! You don’t have to convert your entire house.

Are you thinking about adding a neat solarium to your house? Perhaps you have a screened in porch with a concrete floor that is 6 inches or so below your existing house floor? You can install a single zoned hydronic system just for this new room! There is no need for a boiler as a simple hot water heater may do the job. This is one of the interesting things about hydronics. Many systems are adaptable. They allow you to work them into an existing heating design. You can’t say that about a lot of other heating and cooling systems.

Great FREE Information

How would you like some wonderful free information about hydronic heating systems? You are going to get numerous booklets, pamphlets, literature from numerous hydronics manufacturers, and a copy of a very informative hydronics magazine called Radiant Living. Available online at www.radiantlivingmag.com. Does this sound too good to be true? Well, it isn't. All you have to do is contact the Radiant Panel Association. Tell them to send you the "Information Packet" that includes all of the above stated items. They are located in Colorado and can be reached during normal business hours at 800-660-7187 or visit their website at www.radiantpanelassocation.org. A Growing Industry

Radiant heating systems are growing in popularity. Currently, the industry in the United States is only 10 percent of what it is in Europe! Europeans long ago embraced radiant heating.

The biggest hurdle you will have to overcome is the dual system requirement. If you live in Michigan’s upper peninsula, then you have a great need for hydronic heat and little use for air conditioning. This is where hydronic heating shines. However, if you live in Lexington, Kentucky then you have a great need for winter heat but just as great a need for summertime air conditioning. Some hydronic systems can be installed that do this to a degree, however it is the exception, not the rule.

Keep in mind what you need and ask questions right from the beginning as to how you will have a comfortable climate year round. Hopefully you will be able to incorporate hydronics in your home. It is a truly wonderful form of heat. I know because a friend of mine heats this way!

How To Hang Wallpaper

DEAR TIM: Can you to tell me how to hang wallpaper? I think wallpaper will really make a few of my rooms gorgeous. If you can teach me how to wallpaper, I am convinced you will save me money and allow me to discover a hidden talent. What are some of the most important steps to do when you wallpaper? Are there special tools one uses when installing wallpaper? Molly W., Meredith, NH

DEAR MOLLY: In the limited space of this column, I will be able to give you the view of how to hang wallpaper from 35,000 feet! Entire books have been written on the topic, so I will do my best to give you enough to get started.

I urge you to do further research to find any books, videos or DVDs that really explain the wallpapering process.

You are correct that wallpaper can transform a room. My wife and I are huge fans of wallpaper, and have it in many rooms of our home.

You can create a vibrant mood or theme using wallpaper that just isn't possible with paint or even multi-color paint schemes.

CLICK HERE to get FREE & FAST BIDS from local wallpaper hangers in case you're getting cold feet.

Just A Few Tools

Let's get started with the tools. Fortunately, you don't need many tools to wallpaper.

Here's a list that will get you going on this job:

  • retractable razor knife with snap-off blades
  • 4.5 or 6-inch drywall taping knife
  • smoothing brush or plastic smoother
  • 4-foot level
  • grout sponge
  • measuring tape
  • paint roller & pan
  • paint brush

Click the Image Below to get all, or some, of the tools now:

Wallpaper Tools List

CLICK HERE to get all the tools I recommend in one place. It's easy and fast.

Believe me, a professional wallpaper hanger will have many other tools, but these will get you into the ball game.

Hanging Wallpaper

Cutting wallpaper to fit around older woodwork is challenging, but can be done with patience and the right tools. PHOTO CREDIT: Kathy Carter

The first thing to do is prep the walls. All holes need to be filled and any little bumps need to be scraped off. When wallpaper dries, it clearly shows any imperfections in the wall surface.

You must paint the walls with a special wallpaper primer. These paints size the walls ensuring the adhesive does not penetrate deeply into the wall. Another advantage using these special primers is the extra work time.

The primers leave a glossy sheen that allows the adhesive to stay in the liquid state for up to 15 minutes allowing you plenty of time to wiggle each sheet of wallpaper into position.

It is really important to hang the wallpaper plumb. If you fail to do this, most patterns on the wallpaper will scream that you made a mistake when you look at where the wallpaper hits the ceiling.

The pattern will either run uphill or downhill. The wallpaper needs to be replumbed each time you come out of an inside corner.

Always make a faint pencil line about one-eighth inch away from the actual edge of the wallpaper holding the wallpaper consistently away from the line.

If you place the edge of the wallpaper on the pencil line and the seam between the two pieces of paper pulls away the slightest amount, you will see the ugly gray line between the two pieces of wallpaper.

Many modern wallpapers come prepasted. I have found that using a premixed paste activator is a superb way to activate the adhesive. You apply these clear liquids to the back of the paper using the paint roller.

CLICK HERE to get FREE & FAST BIDS from local wallpaper hangers in case you're getting cold feet.

Fold the paper immediately back on itself so the activator and glue are not exposed to the air. The moisture causes regular wallpapers to expand.

The wallpaper needs to expand on the worktable, not the wall. If you hang a piece of wallpaper before it expands, you will get all sorts of bubbles on the wall.

It usually takes only five minutes or so for the wallpaper to relax and expand once you apply the adhesive activator. There are non-woven wallpapers that do not expand. They can be applied to the wall immediately after activating the paste.

When placing the sheets of wallpaper on the wall, work the side edge first. Do not allow the wallpaper to fully contact the wall and then try to slide it to the plumb line or the adjacent piece of paper. If you do this, you will stretch the paper and create all sorts of problems. Get the edge in the right position, then allow the rest of the sheet to lay against the wall.

Use the special smoothing brush carefully to flatten the wallpaper against the wall. Brush carefully away from the edge making sure the seam is still tight and there are no air bubbles in the paper.

Trim the excess paper on the top, bottom and edges with the handy snap-blade razor knife. These tools are magical as they allow you to get into very tight spaces to make difficult cuts.

Trimming wallpaper might be the most challenging part of the job. Some wallpapers are very tender and tear easily once they are moist from the activated adhesive. You need to work carefully, yet quickly as some pieces of wallpaper that wrap around doors and windows in older homes can have as many as ten or fifteen technical cuts per strip of wallpaper!

Use the wide flexible putty knife to help guide the razor knife along long cuts at ceilings, baseboard and adjacent to windows and doors. Gently push the wallpaper tight into the corners with the putty knife and cut immediately next to the putty knife blade with the razor knife.

Be very careful cutting around electrical switches and outlets. If you allow the blade of the razor knife to contact the screws of the devices, you can get shocked or severely cut as you panic pulling the razor knife away in a shower of sparks and molten metal.

CLICK HERE to get FREE & FAST BIDS from local wallpaper hangers in case you're getting cold feet.

Column 718

Steam Room

DEAR TIM: I have wanted a steam room in my house for a long time. Are there certain things you must do to ensure a home steam room will work well? Can you tell me exactly how to build a steam room so that I do not have any water or water-vapor issues? Will I need a special steam-room door, or will an ordinary shower door suffice? Nate B., Lexington, KY

DEAR NATE: Your questions sure brought back a flood of memories from my childhood. When I was a kid, my friends and I would go swimming and play basketball at a traditional indoor health facility called the Friars Club. There was a steam room in this building that was a wonderful place to sit after swimming in the cool water of the pool. Although I have built a home steam room for more than one client, I have never indulged myself. My aching bones and muscles have complained about this oversight on more than one occasion!

As you get ready to build a steam room, don't let the benefits of a steam room distract you. Construction details must be followed to make sure this room doesn't become a haven for mold, mildew and wood rot. Steam and wood do not play well together. If possible, all wood framing for your new steam room should be treated lumber, including the subfloor.

Steam is simply water in the vapor form. This water vapor will readily return to the liquid state by condensing on cooler surfaces. Because the steam is so hot, the vapor will readily condense on surfaces that are warm to the touch. You have possibly seen this happen in your own home if you have exited a hot shower to see a fogged mirror. Don't think for a moment that the fog just picked the mirror, it was on the walls, ceiling and even the wood cabinets in your bathroom.

To construct a great steam room, you need to keep the water vapor within the steam room where it can condense and run down to the floor drain. Any steam that does exit the steam room must be vacuumed out of the room and vented through the roof of your home. If at all possible, try to make sure the steam room is not located where one or more of its walls will be an exterior wall of your home. If any of the steam water vapor escapes into the exterior wall, you will have serious water issues sooner than later.

I suggest you consider ceramic tile for the entire room including the floor. You can use a membrane shower-pan liner that connects to the floor drain to capture all of the liquid water. This is the first thing that needs to be installed after the walls are framed.

The second most-important element is a high-performance vapor barrier. You will need to get one that meets the ASTM E 1745 standard. This rigid standard will protect the wood in your home if you install one giant piece on the ceiling and walls without any seams. This vapor barrier must extend over the membrane shower liner that was lapped up onto the walls about 6 inches. The vapor barrier on the ceiling and walls will capture any and all of the water returning it to the floor drain.

Before you start any of this, I urge you to research in great detail the steam-generation machine. The manufacturer of these heaters have very specific installation instructions that ensure the units will generate the amount of steam needed for the room. The steam room must be sized correctly for the steam unit you purchase.

The ceiling height in the steam room should not exceed 8 feet. It is a good idea to slope the ceiling so that condensation drops do not fall on you as you sit and enjoy the soothing steam. A slope of 2 inches per foot should suffice. Cover all surfaces in the steam room with ceramic tile or other similar product that is virtually waterproof. The tile must be applied to cement board or other substrate that is approved for use in a steam room. Use thinset mortar to apply the tile to the cement board.

Do not underestimate the tenacity of steam to seek out and condense on anything. You see steam rooms in health clubs and gyms, but keep in mind that these commercial and institutional building are almost always built with masonry or treated, galvanized steel. This material can deal with liquid water better than the wood 2x4s used in most residential homes.

If you do not want to take the chance and make a costly mistake, you can purchase pre-fabricated steam rooms that simply connect to a floor drain. These steam showers take all of the guesswork out of the process when you follow the easy instructions that come with the units.

It is important to install a sealed door to the steam room. Once closed, the steam can begin to form within the steam room. If air from your house or bathroom is allowed to enter freely into the steam room, it will be hard for the steam to form as it tends to dissipate into the drier air of your home.

The location of the steam-generation unit is critical as is the length and sizing of the pipe from the unit to the steam room. Even the location of the steam head within the steam room is important. Read all of the installation instructions of the steam generation unit before you start the project. Make sure you can meet all of the conditions so that the project will be a success.

Column 717

Customer Reviews

Below are customer reviews received regarding the AsktheBuilder Shop and the Ask the Builder products.


"I just wanted to thank you for a excellent eBook on Crown Molding.  I just recently made this purchase from your website.  What a wonderful on line tool and very easy to follow the directions.  I want you to know that I am a rookie at this type of wood working, but your eBook made the job much easier and far less frustrating to complete the job that I was working on.  Best part about all of this is that I am completely blind or visually impaired as some might say, but had fun working on this task. While I am very capable of working with selected power tools, the guide made the job that seems to be a serious challenge for many, very possible for me.  Thank you for the help..."

- Kevin O'C., Indianapolis, IN


"Tim,

I received my bucket of Stain Solver and have to tell you that the stuff is scary - in a good way! I couldn't believe what it did for the no-longer-white grout on my office floor ... and I swear it continued to work even after I rinsed it off. It not only cleaned the grout, but took a layer of dirt off the tile that I didn't realize was there. Now I have to do the whole room since there is a big, super-clean square in the middle!!

I also put it to work on some very old pet stains on the beige carpet in the master bedroom ... some of them will require more treatment, and you can see that the carpet is slightly lighter where I treated, but it took out spots that we have been unsuccessful at removing with Resolve, Woolite, and a number of other "stain removers". Now I'm looking forward to trying it on clothing stains............

Thanks ... I will tell everybody I know about this great stuff!"

- Lori B., Gonzales, TX


"No question, just wanted to say I stumbled across your website and am verrrry pleased to have found it.  Took me 5 minutes to realize how superb and complete your answers are to questions posted.  Thanks,"
 - Jeff, Lynnwood, WA


"Thanks for the discount for your product. Your lightning quick response to my question and the fact that you would make a recommendation to me even though it did not involve your "stuff" spoke volumes as to your ethics. Even though my floor is already clean, I wanted to try the [Stain Solver] product on some other problem projects, in large part because of your actions in this instance. So, I placed an order tonight. I'm sure I'll be one of your loyal customers like the ones who have given testimonials on your website.

Thanks again."

- Kay, Spring, TX


"Once again thank you for taking the time to address my concerns. I followed your [Stain Solver] instruction on a small portion of the floor and left the solution sit for about an hour now - I can actually SEE it working. I'm running to the store in a few minutes and expect when I get back that the grout will be totally clean - the way it's worked so far I don't have much doubt that will happen. "Oh ye of little faith"!!

What a JOY it is dealing with a "vendor" who cares about his customers. I've had nothing but nightmares recently with Sears - therefore your response is even MORE meaningful!"

- Barbara, Miami, FL


"I am a new subscriber to your newsletter after finding your website in a search for a problem that I had. I can't remember what the problem was now, but in viewing your website I saw the information about Stain Solver and decided to order some for use on a deck.

A few days after it arrived, my husband dropped a plastic half-gallon container of cranberry grape juice on the ceramic tile in the doorway to the kitchen. The lid broke and the juice -- about half the jug -- shot across our light beige Berber carpet. We soaked up as much of the juice as possible with old bath towels. I then saw the Stain Solver box sitting on the counter, so I decided to mix up some and try it. I poured the solution liberally on the carpet, worked it in with the back of a large spoon (so as not to damage the carpet fibers), then vacuumed it up with our shop vac. I did this several times and was amazed that the carpet appeared clean!

In the morning there was a pink cast to it, however, so I repeated the process and this time also tried a hint that I found on the internet. I put paper towels on the cleaned wet spots, then a bath towel, then plastic wrap, and then heavy books. I left it that way overnight, then removed it. The stain was gone. The last procedure helped to wick the remaining stain up out of the carpet and into the paper towels.

I never expected anything to take that huge deep purple-red stain out. Your product has paid for itself a hundred times over in saving me from having to recarpet my condo."

- Karen V., Woodbury, CT

"PS: Fortunately the juice was sugar-free so I didn't have to worry about whether there would be any sticky residue, although Stain Solver might have taken that out, too."


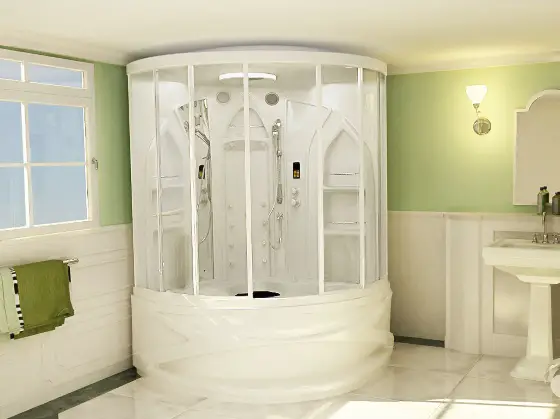
"Well, I've got the [Shower Pan Liner] EBook & am anxiously reading it. I can already see in the details about leaving a gap in the studs for the membrane fold is the type of info that is invaluable ......... I already like what I see after just reading the first couple of pages. In fact, I liked it so much, I called my wife over to the computer & had her read it with me. ....... Well, I've got more reading to do so I'll get to it!"

- Greg Kolber, San Jose, CA


"I purchased six pounds of your Stain Solver almost a month ago. I cannot believe how great this stuff works. (I will eventually send you some pictures once my daughter shows me how!)

I did my mom's deck first, it has been much neglected and had a lot of mildew/algae built up on it. She is 77 and I was worried she may slip and fall on it because it was quite slimy when wet. I showed up with my rag mop, bucket, long handled scrub brush and the piece of resistance (imagine a French accent) - Stain Solver. Both my mom and my sister gave me a look like why are you wasting your time, why didn't you bring the pressure washer? I told them to just go about their business because I did not need any help and that they would both be surprised to see the results. They did not act to enthused until they, like me, saw the first few boards. After I had let [the Stain Solver] sit for 10 minutes, it was like brand new wood.

I could smell the mildew/algae as I scrubbed with my brush, it just like melted off the wood. I told my sister to come up and see the results in just the little area I had scrubbed. She was amazed. She stayed right up on the deck and was like - "What can I do to help?" I couldn't keep her away from my bucket of Stain Solver. She was like "Do you think this would work on the grease stains on the garage floor? Could I use it on this or that…..?"

Both my mom and sister were so happy that it didn't hurt her plants around the deck. I'm bummed because I used almost all of it on their deck and now I won't have enough to do mine. I also wanted to tell you what else I used it on, my bird bath. It was very nasty and slimy. I sprinkled a little in and filled it with water and let it sit for maybe 20 to 30 minutes. I scrubbed a little with a brush and rinsed it very well. It looks brand new!

Well the main reason I am writing is I need to order ... the 12 pounds and use my coupon. ... Thank you."

- Pam P., Traverse City, MI


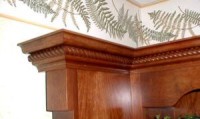
"I was very pleased to not only receive the EBook on cutting Crown Moulding but to also get your explanation of what happened when I ordered it twice and a refund for the second order... There are still good honest people out there. Impressive. I have had a chance to quickly read through Tim's book and as a long time DIYer was impressed. I have never had the chance to work with crown as yet but our latest renovation project has lots, so I am eager to get at it now. Thanks again for the honest... and prompt... service."

- Glen Adam, Alberta, Canada


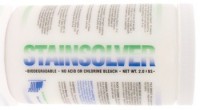
"WOW, that's all I can say! I purchased your product last week to clean the grout on my 800 sq. ft. of tile, and it looks as clean as the day we moved in eight years ago. I must admit, I was a little skeptical when I ordered the Stain Solver, but after having used it, I know I will always have some on hand and look forward to cleaning my wood deck this spring. This is by far one of the best products I have purchased in many, many years. Thanks Tim!"

- Ed, Macomb, Michigan


"Thank you for sending me the Room Addition Checklist. I read through the document, and it's quite thorough.

I know that this will be a useful and valuable document for me."

- Fredia J.


"I bought Stain Solver for the grout on my bathroom floors. Wow! I have tried numerous products to clean the everyday dirt, but nothing brought my grout back to its original white color. Stain Solver did the job, and I was amazed. Thanks!

Place your right hand on your left shoulder, and your left hand on your right shoulder...squeeze. There, you've just had a hug from utvandymom! Have a great day!"

- Margaret from Tennessee


"Thank you, Tim.

I used your (Walk Thru) checklist for the condo I plan to buy and really surprised all involved. They had only allocated 30 minutes for my walk through since it's just a condo, but I kept them there longer and feel much better. There were only a few things that need attention but I would have never noticed them if it weren't for your packet. So, thank you.

All the best,"

- Holley S., Nashville, TN


"This is what I call CUSTOMER SERVICE !!!!!!!! In today's business the customer is not often treated with respect, so I was surprised by your quick response. Thank you."

- Bill L., Stoney Creek, Ontario


"Hi Tim,

Your product is, by far, the best grout cleaner I have ever used, and I thank you for delivering "the goods" , in more ways than one."

- Al Lawrence, La Jolla, CA


"Hey Tim,

I wanted to thank you for the excellent book you wrote about crown molding. It was my first time trying to put crown molding in my house today. It looked easy until I actually tried it, then I got pretty frustrated. I came across your website after trying to get some help on the internet, and then I saw your book. Your book was the best money I could have spent. Within minutes after reading the section on inside corners, I was back at it again making the right cuts the first time! So easy a caveman can do it! The resale value of my house is definitely going to increase now. Thanks again for writing the book - it was a lifesaver!"

- Nick Agle, Kennesaw, GA
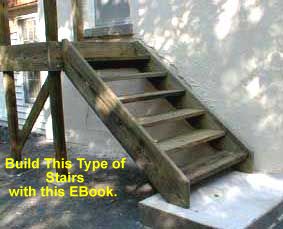

"Hi, Tim,

Your ebook "Building Simple Stairs" was an excellent guide in building a proper staircase. It was written in a straightforward, easy-to-understand style, the pictures were very useful, and your advice was invaluable. The guide contained tips that saved time, aggravation, and money. There were many suggestions that I don't have in other help books that cover the same topic. I particularly appreciate your advice on building stairs with mortises, adding the 1.5" edge, and using the X-acto knife to mark the mortises. Very clever.

Thanks to your guidebook, we were able to build a set of stairs – with a landing and U-turn nonetheless – and turn an unused attic at an outbuilding at my cottage into a usable loft. We now have an extra place for guests to sleep in two weeks for (Canadian) Thanksgiving weekend!"

- Rob Hyams, Ottawa, Ontario, Canada


"Hi Tim,

Just wanted to let you know that with your advice to use stain solver and a just a little bit of elbow grease we were able to clean & recolor/seal approximately 300 square foot of grout for a fraction of the cost. We were quoted $650.00 from a professional grout cleaning company. The cost of your Stain Solver, a long handled grout brush (easy on the back for the cleaning part) and the stain/sealer combination came to a grand total of $65.00. We now have a floor that looks brand new for 1/10th the cost!"

- Wanda Sidley, Cleveland, OH


"I received my order Thursday afternoon. My kitchen tile floor is disgusting. We have light/medium brown grout in between, but this had gotten super dark brown and I couldn't stand it anymore.

Some areas that didn't have heavy traffic, still had the original color that it is suppose to be. The heavily traffic areas were awful. I was going to hire someone to come out and steam clean it, although I didn't know if that would work. I just refused to scrub that floor. I would have an awful backache. I told my husband, I'm done cleaning this floor. No more.

I used the product, took extra powder and water just to get the first grout layer clean. I flooded my kitchen with the solution. Let it sit as long as I could, 1 hour, and then proceeded to mop up the mess I made. We had company coming in Saturday. The floor looks 98.9 percent better. I plan on re-doing the whole floor one more time. Like I said, it had gotten real bad. Now every time I mop my floors, I will use this Stain Solver solution to clean with.

Thank you again. I will let you know how the next application makes my tile floor look."

- June Hunter, Jacksonville, FL