Concrete Deck Foundation Details

concrete deck pier

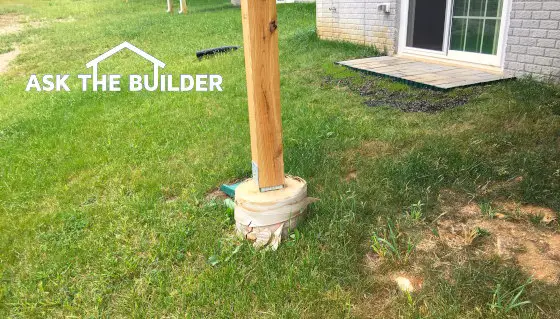
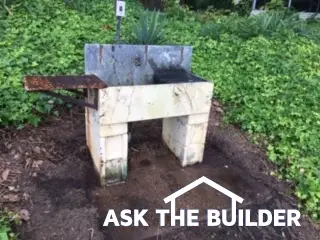
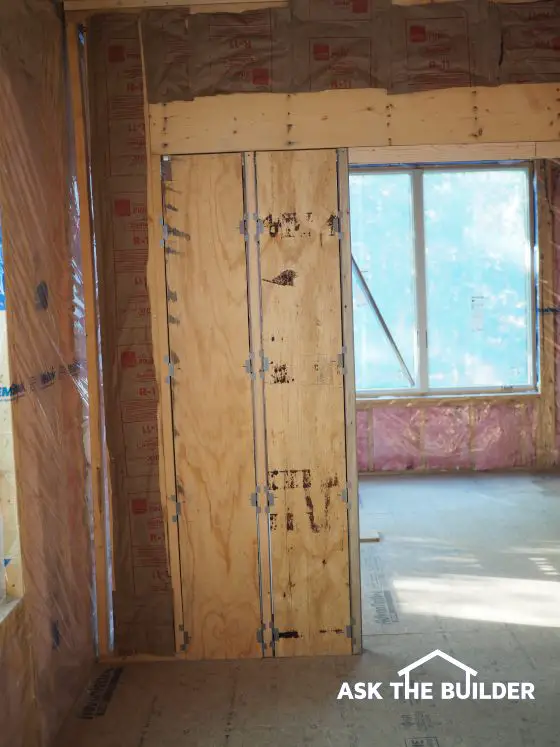
Concrete Deck Foundation Details | This round concrete deck foundation pier may look shabby but it’s quite possible it’s installed correctly so the deck post will not fail. (C) Copyright 2019 Tim Carter

Deck Foundation

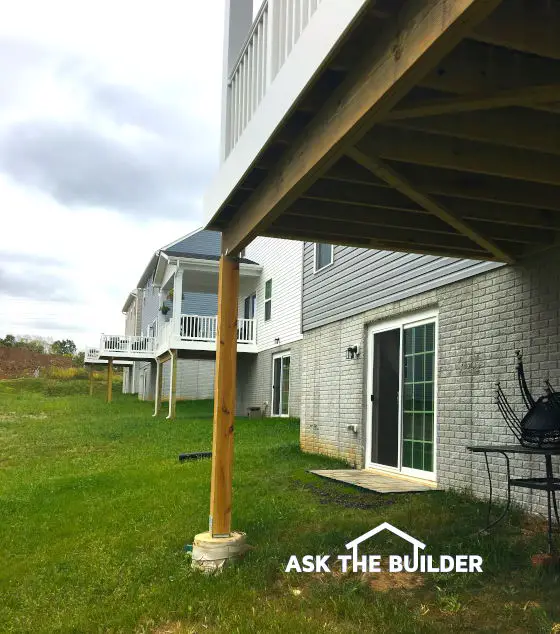
DEAR TIM: I’m concerned about the concrete deck base that’s fully above ground at my new home. The other decks in our development have the concrete piers below ground. Shouldn’t the concrete be completely buried to protect against freezing and cracking in the winter months? What do you feel are the best concrete deck foundation details? Jeff K., Falling Waters, WV

I don’t know about you, but I love questions like Jeff’s. I can absolutely understand his concern based on the data that he’s considering. When you think about it, it’s not far-fetched to think that his deck foundation piers are wrong when his are the only ones that look like it in the neighborhood! But you and Jeff need to cast a wider net to gather more data points that will give you the comfort that your job was done right. Trust me, the truth is out there.

But think about this: Is it possible the carpenter that built Jeff’s deck was the only good one in the development and the other ones are ill-informed and lack critical thinking skills? You bet it’s possible. I see it every day in the photos and emails I get on my website.

The two photos Jeff sent me show me that the builder or carpenter got everything right as far as what’s supposed to happen above ground. It would take less than an hour with a round point shovel to determine if the deck pier extends below the frost level and has a wider concrete footing that the circular deck pier rests on.

round concrete deck pier

(C) Copyright 2019 Tim Carter

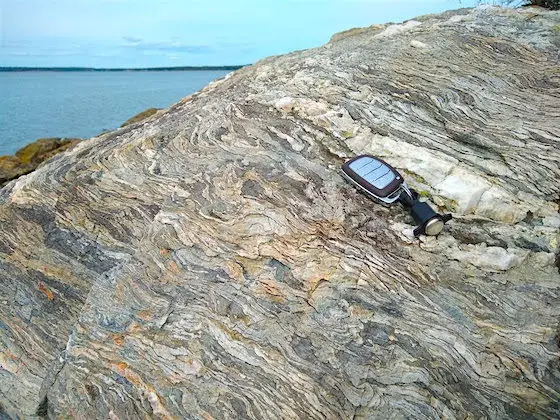
Let’s discuss Jeff’s deterioration concerns first. Concrete is an artificial man-made rock. If it’s mixed and installed properly for the local weather conditions, it can last for hundreds of years. All you have to do to prove this is visit a few railroad bridges in your area that have poured concrete abutments that support the bridge structure. I’ve seen concrete bridgework that was put in in the early 1900s that looks in excellent shape.

You can also look around to see above-ground poured concrete house foundations in your area that might be eighty, or more, years old. It’s all about adding enough Portland cement to the mix and making sure you don’t add too much water to the mix or use water to finish the concrete. Curing the concrete to slow the release of the mix water is also very important.

Jeff is probably worried about frost heave and/or he should be. Soils that contain water in freezing climates can expand and they go up in almost all cases. Here where I live in central New Hampshire, the soil around my house goes up at least 3 inches each winter. It can go up even more if there’s an active spring under the soil. Ice lenses grow and grow pushing the soil above them higher as the bitter weather drives the frost deeper in the soil.

Builders, engineers, architects, and building inspectors are all aware of the frost depth in a local area. I’ve got a drawing on my AsktheBuilder.com website showing the frost depth across many areas of the USA. If you live in the farthest northern reaches of Minnesota or Maine, you might have to dig down at least 6, or more, feet to get a foundation footing below the depth that frost penetrates!

You want your deck piers to be below the frost level so the deck doesn’t lift up. This kind of unwanted force can cause severe structural damage to the deck.

I’ve worked with many architects and engineers in my building career. Most of their plans all agree. It’s important to realize you need to spread out the concentrated load of the deck posts across as much soil as you can. Usually, a 6 or 8-inch-thick 2-foot-diameter poured concrete pad below the frost depth is sufficient to distribute the weight of the deck.

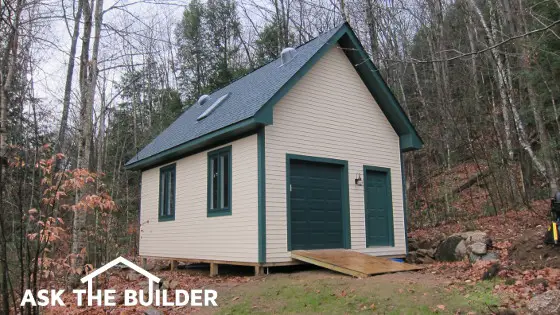
There are all sorts of ways to install a deck foundation base or pier. I can think of no less than ten off the top of my head. The most ingenious method I’ve seen to date, and I used this on my own deck and for shed foundation piers I built four years ago, is a plastic deck pier form you snap together on the job site. It even comes with all the required pre-bent and pre-cut reinforcing steel rods! I’ve got several videos of this marvelous deck pier system on my website.

This deck pier form is designed so its base is flared out at the bottom so it spreads out the concentrated load. You just dig the hole to the correct depth, make sure the soil is compacted, set the form in place and then immediately backfill around the form with the soil you just dug out of the hole. Add this soil slowly so you make sure the form doesn’t move.

You then fill the form with the concrete, place the anchor bolt for the post base and wait one day to start building the deck.

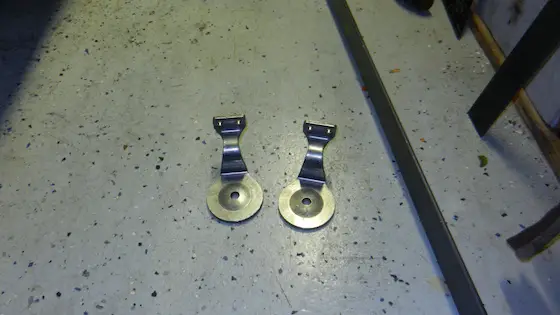
I prefer to have the top of my concrete deck piers at least 4 inches above the final grade around the piers. I don’t want my treated lumber posts buried in the soil as I’ve seen them rot and be a food source for termites. I always use a galvanized steel post base that keeps the bottom of the wood post up and off the poured concrete. This allows water to drain away from the wood.

Column 1323

Outdoor Sink Restoration & Handrail on Brick Wall

natural stone outdoor sink

Outdoor Sink Restoration | This is a stunning outdoor sink (featured in the September 22, 2019 AsktheBuilder Newsletter) made from natural stone. It was originally installed to clean fish. Special sealers should be used to preserve it. (C) Copyright 2019 Tim Carter

Outdoor Sink Restoration

QUESTION #1: I’m in the process of restoring a grand natural stone outdoor sink. It’s made from some type of natural stone. Locals tell me it’s soapstone. Once restored, it’s going to be used as a beverage serving station for outdoor parties. Someone painted it years ago and after stripping the paint, the stone is a matte finish and rather dull. I’d like to enhance the color and protect it from the elements. What would you recommend? JoAnne G., Earleville, MD

My college degree is in geology and I can tell you that just about every natural stone has a natural resistance to weathering. This is but one reason why mountains exist. That said, it can be a good idea to seal certain polished stones to minimize deterioration from freezing weather and oils that might stain the stone.

JoAnne sent me several photos of this grand sink and they’re all visible on my AsktheBuilder.com website. The stone does resemble soapstone in appearance. There’s an easy way to determine it as soapstone. True soapstone is a metamorphic rock that’s got a high content of talc. Talc is extremely soft and soapstone can be scratched with relative ease.

outdoor stone sink

Soapstone also feels smooth and slick when dry just like wet soap. Stone fabricators often tell homeowners who use soapstone for countertops to coat the stone with linseed oil. My experience has been dreadful doing this as everything you set on it picks up the oil. Do this outdoors and your soapstone will be black in weeks as mold and mildew will feast on the natural oil.

My suggestion is to purchase a cordless electric orbital buffing tool that car body shop techs use. I’d invest in some marble polishing compounds to bring back the luster of the natural stone. Start on the rear of the tall panel until you determine the correct method to get a fine polish.

There are quite a few great videos online showing how to polish marble. Watch those as soapstone reacts to polishing just as marble does.

Once you get the stone looking as good as possible, I’d then test out on the sink back the clear penetrating sealers recommended for use on granite countertops. These sealers can penetrate into the microscopic cracks in granite and will do the same in the soapstone. The sealers work well on just about every natural stone. Simply read the label to see if there are restrictions.

Don’t expect a sealer alone to product magical results if the stone is dull and scratched. The stone needs to be polished before sealing. Beware of sealers that are like urethane or varnish. These form a film on top of the stone and will eventually peel leaving a huge mess.

outdoor stone sink

Handrail on Brick Wall

QUESTION #2: Help Tim! I need to install a wrought iron handrail down an exterior stairwell. One of the mounting brackets will be on the poured concrete foundation wall but the other one must be on the exterior brick. I don’t want to ruin the brick and realize I must get this right the first time. What would you do to prevent the handrail from pulling away from the wall? Ken B., Homewood, IL

Ken’s facing an interesting conundrum. You do usually only get one chance to get this installation right. Ideally, it would have been best to put in through bolts in the masonry walls, but this is also extremely problematic.

I’ve tested all sorts of masonry anchors over the years and some are far better than others. Lately, I’ve had the best success coupling wedge anchors with high-strength epoxy.

A wedge anchor looks just like a normal threaded bolt at one end. However, the business end of the anchor is cone-shaped end and a secondary steel sleeve fits over the cone. As you tighten a nut at the end of the anchor it pulls the cone-shaped end into the sleeve causing the sleeve to grow in diameter and wedge itself into the masonry.

This friction helps offset the pulling force exerted by the weight of the handrail and anyone pulling on it. However, I’ve had failures with just using the anchors alone even though I made sure the drilled hole was not oversized and the hole was free of grit and dust.

I decided to start testing a new method where I angle the hole as I drill into the masonry. I move the drill left and right about 15 degrees off-center to create a hole that is much wider deep in the masonry than the small-diameter hole that you can see on the face of the brick or concrete.

I blow out all the grit and use a bottle brush to make sure every bit of dust is removed from the cavity. I then squirt in a special concrete epoxy so the hole is just about filled. I coat the wedge anchor and then push it into the hole so that some of the epoxy squirts out. I clean off the epoxy and allow it to cure for 48 hours before applying tension.

IMPORTANT NOTE:

I created a special column about Ken's project with photos and a list of all products I suggested he use. CLICK HERE to read the column on how to install handrail into brick.

Column 1322

PEX or Copper – Which One Should I Use?

PEX cold water lines

PEX or Copper | These are PEX cold water lines in my daughter’s new home. Each blue tube supplies cold water to a single fixture. (C) Copyright 2019 Tim Carter

Which one - PEX or Copper?

DEAR TIM: I have to install some new water supply lines in my home. My current home has copper water supply lines. I’m intrigued by the plastic PEX material and it seems too good to be true. Using PEX I’d only have a joint in my basement and then up at the shutoff valve at the fixture. Hard copper requires many more fittings and lots of soldering. What’s been your experience with both materials and what would you use in your own home? Victoria C., Grand Rapids, MI

I’ve been a master plumber since age 29. You may have the same interest in water supply lines in your own home just like Victoria. The good news is I’ve got deep experience with both copper and PEX water supply lines.

It’s important to realize that I could write an entire book on the topic of copper vs PEX water lines. There’s simply so much information to know about both products and the pros and cons to each. Another key point is there are different types of plastic PEX piping and different systems. With that in mind, I’m going to give you the Cliffs Notes version. You’ll be able to make a sound decision for sure.

I cut my teeth as a young plumber using copper. PEX hadn’t even been invented at the time. Plastic PEX tubing first was introduced into the USA market as a radiant floor heating product in the 1980s. Just over twenty years ago, in the 1990s, PEX started to appear as piping material for use in domestic potable drinking water supply.

Copper is a time-tested water supply line material, but it’s not immune from trouble. There are places in the USA where the water chemistry is aggressive. The water can actually dissolve the copper and cause pinhole leaks and other catastrophic failures. Copper is also subject to splitting if the water in tubing freezes and expands.

Copper is easy to work with. Believe it or not, a homeowner with just a little practice and inexpensive tools can cut and solder copper creating leak-proof joints. It may seem intimidating, but I recorded a video years ago showing how to solder copper in just minutes. You can watch the video by clicking here.

The issue with copper is that it takes quite a bit of time to install a water line from one part of a home to another. You might have five, or more, fittings to get from point A to point B. Each fitting requires you to cut and clean the pipe, clean the fitting, apply flux, and solder. Working with a hot propane torch around wood can be dangerous. Countless house fires have been started by plumbers and DIYers who underestimate how fast a torch can ignite nearby combustible materials.

There’s a newer system to attach fittings to copper tubing without solder. The fittings have a rubber o-ring inside them and an expensive tool crimps the fitting onto the end of the tubing to make a leakproof connection. I doubt you can afford to purchase the required tool. The fittings are also expensive compared to those you solder.

PEX tubing is a magical material. For the most part, you install it like you’d run an electric cable from a circuit-breaker panel to a wall outlet. You snake the PEX tubing through floors and walls from a manifold or adapter in your basement or crawlspace and then end the tubing at the fixture. There are no joints at all that can leak between the two points.

I prefer the Uponor PEX system. You create a leakproof connection using a small PEX collar that slides over the end of the tubing. A tool is used to expand the PEX so it can slide onto the end of a fitting. It’s far easier to create a joint using PEX than copper and I created a Connect PEX video at my website to show you just how easy it is to do.

The PEX tubing has a memory and wants to go back to its original shape so it starts to squeeze very hard onto the ridges on the fitting. After a short time, it’s impossible for me to try to pull the tubing off a fitting. I’ve never ever had a leak with PEX tubing.

Another benefit to PEX is its resistance to splitting when water freezes inside the tubing. In my current home which I did not build, a second-floor water line to a sink always freezes in bitterly cold weather because the builder and plumber goofed up installing the PEX. The tubing has never split and leaked.

You can purchase electric tools that expand the PEX or you can use hand-powered versions. Watch this video of mine to see how easy it is to make up a PEX joint. You couldn't even clean the copper in the short amount of time I can COMPLETE a joint!

Cutting the PEX accurately is important and a simple hand tool cuts the tubing square and perfectly each time. Watch this video to see how easy it is to cut PEX tubing:

You can install PEX as you would a traditional copper system where a larger-diameter pipe supplies water to all the fixtures as the large line snakes through the house. Or, you can install a separate water line from a manifold to each fixture. The manifold method ensures you have no hidden joints or fittings hidden in walls or ceilings, but you end up using much more tubing material.

I’m a big believer in PEX and because it’s so easy to install, I’d use it in any new home I’d build. I just installed over 6,000 feet of hePEX in my daughter’s home for radiant heating and I installed about 1,500 feet of PEX for her hot and cold water lines. We went with the manifold system because I didn’t want any hidden fittings anywhere.

Column 1321

Foam Insulation Above Windows & Painting Bath Tile

foam insulation above window

Foam Insulation Above Windows | This is a beam across the top of a window. It should have had twice as much closed-cell foam insulation. (C) Copyright 2019 Tim Carter

Foam Insulation Above Windows

QUESTION #1: Tim, I need your expert opinion. I’m building a new home with 2x6 exterior walls. Beams have to be installed over the top of all windows and doors. What’s a great way to insulate these as the solid wood creating the beam doesn’t have a very high R-value. What did you used to do and did you ever have any failures? Beth S., Table Rock, WY

You may be building a new home or contemplating a room addition like Beth. If so, you’ve got a once-in-a-lifetime opportunity to make your home as energy-efficient as possible. It’s important to realize that once the wall framing is covered with exterior siding, brick or stone and the inside is covered with drywall, paneling, or plaster, it’s impractical to tear everything apart to add more insulation over a window or door.

The issue of beams, or headers, over windows and doors is somewhat complex. The size and number of the framing members used to create the beam depends on the load that’s pressing down on top of the window or door. This load can be small or it can be enormous.

The last home I built for my family had a header over an opening that had a concentrated load on it that was the sum of 1/4 the load of the entire second floor, plus 1/4th of the attic floor, plus a large part of the roof. One end of a large beam carrying all that load was resting on the header, or beam, that spanned over the opening.

You want the smallest beam height as you can get by with that will handle the load as calculated by a residential structural engineer. These professionals almost always include an additional safety factor. If you oversize the beam to a great degree, you simply have too much solid wood where there could be a full-thickness fiberglass batt or spray foam depending on what you’ll use for your wall insulation.

For example, a small narrow window in a wall that has no concentrated loads above it may have a header beam that’s just made with one or two 2x6s and the rest of the space can be filled with closed-cell foam insulation.

The wider the window or door opening the taller the wood beam must be to handle the load above the space. Engineers will tell you if the beam needs to be made from something as large as multiple 2x12s.

I’ve installed countless header beams across windows and doors and never had any failures. I never used more than a double 2x12 in the largest openings. In rare cases, the engineer or architect called for a metal flitch plate that was bolted to the inside of the wood header. The steel added an extreme amount of strength to the beam.

Closed-cell foam is a great material because it also acts as a very good vapor retarder. The foam comes in various thicknesses so you can fill the space in the header completely with foam depending on how much wood the engineer or architect specifies.

Painting Bath Tile

QUESTION #2: Dad, what can I do to make the tile in my apartment bath and shower look better? I just want to paint the dingy tan tile all white. Should I coat the paint with a clear coating for durability? What problems might I have? Your loving daughter, Kelly

Yes, my daughter texted me that question last night. She lives in Puerto Rico and at least had the good sense to ask me what to do before creating a nightmare.

Painting tile can be very problematic. It’s important to realize that paint is just colored glue. Most consumer paints prefer to stick to rougher surfaces like drywall and wood, not glass. The surface of almost all ceramic tile has an ultra-thin top layer of glaze or glass. That’s why most ceramic tile has a gloss to it.

The internet is littered with stories from homeowners who paid companies to come out and *re-glaze* their porcelain or cast-iron bathtubs. These tubs have the same ceramic glaze on them as tile. If you truly want to re-glaze a tub, you need to rip it out and send it back into a kiln.

The companies don’t re-glaze the tub. They paint the tub with special epoxy paint. Go read the stories about how some of these installations fail and the paint peels. It’s all about adhesion, never forget that.

The paint, and even a clear coating you might use to protect the paint, generally are not as hard as the glaze on tile. This means that they can be scratched with ease and cleaning with any abrasive cleanser will absolutely dull the painted finish.

Water is the biggest culprit and painted tile in a shower stall will almost always fail in short order. I’ve successfully painted wall tile that doesn’t get wet. You can paint floor tile in a room and coat it with three coats of water-based clear urethane. The urethane protecting the paint is the same product used to protect hardwood floors. Once again, this will work well as long as you don’t subject the painted floor tile to lots of water.

Column 1320

Install Handrail Into Brick

install handrail into brick

Install Handrail Into Brick | The blue chalk line marks the future location of the iron handrail. You only get one chance to get this right. Copyright 2019 Tim Carter

Install Handrail Into Brick - Easy with Epoxy & Studs

You need moderate skills to install a handrail into brick and poured concrete. It's important to realize that you can't use regular expansion anchors in the brick as they very likely will fracture the brick if they're not solid.

What Tools Are Required?

You'll need the following tools to complete this job:

  • a hammer drill with a bit sized to match the anchors and threaded rod
  • a 3-foot plastic flexible tube
  • a small bottle brush slightly larger than the diameter of the drilled holes
  • a caulk gun
  • a ratchet with assorted sockets

What Materials Are Required?

You'll need the following materials:

What Do I Do Next?

It's important to realize the handrail must be parallel with the nosing of the steps. The handrail height must be no less than 34 inches and no more than 38 inches in a vertical line that extends up from the tip of the nosing of any tread.

My experience has shown that 35 inches is a very comfortable height and small children can reach this handrail.

You need a helper or two to hold the railing in place with the brackets attached to the railing. You will triple-check that the railing is parallel with the stair tread nosings and at the right height.

Mark the hole location of the two mounting brackets. Look at the following photo to see what I mean.

install handrail into brick

These two brackets are what will hold the handrail to the wall. The code requirement states that they must resist 200 pounds of pull force. Remember, that's a MINIMUM requirement. Copyright 2019 Tim Carter

With the holes marked, you drill a hole that's the size of the stud anchor you choose to use. I would highly recommend using a 1/2-inch by 4-inch-long stud anchor. You may have to enlarge the hole in the handrail brackets to make this work.

You use the plastic tube and bottle brush to make sure every speck of dust is out of the drilled holes. Any dust in the holes will interfere with adhesion. Do NOT have your face in front of the hole when you blow through the plastic tube. A visit to the emergency room to have your eyes cleaned out is expensive.

Watch this video for the foolproof method of drilling the holes so the stud anchors never pull out of the wall:

How Long Should The Epoxy Cure?

I would allow the epoxy to cure for at least 48 hours before I'd install the handrail.


Should A Shed Look Like The House?

house & shed look alike

Should A Shed Look Like The House? | The shed is a miniature version of the house. This is first class all the way. (C) Copyright 2019 Tim Carter

DEAR TIM: I want to build a deluxe shed. I’ve just retired and have plenty of time on my hands. I want to stop paying the outrageous offsite storage fees. First and foremost, what do you think of my shed matching my house? Is this a good idea or a waste of time? In your opinion, what are the best things to include in a shed? What are the biggest mistakes homeowners make when they build sheds? Daniel P., Lincoln, NE

You may be in the same situation as Dan. You’ve accumulated so much stuff that you pay to store it at some offsite facility. If you add up what you pay in a year, you can buy quite a bit of material to build a handsome shed in just a few weeks. Ask most realtors and they’ll probably say a nice shed adds value to a home.

Most people think about if the shed should match the house color, but that’s where it stops. Only a few take it the next step and wonder if the shed should match the actual house! Yes, you can create a miniature version of your house in almost all cases. It’s not as hard as you might think and believe me, you’ll get more compliments from friends, neighbors, and visitors than grains of rice in a 50-pound sack!

The process of making the shed match the house is fairly simple. It’s important to realize the first step is to create a simple plan of the minimum size your shed should be. One of the biggest mistakes homeowners make is building a shed far too small for their needs. I recorded a video a few years ago showing how very simple it is to create a perfect shed for your stuff. You can view this Planning a Shed Video by clicking on the link.

Should A Shed Look Like The House?

Once you have the outer dimensions of your new shed, you need to see how they compare to the shape of your home. If your home is rectangular, then try to mold your shed dimensions to mimic this shape and maintain a reasonable ratio if possible. It doesn’t have to be perfect, but you’ll achieve the best possible look if you maintain both the shape and size ratio.

My sheds have always had electric power in them. It’s so nice to have lights and to be able to plug in tools. A simple 30-amp 240-volt circuit is usually plenty of power for just about anything you’d do inside a shed.

I discovered about twenty years ago that overhead doors offer the most utility getting things in and out of sheds. A 6-foot-wide door allows plenty of room to get a decent-sized lawn tractor in and out of the shed.

If your home is two-story you get an added benefit. You’ll discover when you do the height ratio that the shed ceiling height will almost always be about nine or ten feet tall. This allows you to include a small loft along one or two walls for extra storage of larger boxes.

Many sheds have wood floor systems. You’ll want to use treated lumber for your floor joists and I’d highly recommend using treated plywood for the flooring. Treated plywood is readily available from most neighborhood lumberyards and you never have to worry about the floor getting wet.

The last shed I built not only had treated floor joists and treated plywood, but it also had 4 inches of closed-cell foam insulation in between the joists. This foam was flush with the top of the joists allowing me to finish the shed at a later date and have a toasty warm floor in winter months.

wood sheds

This is a wood shed that has a handy 6-foot-wide overhead door. You can pull in a garden tractor with ease. Wind can cause swinging doors to slam shut. An overhead door seals better against the weather. Copyright 2017 Tim Carter

The biggest blunders made by homeowners shouldn’t surprise you. Don’t be a fool and forget natural light. You can incorporate simple low-profile skylights or roof windows to let in copious amounts of natural light.

I’ve received countless emails from homeowners who failed to install a normal 3-foot wide normal door in one wall of their shed. They want to know how to add one at a later date. Large swinging shed doors are a pain and can be dangerous on windy days. A normal man-door in addition to a larger opening is a must. Avoid that mistake!

Don’t skimp on the foundation. All too many sheds I’ve seen are just setting on concrete blocks on the soil. Do this and your shed may start to roll around the neighborhood in the next windstorm. Your shed may get twisted out of shape without a great foundation system should you live where the ground freezes. Frost heave can lift the shed unequally and contort it so much you can’t open a door or window.

Be sure you don’t build the shed too close to the ground. It’s best to have at least a 6-inch air space under wood floor joists for some air circulation. You can install decorative screening to keep critters from living under the shed. Install a great vapor barrier under a concrete slab that is the floor of your shed. All too many homeowners forget this important step!

Column 1319

September 15, 2019 AsktheBuilder Emergency Announcement

Did you see the overnight news about the horrible multi-story deck collapse in New Jersey?

At this time, I don't believe anyone died, but several were seriously injured.

CLICK or TAP HERE for a local news story.

You could become a statistic in the future if a deck you're standing or DANCING on collapses.

The news dovetails in with my announcement about my Basic Structural Concepts eBook sale.

For just $7, you could discover lots of things on WHAT TO LOOK FOR on your own deck or one at someplace you visit to make sure it's STRUCTURALLY SOUND.

This eBook is over 126 pages and it's written for the non-engineer.

The book could SAVE you or a loved one from getting killed or injured.

I guarantee you that you'll NEVER again see the price this low for the book and if you've been a subscriber for decades you know this is a RARE sale on this item.

CLICK or TAP HERE NOW and just get the book even if it's just for future reference.

STAY SAFE!!!!

Tim Carter
Founder - www.AsktheBuilder.com

September 15, 2019 AsktheBuilder Newsletter

Are you a new subscriber? I'm about to summon my fellow NH wizards and we're going to cast a protective spell on you and all your underwater allies. You'll be able to eat what you want for the next three days with no ill effects if all goes well.

If you've been here for a while, then you know what three cups of coffee does to me, right?

Fun and Games

What's that old saying? "It's all fun and games until someone gets hurt."

No, I didn't get hurt, but you're going to have some fun playing a game in a few minutes. The last few years, I've started a tradition at the end of summer here above the Equator.

About seven years ago, I discovered, quite by accident, that you love love love playing an adult game of digital hide and seek.

The best part is that you get to see stunning photos of what you can do in your own home with LE Johnson door suspension hardware.

I've installed LE Johnson pocket door and wall-mount door hardware for years. Just four months ago, I put in a converging set of LE Johnson pocket doors in my daughter's new home.

pocket door plywood

CLICK or TAP HERE now to see a short video about pocket doors reinforced with thick plywood. This allows you to hang heavy things on the pocket wall!

LE Johnson is the biggest sponsor at AsktheBuilder.com year in and year out. Over the years I've tried to cultivate relationships with the BEST companies.

I want you to be made aware of the great products I use and put in the homes of my kids and friends. It's all too easy to put junk in your home and I don't want that to happen.

You can HELP ME continue to SHARE GREAT PRODUCTS by playing the End-of-Summer LE Johnson door game.

I GUARANTEE you'll laugh no less than three times. If you don't then you can go to lunch with my wife Kathy as she almost never laughs at my jokes.

If you don't want to play the game, then I challenge you to just look at the following six photos and IMAGINE the question I might be asking you in the game. I'll bet you get the questions WRONG. BWAHAHAHAHAHA!

You Can Hang Heavy Things on Pocket-Door Walls

Don't Cut Off Your Finger For Goodness Sakes!

A Gardener's Delight

Candles, Warm Water, Maybe Some Wine!

Oh, I'm So Hungry!

Are You Related to Detective Columbo?

Okay, do I have your interest now? I thought so.

CLICK or TAP HERE after clicking all six of those links above and see how good your eyes and cognitive skills are.

End World Hunger Idea!

I've got an idea that might end world hunger. It's baked, pun intended, into the game.

I'm curious if you feel the idea has any merit.

CLICK or TAP HERE and it will be obvious as to what the idea is.

Water Leaks and Artificial Stone

Look at this house in Oklahoma.

 artificial stone leaks


The homeowners did the installation of the artificial stone above. From what I can tell, they did an outstanding job.

But they made one very critical mistake and are now suffering. Can you guess what they did wrong?

CLICK or TAP HERE to see if you have home building super powers.

I'd say that's quite enough for a Sunday morning or evening if you're in Australia or Japan!

I'd LOVE to hear back from you what you thought about the LE Johnson game. Share with me what you think about the design possibilities of these doors and MORE IMPORTANTLY, let me know if you prefer to discover new products inside a game like this.

I'll leave you with this. What kind of rock do you think this is? That's a car no-key fob for scale.

rock with no-key fob

My college degree is in geology and I'm here to tell you this is a handsome rock in person. It's at a secret location that I'm not allowed to tell you about unfortunately.

Tim Carter
Founder - www.AsktheBuilder.com
Clean Corian Sinks! - www.StainSolver.com
Pound Brass Oh Yes - www.W3ATB.com

Do It Right, Not Over!

P.S. The Basic Structural Concepts eBook sale ENDS in 18 hours. CLICK or TAP HERE to get it now. It's 126 pages for goodness sakes! This is an INCREDIBLE DEAL you don't want to miss.

LE Johnson Q3 2019 Fun Game

I want you to guess how many cups of coffee I consumed while creating this game.

To arrive at the CORRECT answer, you need to answer all the questions and then see what I have to say in the Feedback comments after you answer.

Step One: Click each of the following links and STUDY what you see

You Can Hang Heavy Things on Pocket-Door Walls

Don't Cut Off Your Finger For Goodness Sakes!

A Gardener's Delight

Candles, Warm Water, Maybe Some Wine!

Oh, I'm So Hungry!

Are You Related to Detective Columbo?

Step Two: Answer these simple six questions. Be SURE to SLIDE BACK UP to the top AFTER clicking SUBMIT. You'll see a VIEW SCORE button. CLICK it so you can see how well you did AND read my Feedback Comments.

Artificial Stone is Not Waterproof

Artificial Stone is Not Waterproof

Artificial Stone is Not Waterproof | Artificial stone like this on the outside of a home is not waterproof. (C) Copyright 2019 Tim Carter

This is not a normal column of mine. I’m sitting in my man cave writing this column several hours before I talk to Amanda on the phone. She lives in Oklahoma and her new home covered with artificial stone made from colored and textured concrete is leaking when it rains and the wind blows. These are common conditions in many places in the USA as well as the Great Plains. I’ve offered a simple phone consult service for years to homeowners in distress so they can get the straight answer from someone who doesn’t have a dog in the fight.

I’m really troubled by Amanda’s plight because each week the number of serious defects I hear about from homeowners just like you is growing, and growing fast. The reasons for the defects are many. As insane as this sounds, I’m even dealing with this situation within my own family as my daughter’s new dream home construction project has turned into a nightmare. I’m not building her home because she lives too far away from me.

Allow me to share with you why Amanda’s new home is leaking water. Just an hour ago, I watched a video Amanda sent me where she showed me her waterlogged exterior wall sheathing as well as wet wood studs. It was hard to watch because I know how easy it is to ensure rainwater never ever touches wood exterior wall framing. When I was a young builder I had the luxury of taking apart older homes. I saw how the builders and carpenters from 100-150 years ago used basic building materials and techniques to keep houses dry for decades.

It’s important to realize that wind-driven rain penetrates brick-veneer, solid brick walls, artificial stone, and just about any other masonry material. The water almost always enters through nearly invisible cracks where the mortar touches the masonry material.

The Brick Industry Association (BIA) created years ago a series of technical notes that shows how to build homes and other buildings that stay dry inside. You can get access to these technical notes at their gobrick.com website at no cost. You use the same best practices when working with artificial stone, real stone, concrete block or any other exterior masonry material.

Builders hundreds of years ago knew that brick leaked water. This is why they used different types of brick to build solid-masonry buildings. The brick you see on the outside of the structure was fired harder and longer in the kiln and didn’t normally absorb much water at all. But the brick used behind the face brick was a softer less-hard brick that was quite absorbent.

When the rain got past the outer layer of brick through the mortar joints, the inner layer of brick acted like a temporary reservoir. As soon as the rain stopped and the sun came out, the water inside the brick wall would wick out to the atmosphere. It was an ingenious system learned no doubt the hard way over a few centuries.

Today brick or stone is almost always a non-structural element on homes. Extra care has to be taken to construct the home so the water that gets through the mortar is collected and redirected to the exterior without ever touching the wood framing. All of the methods to achieve this goal are outlined in the technical notes you, as well as your builder and mason, can get from the BIA.

Amanda’s artificial stone dilemma is not easy to rectify. The best way to solve the problem is to remove all the stone and start over with the correct detailing using waterproof membranes and flashings above and below all windows and doors. But this is not realistic. Very few people can afford to do this and Amanda’s builder is not going to do the honorable thing and correct the problem. Heck, he probably won’t even do it right the second time, but I digress.

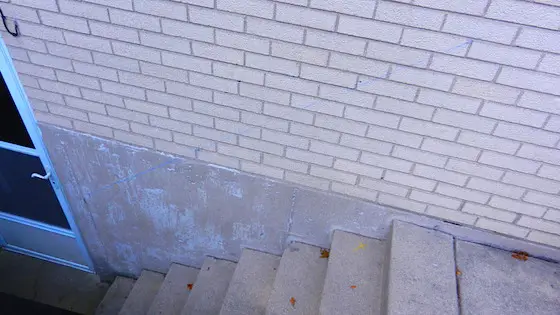
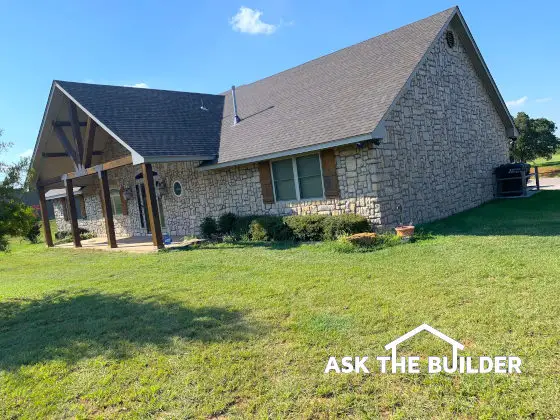
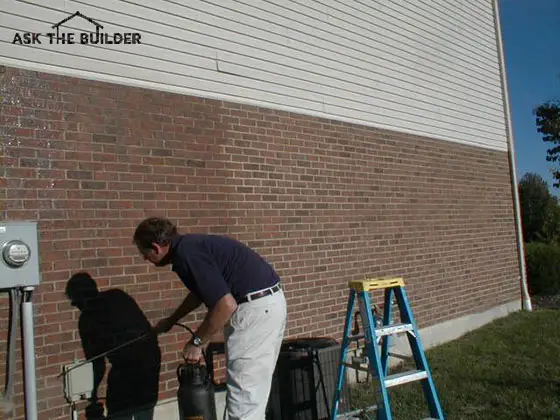
Amanda will probably have to apply several coats of a silane-siloxane water repellent on her stone facing. This might solve the problem. If not, she may have to apply a thicker clear sealant that’s brushed on the mortar and overlapped onto the artificial pieces of stone.

How can you avoid becoming a statistic like Amanda and my daughter? It’s not easy. My daughter, who did everything right including extremely detailed plans and specifications still got ensnared in the net of a builder who didn’t bid the project right and only wants to go work on jobs where he can make money. My daughter should have moved in three months ago. Right now her drywall is still not complete. Her house sits for days with no one working there.

You need to have fantastic plans and written specifications to start. Another key point is to have a meeting with your builder before he bids the project and review every aspect of the house and make sure he understands what needs to be done. Include great photographs with your plans, if you can get them, showing exactly what you want each part of your house to look like when complete. These photos help communicate the level of quality you expect.

Be sure you include a penalty clause so each day the builder is late, you deduct a certain amount from his final bill. Don’t get trapped into giving the builder more money at any point than he deserves. If you do this, there could still be $80,000 worth of work to do but only $40,000 in your construction loan account. Be careful!

Column 1318