Install Handrail Into Brick

install handrail into brick

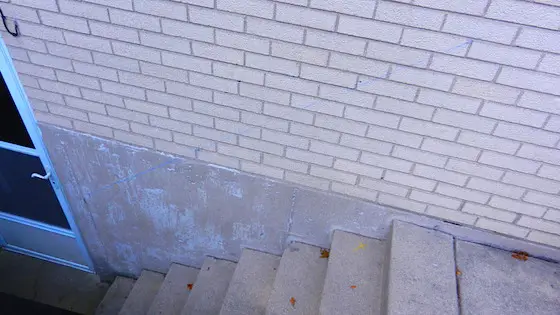
Install Handrail Into Brick | The blue chalk line marks the future location of the iron handrail. You only get one chance to get this right. Copyright 2019 Tim Carter

Install Handrail Into Brick - Easy with Epoxy & Studs

You need moderate skills to install a handrail into brick and poured concrete. It's important to realize that you can't use regular expansion anchors in the brick as they very likely will fracture the brick if they're not solid.

What Tools Are Required?

You'll need the following tools to complete this job:

  • a hammer drill with a bit sized to match the anchors and threaded rod
  • a 3-foot plastic flexible tube
  • a small bottle brush slightly larger than the diameter of the drilled holes
  • a caulk gun
  • a ratchet with assorted sockets

What Materials Are Required?

You'll need the following materials:

What Do I Do Next?

It's important to realize the handrail must be parallel with the nosing of the steps. The handrail height must be no less than 34 inches and no more than 38 inches in a vertical line that extends up from the tip of the nosing of any tread.

My experience has shown that 35 inches is a very comfortable height and small children can reach this handrail.

You need a helper or two to hold the railing in place with the brackets attached to the railing. You will triple-check that the railing is parallel with the stair tread nosings and at the right height.

Mark the hole location of the two mounting brackets. Look at the following photo to see what I mean.

install handrail into brick

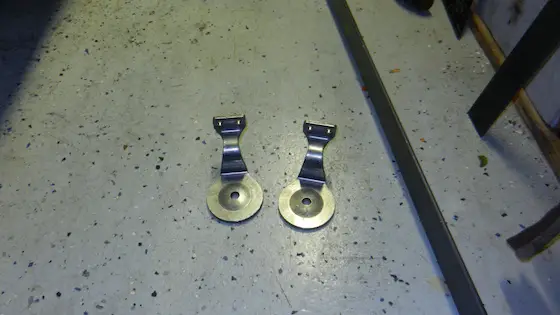
These two brackets are what will hold the handrail to the wall. The code requirement states that they must resist 200 pounds of pull force. Remember, that's a MINIMUM requirement. Copyright 2019 Tim Carter

With the holes marked, you drill a hole that's the size of the stud anchor you choose to use. I would highly recommend using a 1/2-inch by 4-inch-long stud anchor. You may have to enlarge the hole in the handrail brackets to make this work.

You use the plastic tube and bottle brush to make sure every speck of dust is out of the drilled holes. Any dust in the holes will interfere with adhesion. Do NOT have your face in front of the hole when you blow through the plastic tube. A visit to the emergency room to have your eyes cleaned out is expensive.

Watch this video for the foolproof method of drilling the holes so the stud anchors never pull out of the wall:

How Long Should The Epoxy Cure?

I would allow the epoxy to cure for at least 48 hours before I'd install the handrail.


Should A Shed Look Like The House?

house & shed look alike

Should A Shed Look Like The House? | The shed is a miniature version of the house. This is first class all the way. (C) Copyright 2019 Tim Carter

DEAR TIM: I want to build a deluxe shed. I’ve just retired and have plenty of time on my hands. I want to stop paying the outrageous offsite storage fees. First and foremost, what do you think of my shed matching my house? Is this a good idea or a waste of time? In your opinion, what are the best things to include in a shed? What are the biggest mistakes homeowners make when they build sheds? Daniel P., Lincoln, NE

You may be in the same situation as Dan. You’ve accumulated so much stuff that you pay to store it at some offsite facility. If you add up what you pay in a year, you can buy quite a bit of material to build a handsome shed in just a few weeks. Ask most realtors and they’ll probably say a nice shed adds value to a home.

Most people think about if the shed should match the house color, but that’s where it stops. Only a few take it the next step and wonder if the shed should match the actual house! Yes, you can create a miniature version of your house in almost all cases. It’s not as hard as you might think and believe me, you’ll get more compliments from friends, neighbors, and visitors than grains of rice in a 50-pound sack!

The process of making the shed match the house is fairly simple. It’s important to realize the first step is to create a simple plan of the minimum size your shed should be. One of the biggest mistakes homeowners make is building a shed far too small for their needs. I recorded a video a few years ago showing how very simple it is to create a perfect shed for your stuff. You can view this Planning a Shed Video by clicking on the link.

Should A Shed Look Like The House?

Once you have the outer dimensions of your new shed, you need to see how they compare to the shape of your home. If your home is rectangular, then try to mold your shed dimensions to mimic this shape and maintain a reasonable ratio if possible. It doesn’t have to be perfect, but you’ll achieve the best possible look if you maintain both the shape and size ratio.

My sheds have always had electric power in them. It’s so nice to have lights and to be able to plug in tools. A simple 30-amp 240-volt circuit is usually plenty of power for just about anything you’d do inside a shed.

I discovered about twenty years ago that overhead doors offer the most utility getting things in and out of sheds. A 6-foot-wide door allows plenty of room to get a decent-sized lawn tractor in and out of the shed.

If your home is two-story you get an added benefit. You’ll discover when you do the height ratio that the shed ceiling height will almost always be about nine or ten feet tall. This allows you to include a small loft along one or two walls for extra storage of larger boxes.

Many sheds have wood floor systems. You’ll want to use treated lumber for your floor joists and I’d highly recommend using treated plywood for the flooring. Treated plywood is readily available from most neighborhood lumberyards and you never have to worry about the floor getting wet.

The last shed I built not only had treated floor joists and treated plywood, but it also had 4 inches of closed-cell foam insulation in between the joists. This foam was flush with the top of the joists allowing me to finish the shed at a later date and have a toasty warm floor in winter months.

wood sheds

This is a wood shed that has a handy 6-foot-wide overhead door. You can pull in a garden tractor with ease. Wind can cause swinging doors to slam shut. An overhead door seals better against the weather. Copyright 2017 Tim Carter

The biggest blunders made by homeowners shouldn’t surprise you. Don’t be a fool and forget natural light. You can incorporate simple low-profile skylights or roof windows to let in copious amounts of natural light.

I’ve received countless emails from homeowners who failed to install a normal 3-foot wide normal door in one wall of their shed. They want to know how to add one at a later date. Large swinging shed doors are a pain and can be dangerous on windy days. A normal man-door in addition to a larger opening is a must. Avoid that mistake!

Don’t skimp on the foundation. All too many sheds I’ve seen are just setting on concrete blocks on the soil. Do this and your shed may start to roll around the neighborhood in the next windstorm. Your shed may get twisted out of shape without a great foundation system should you live where the ground freezes. Frost heave can lift the shed unequally and contort it so much you can’t open a door or window.

Be sure you don’t build the shed too close to the ground. It’s best to have at least a 6-inch air space under wood floor joists for some air circulation. You can install decorative screening to keep critters from living under the shed. Install a great vapor barrier under a concrete slab that is the floor of your shed. All too many homeowners forget this important step!

Column 1319

September 15, 2019 AsktheBuilder Emergency Announcement

Did you see the overnight news about the horrible multi-story deck collapse in New Jersey?

At this time, I don't believe anyone died, but several were seriously injured.

CLICK or TAP HERE for a local news story.

You could become a statistic in the future if a deck you're standing or DANCING on collapses.

The news dovetails in with my announcement about my Basic Structural Concepts eBook sale.

For just $7, you could discover lots of things on WHAT TO LOOK FOR on your own deck or one at someplace you visit to make sure it's STRUCTURALLY SOUND.

This eBook is over 126 pages and it's written for the non-engineer.

The book could SAVE you or a loved one from getting killed or injured.

I guarantee you that you'll NEVER again see the price this low for the book and if you've been a subscriber for decades you know this is a RARE sale on this item.

CLICK or TAP HERE NOW and just get the book even if it's just for future reference.

STAY SAFE!!!!

Tim Carter
Founder - www.AsktheBuilder.com

September 15, 2019 AsktheBuilder Newsletter

Are you a new subscriber? I'm about to summon my fellow NH wizards and we're going to cast a protective spell on you and all your underwater allies. You'll be able to eat what you want for the next three days with no ill effects if all goes well.

If you've been here for a while, then you know what three cups of coffee does to me, right?

Fun and Games

What's that old saying? "It's all fun and games until someone gets hurt."

No, I didn't get hurt, but you're going to have some fun playing a game in a few minutes. The last few years, I've started a tradition at the end of summer here above the Equator.

About seven years ago, I discovered, quite by accident, that you love love love playing an adult game of digital hide and seek.

The best part is that you get to see stunning photos of what you can do in your own home with LE Johnson door suspension hardware.

I've installed LE Johnson pocket door and wall-mount door hardware for years. Just four months ago, I put in a converging set of LE Johnson pocket doors in my daughter's new home.

pocket door plywood

CLICK or TAP HERE now to see a short video about pocket doors reinforced with thick plywood. This allows you to hang heavy things on the pocket wall!

LE Johnson is the biggest sponsor at AsktheBuilder.com year in and year out. Over the years I've tried to cultivate relationships with the BEST companies.

I want you to be made aware of the great products I use and put in the homes of my kids and friends. It's all too easy to put junk in your home and I don't want that to happen.

You can HELP ME continue to SHARE GREAT PRODUCTS by playing the End-of-Summer LE Johnson door game.

I GUARANTEE you'll laugh no less than three times. If you don't then you can go to lunch with my wife Kathy as she almost never laughs at my jokes.

If you don't want to play the game, then I challenge you to just look at the following six photos and IMAGINE the question I might be asking you in the game. I'll bet you get the questions WRONG. BWAHAHAHAHAHA!

You Can Hang Heavy Things on Pocket-Door Walls

Don't Cut Off Your Finger For Goodness Sakes!

A Gardener's Delight

Candles, Warm Water, Maybe Some Wine!

Oh, I'm So Hungry!

Are You Related to Detective Columbo?

Okay, do I have your interest now? I thought so.

CLICK or TAP HERE after clicking all six of those links above and see how good your eyes and cognitive skills are.

End World Hunger Idea!

I've got an idea that might end world hunger. It's baked, pun intended, into the game.

I'm curious if you feel the idea has any merit.

CLICK or TAP HERE and it will be obvious as to what the idea is.

Water Leaks and Artificial Stone

Look at this house in Oklahoma.

 artificial stone leaks


The homeowners did the installation of the artificial stone above. From what I can tell, they did an outstanding job.

But they made one very critical mistake and are now suffering. Can you guess what they did wrong?

CLICK or TAP HERE to see if you have home building super powers.

I'd say that's quite enough for a Sunday morning or evening if you're in Australia or Japan!

I'd LOVE to hear back from you what you thought about the LE Johnson game. Share with me what you think about the design possibilities of these doors and MORE IMPORTANTLY, let me know if you prefer to discover new products inside a game like this.

I'll leave you with this. What kind of rock do you think this is? That's a car no-key fob for scale.

rock with no-key fob

My college degree is in geology and I'm here to tell you this is a handsome rock in person. It's at a secret location that I'm not allowed to tell you about unfortunately.

Tim Carter
Founder - www.AsktheBuilder.com
Clean Corian Sinks! - www.StainSolver.com
Pound Brass Oh Yes - www.W3ATB.com

Do It Right, Not Over!

P.S. The Basic Structural Concepts eBook sale ENDS in 18 hours. CLICK or TAP HERE to get it now. It's 126 pages for goodness sakes! This is an INCREDIBLE DEAL you don't want to miss.

LE Johnson Q3 2019 Fun Game

I want you to guess how many cups of coffee I consumed while creating this game.

To arrive at the CORRECT answer, you need to answer all the questions and then see what I have to say in the Feedback comments after you answer.

Step One: Click each of the following links and STUDY what you see

You Can Hang Heavy Things on Pocket-Door Walls

Don't Cut Off Your Finger For Goodness Sakes!

A Gardener's Delight

Candles, Warm Water, Maybe Some Wine!

Oh, I'm So Hungry!

Are You Related to Detective Columbo?

Step Two: Answer these simple six questions. Be SURE to SLIDE BACK UP to the top AFTER clicking SUBMIT. You'll see a VIEW SCORE button. CLICK it so you can see how well you did AND read my Feedback Comments.

Artificial Stone is Not Waterproof

Artificial Stone is Not Waterproof

Artificial Stone is Not Waterproof | Artificial stone like this on the outside of a home is not waterproof. (C) Copyright 2019 Tim Carter

This is not a normal column of mine. I’m sitting in my man cave writing this column several hours before I talk to Amanda on the phone. She lives in Oklahoma and her new home covered with artificial stone made from colored and textured concrete is leaking when it rains and the wind blows. These are common conditions in many places in the USA as well as the Great Plains. I’ve offered a simple phone consult service for years to homeowners in distress so they can get the straight answer from someone who doesn’t have a dog in the fight.

I’m really troubled by Amanda’s plight because each week the number of serious defects I hear about from homeowners just like you is growing, and growing fast. The reasons for the defects are many. As insane as this sounds, I’m even dealing with this situation within my own family as my daughter’s new dream home construction project has turned into a nightmare. I’m not building her home because she lives too far away from me.

Allow me to share with you why Amanda’s new home is leaking water. Just an hour ago, I watched a video Amanda sent me where she showed me her waterlogged exterior wall sheathing as well as wet wood studs. It was hard to watch because I know how easy it is to ensure rainwater never ever touches wood exterior wall framing. When I was a young builder I had the luxury of taking apart older homes. I saw how the builders and carpenters from 100-150 years ago used basic building materials and techniques to keep houses dry for decades.

It’s important to realize that wind-driven rain penetrates brick-veneer, solid brick walls, artificial stone, and just about any other masonry material. The water almost always enters through nearly invisible cracks where the mortar touches the masonry material.

The Brick Industry Association (BIA) created years ago a series of technical notes that shows how to build homes and other buildings that stay dry inside. You can get access to these technical notes at their gobrick.com website at no cost. You use the same best practices when working with artificial stone, real stone, concrete block or any other exterior masonry material.

Builders hundreds of years ago knew that brick leaked water. This is why they used different types of brick to build solid-masonry buildings. The brick you see on the outside of the structure was fired harder and longer in the kiln and didn’t normally absorb much water at all. But the brick used behind the face brick was a softer less-hard brick that was quite absorbent.

When the rain got past the outer layer of brick through the mortar joints, the inner layer of brick acted like a temporary reservoir. As soon as the rain stopped and the sun came out, the water inside the brick wall would wick out to the atmosphere. It was an ingenious system learned no doubt the hard way over a few centuries.

Today brick or stone is almost always a non-structural element on homes. Extra care has to be taken to construct the home so the water that gets through the mortar is collected and redirected to the exterior without ever touching the wood framing. All of the methods to achieve this goal are outlined in the technical notes you, as well as your builder and mason, can get from the BIA.

Amanda’s artificial stone dilemma is not easy to rectify. The best way to solve the problem is to remove all the stone and start over with the correct detailing using waterproof membranes and flashings above and below all windows and doors. But this is not realistic. Very few people can afford to do this and Amanda’s builder is not going to do the honorable thing and correct the problem. Heck, he probably won’t even do it right the second time, but I digress.

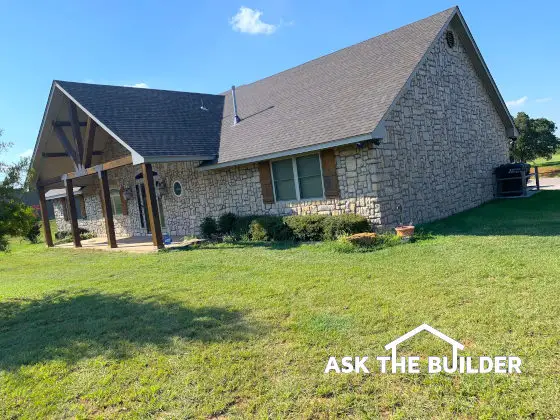
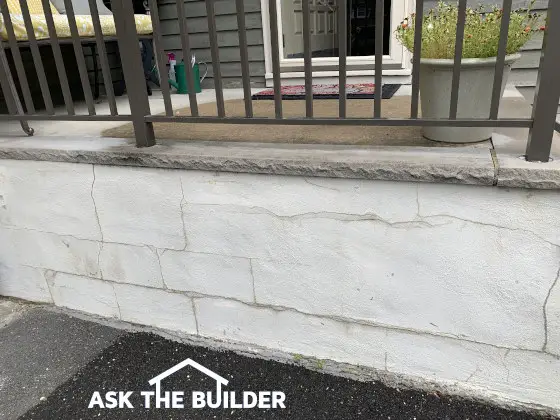
Amanda will probably have to apply several coats of a silane-siloxane water repellent on her stone facing. This might solve the problem. If not, she may have to apply a thicker clear sealant that’s brushed on the mortar and overlapped onto the artificial pieces of stone.

How can you avoid becoming a statistic like Amanda and my daughter? It’s not easy. My daughter, who did everything right including extremely detailed plans and specifications still got ensnared in the net of a builder who didn’t bid the project right and only wants to go work on jobs where he can make money. My daughter should have moved in three months ago. Right now her drywall is still not complete. Her house sits for days with no one working there.

You need to have fantastic plans and written specifications to start. Another key point is to have a meeting with your builder before he bids the project and review every aspect of the house and make sure he understands what needs to be done. Include great photographs with your plans, if you can get them, showing exactly what you want each part of your house to look like when complete. These photos help communicate the level of quality you expect.

Be sure you include a penalty clause so each day the builder is late, you deduct a certain amount from his final bill. Don’t get trapped into giving the builder more money at any point than he deserves. If you do this, there could still be $80,000 worth of work to do but only $40,000 in your construction loan account. Be careful!

Column 1318

Two Steps Behind Def Leppard

Two Steps Behind - Gives the Band A Breather

You don't need to be a jeanyus to realize that rock bands often need to slow the pace of the show so they can catch their breath.

I saw Def Leppard in concert about twelve years ago and this is a great song they do after getting a sweat going!

And here's another great slow Def Leppard song:

While we're at it, here's another slow-dance song:

Okay, okay, here's the last one:

September 8, 2019 AsktheBuilder Newsletter

Are you a new subscriber? Don't hang out along the wall like I did at freshman sock hops. Get out here on the floor and dance like the rest of us. It's fun!

Seasoned sock-hopper? Yeah, you know I'm listening to some great tunes in the background as I create this issue. CLICK or TAP HERE to peer into my playlist. It's that kind of morning.

Will Your House COLLAPSE?

Not a week goes by where I don't get a question or two like this:

"Dear Tim,

I need to know if I can create an opening in a wall in my house so two rooms sort of become one. What kind of beam do I need and how do you go about installing one?"

or how about this one:

"Hey Timbo,

I want to build a retaining wall about seven feet tall. What are the chances of it tipping over on me in five years?"

What do you think it costs to have a residential structural engineer come by your home for a consult and educate you on what to do so you don't have a structural failure?

$200, $300, $500?

What if I told you there's a good chance you could get most structural questions you might have answered for just $7?

Yep, SEVEN US Dollars.

I decided to put on SALE a well-hidden gem that's been in my shopping cart for over fifteen years.

It's a homeowner-friendly eBook about all the structural things in and around your home. It could SAVE YOU THOUSANDS of DOLLARS.

It's written for NON-ENGINEERS so you can UNDERSTAND it.

It even includes a RARE structural terms GLOSSARY!!!

I do a HORRIBLE job, in my opinion, of telling you about lots of my products. Stain Solver is an exception.

You can get my Basic Structural Concepts eBook right now and SAVE 60%.

That's NOT a typo. 60% off. But for only one week.

CLICK or TAP HERE to get it. It's an INSTANT Download. Remember, this is a PDF eBook you read on your phone, tablet, or computer.

Sweet Klein Personal Worklight

I've seen so many new products in my career, it's pretty tough to get me excited.

Well, Klein Tools must have hired some of the most ingenious engineers out there. It took me thirty minutes to lower my pulse rate!

klein personal worklight


CLICK or TAP HERE to discover WHY I loved this dandy little worklight.

I GUARANTEE you'll want one after you can see all it can do.

Hoover Cordless Hand Vacuum

Here's another handy tool I've been testing for about a month. This one is also a winner.

hoover hand vacuum

I've rarely used a hand vacuum over the years. Don't ask me why. The steps up to my man cave above the garage get dirty and it's hard to clean them.

Well, it USED TO BE HARD.

CLICK or TAP HERE to see a bunch of photos of this new cordless hand vacuum.

With Christmas looming right around the corner, now might be the time to snag a few for gifts.

Cement Stucco Crack Repair

How would you repair these stucco cracks so they don't come back?

 repair stucco cracks

This cracked stucco can be repaired with a moderate amount of effort. (C) Copyright 2019 Tim Carter

CLICK or TAP HERE and discover if your method is copacetic.

Did you even know you could still buy that metal product? Come on, tell the truth!

I had a respected California artist contact me this past week asking about how to do a certain thing with concrete and I told her about that metal. She had never heard of it and it was the EXACT PRODUCT she needed to complete a project she was working on.

Who knew AsktheBuilder could come to the rescue of the art community?

That's quite enough for a Sunday morning.

I'm wearing a dark blue solid shirt with a two-toned blue bow tie to church this morning. I know a few of the women are going to say how it makes my eyes pop. 🙂

Tim Carter
Founder - www.AsktheBuilder.com
Get Certified Organic CLEAN - www.StainSolver.com
Pounding Brass Next Saturday in COSTUME! - www.W3ATB.com

Do It Right, Not Over!

P.S. Do you live near central NH? You may want to come to see me next Saturday from 11-4 operating an old-fashioned Morse code key in the telegraph office of the Ashland, NH railroad station. It's their 150th anniversary celebration. There's even going to be a SPECIAL train ride from Ashland to Plymouth, NH. CLICK or TAP HERE for ticket information!!!!

I'll be dressed in period clothing including a green visor, black sleeve socks, and a handsome bow tie. Do you know why telegraph operators, accountants, and draftsmen wore green visors all those years ago? I didn't think so.

Hoover OnePWR Hand Vacuum

hoover hand vacuum

Hoover One PWR Hand Vacuum | Don't let the size fool you. This bad boy can really pick up dirt FAST. CLICK or TAP HERE or the photo to have one in your hands in days.

Hoover OnePWR Hand Vacuum - Light on Weight, Heavy on Cleaning

I've been testing the lightweight Hoover OnePWR hand vacuum for about a month. So far I love it.

I wish I had been using one like this long ago for small jobs.

It's easy to remove the nozzle from the motor to dump out the dirt.

hoover hand vacuum

You can see next to my hand this is the perfect size for a man, woman or even a child. It's that easy to use. CLICK or TAP HERE or the photo to have one delivered to your doorstep.

hoover hand vacuum

A rechargeable lithium-ion battery powers the hand vac. It recharges FAST. CLICK or TAP HERE to purchase this dandy vac now.

hoover hand vacuum

This is the detachable nozzle and the dirt collects on the other side between the blue filter and the tip. You can easily see when it's time to dump out the dirt. CLICK or TAP HERE to order this hand vac now before they're SOLD OUT!

hoover hand vacuum

This is the removable two-stage filter. The screening captures the large dirt particles and just to the left of it behind the blue plastic is a paper filter that protects the electric motor. CLICK or TAP HERE now before the price goes up on this wonderful tool.

It's important for you to read my Disclosure Policy about products I test.


Magic Wand Stucco Crack Repairs

cracked stucco wall

Magic Wand Stucco Crack Repairs | This cracked stucco can be repaired with a moderate amount of effort. (C) Copyright 2019 Tim Carter

DEAR TIM: I’ve got a mess at my home that’s driving me crazy. My 3-foot tall concrete block foundation was coated years ago with a thin coat of cement stucco. There are countless cracks in the stucco coating that outline many of the blocks. I’ve tried caulking the cracks before painting but they always seem to return. Is there a DIY solution I can attempt to solve the cracked stucco once and for all? I’m pretty handy and not afraid of a challenge. Just keep your mansplaining to a minimum if you can. Just kidding! I’ll take any and all advice you can offer! Vicki LaP., Toms River, NJ

Stucco cracks can be quite common. Cement stucco is normally just a mix of sand and Portland cement. This rock-hard building material is unforgiving to any sort of stretching or tension movement. On the other hand, if you try to squeeze stucco or concrete it’s normally ten times stronger than if you try to pull it apart.

Let’s assume you’re as industrious as Vicki. The good news is you might be able to recoat the concrete block with new stucco and be quite pleased with the results. Your chances of getting professional results improve dramatically if you can recruit some help from your husband, wife, or friends. While no one aspect of the repair job is hard, an extra set of hands and back muscles will come in handy.

How to Work with Stucco

I’m going to assume you’re a stucco rookie and have never worked with the material. Fortunately, it’s quite forgiving as you can do all sorts of texturing to mask your inexperience. While texturing is in itself an art form, you can achieve an interesting look with rough brush strokes, a sponge and even round brushes.

The first thing I’d do is build a small test wall using some 2x4 studs and one sheet of 4x8 oriented strand board (OSB). Stand this up on its side so it’s only 4-feet tall and put some diagonal supports so the low wall doesn’t blow or fall over. You’re going to stucco this test wall to gain some experience.

In my opinion, you need to be sure when you do the real repair on your existing stucco you make sure the new stucco doesn’t bond with the old stucco. A simple sheet of 15-pound tar paper put on top of the old stucco will act as a crack isolation membrane. We want the new stucco to be a pseudo rock cloud that will float on top of the old stucco as crazy as that sounds.

How to Install Tar Paper

On your test wall, use a few roofing nails to install tar paper on the OSB. You don’t need too many nails, just be sure the paper is laying flat with no bubbles. The first piece starts at the bottom and each higher piece overlaps the sheet below by three inches.

You’ll now cover the tar paper with a galvanized expanded wire lath.

You can buy this in rolls and be sure to wear heavy gloves working with it to avoid cuts to your hands. There’s a distinct way it’s installed so that the slanted parts of the mesh as you look at them from above slant back in towards the wall. The design is a miniature french cleat where the fresh stucco is locked into the mesh and can’t slide off down the wall to the ground. Believe me, it will make sense when you see the mesh.

Attach the mesh to your wood test wall using galvanized roofing nails. Be sure you nail into the wood studs behind the OSB. When you apply this mesh to your existing stucco, you’ll be drilling 1/4-inch holes with a hammer drill and using anchors, screws, and washers to ensure the mesh will never come off the concrete block. Put the fasteners every 16 inches on center horizontally and every 24 inches vertically. Stagger the fasteners each row.

Now comes the fun part - applying the stucco! You can discover all sorts of recipes for this material, but I’ve had the best success with this one I developed:

  • 1.5 parts Portland cement
  • 0.5 parts of hydrated lime
  • 4 parts medium or fine sand depending on the final texture

Blend these materials together dry at first. Then add clean cold water until you get the mix the consistency of stiff applesauce. You then trowel in onto the wire mesh so it fills the mesh and covers it by no more than 1/4 inch.

How to do a Stucco Test

Do your test in the shade so the stucco doesn’t set too fast. Don’t add more water to the mix if it starts to harden. Mix only as much stucco as you can apply and finish in about 30 minutes. Practice swirling the stucco with a wood float and experiment with textures.

You’re going to discover that it can be boatloads of fun to tackle this project. Guess what? You can colorize the stucco too! You can add dry-shake pigments to the mix to create just about any color. This means you never have to paint the new stucco. I’d love to see your photos. Send them to me via the Ask Tim page at my AsktheBuilder.com website!

Column 1317