Are you a new subscriber in the last week? Welcome and you picked a great time to jump aboard. Distinguished subscriber of record? I've got some great new-house eye candy for you today.
Floor Trusses - Endless Joy
The construction of my daughter and son-in-law's house continues. The brutal cold weather is behind and I've been hard at work with my son-in-law continuing to put in the entire plumbing, radiant heat, and electrical systems in the house.
Before I jump into the topic of floor trusses, I wanted to give you an overview of what's going on.
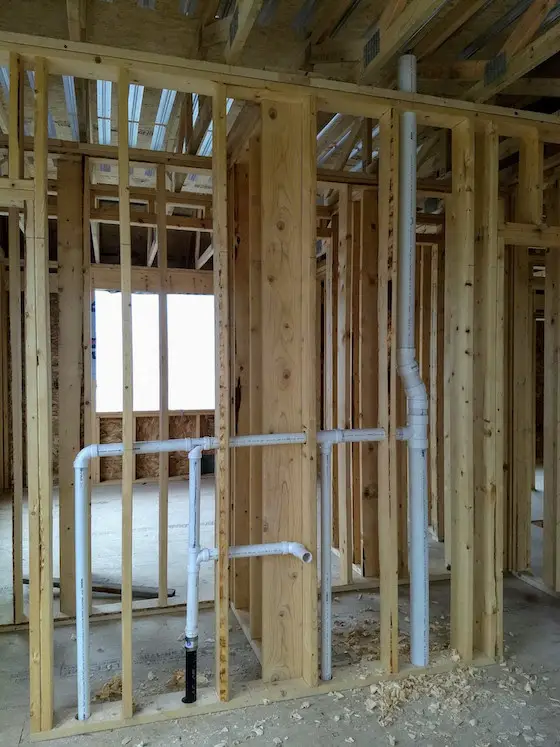
The past few days, I pretty much finished all the rough plumbing drain, waste, and vent piping. Here's a couple of shots showing how to combine the benefits of cast iron with the affordability of PVC.
This first photo was taken in the living room looking above at the underside of the master bathroom. You see lots of no-hub cast iron piping installed for both durability and sound control. You'll never hear water flowing across the ceiling and down a wall after someone flushes the toilet or takes a shower! Cast iron is QUIET!

This next photo is showing the main wall in the master bathroom. You can see the vanity drain line sticking out of the wall. That vanity is going to be a 36-inch tall base cabinet with a shallow vessel sink on top of it. That's why the branch arm is roughed in so high off the floor.
The other white PVC pipes are vents (left to right) for the shower, free-standing tub, and the not-so-common 3-inch full-size vent for the toilet and the rest of the house. That 3-inch pipe will be extended across the ceiling this coming week and connect to the 4-inch pipe that pokes through the roof.
Note how the vanity stack has cast iron extending up through the floor, but at the tee fitting it has transitioned to plastic PVC. You can combine the two pipe types in your home just like this.
CLICK HERE to see why you'd want to use both cast iron and PVC pipes in your next new home or remodeling job.
Now about the floor trusses.
I've used floor trusses on a past job or two. It's been so long I forgot how wonderful they are.
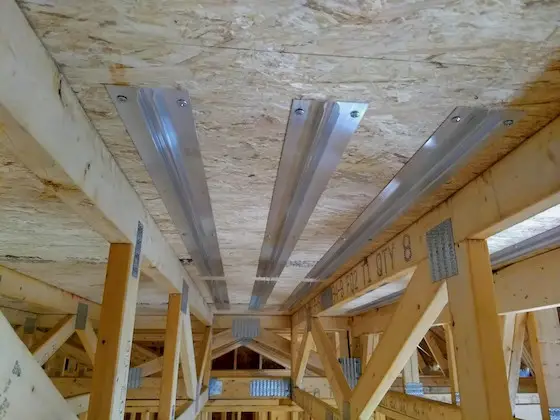
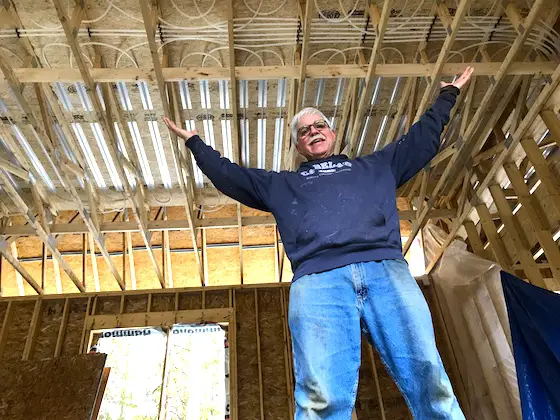
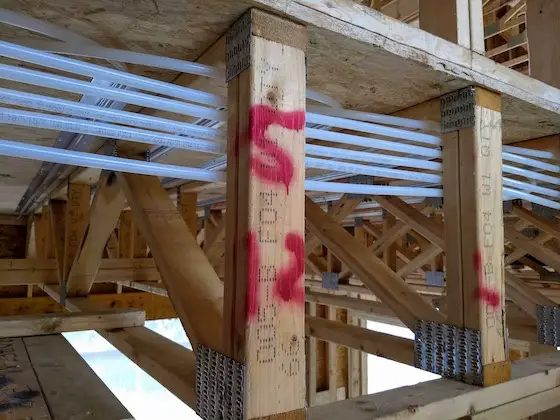
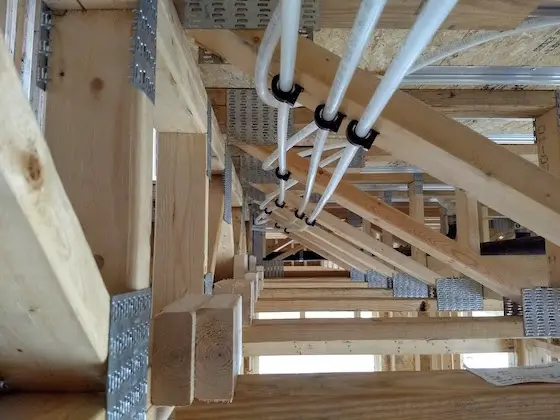
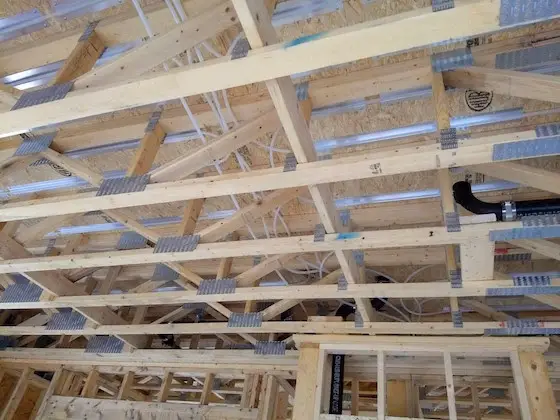
Each day as we've been working putting in over 5,000 linear feet of the Uponor WIRSBO hePEX tubing for the radiant heating, I've come to fall in love with floor trusses. They have me swooning.
Look at the following photos and tell me if you could ever imagine putting in all you see using regular solid floor joists. Think of how many holes and friction points you'd have with solid lumber!
CLICK or TAP HERE to read about floor trusses. In that column, you'll discover a link you can click to get pricing for floor trusses and a local factory that will make them for you.
I recorded a FAST video about nine days ago on a whim about floor trusses. It was raining outside, it was dark in the garage and we used an iPhone. That explains why the video is not as good as my normal ones.
But I was SO overjoyed while working up in the floor trusses I had to share what I felt.

CLICK or TAP HERE to watch the fast video.
I can't begin to tell you how difficult it would be to run all the hePEX without the floor trusses.
Without floor trusses, I can't begin to tell you how many hundreds of holes would have to be drilled for all the:
- hePEX heating tubing
- plumbing drain lines - HUGE holes
- plumbing supply lines
- electrical wiring
- low-voltage wiring
I can't begin to tell you how much my shoulder would ache. I can't believe all the extra time it would have taken.
Oh, and it's important to realize, when you decide to use floor trusses, you eliminate the need for interior bearing walls!
Can you see how that gives you all sorts of options when it comes to open floor plans and the ability to change the floor plan in the future with minimal disruption?
The other thing I love about the floor trusses is all the floors in the house are FLAT. Regular floor joists have crowns in them and the resulting floor can have all sorts of humps and dips in it.
Floor trusses allow you to have nice smooth floors.
I'm shooting a very interesting video today about how to install hePEX tubing that's 8-inches on center in 24-inch-on-center framing. You can have that in certain situations. I was unable to locate a video on YouTube showing how to do this very complex operation.
It's not going to be easy to record the video, because it's such a hard thing to visualize and do. But I'm going to give it my best shot.
It's time to get ready to go to the job site. I've already worked the past three days ten hours a day and the next eight are more of the same as my son-in-law took off a week of vacation so we could ram-rod this part of the job.
Have a great week!
Tim Carter
Founder - www.AsktheBuilder.com
P.S. NEXT WEEK is a full issue about our certified organic Stain Solver. Now that spring has arrived, you need to know all about Stain Solver and ALL of the things it can clean around and in your home. Of course there will be a special sale - especially on our most popular 4.5 and 9.2-pound sizes.
If you're a loyal user of Stain Solver, speak up now and send me your quick story about the most remarkable thing you cleaned or restored. Help Kathy and me convince others how wonderful Stain Solver is.
I'm going to be sharing many of the things you can CLEAN safely using Stain Solver. You'll also hear some incredible stories from homeowners just like you.
Here's my FAVORITE story of all time with stunning before and after photos. Look VERY CLOSELY at what's under the hat in the top BEFORE photo.
Do It Right, Not Over!