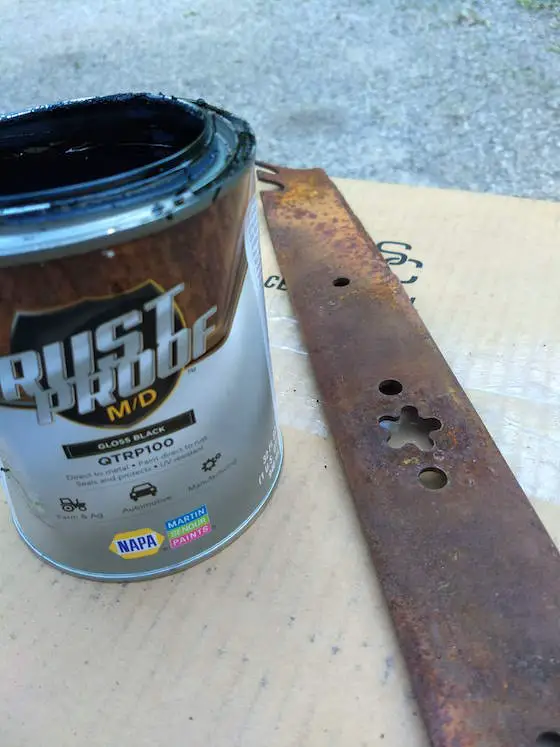
Rustproof MD paint will make this rusty lawnmower blade look like new in minutes. Copyright 2018 Tim Carter
"The paint is a single-component moisture-curing urethane. Urethanes are one of the stickiest paints you can buy."
Rustproof MD Paint Checklist
- primer and finish coat in one
- sticks well to slightly rusted metal
- paint steel or aluminum
- two coats five hours apart provide the best protection
- thin with acetone
RustProof MD Paint - Paint Rusty Metal
Rustproof MD paint is a special coating for rusty metal. Coating is a fancy word for paint.
The Rustproof MD has a very stick urethane resin, or glue, in it that allows it to bond to rusty metal like your shadow sticks to you.
Related Links
XO Rust vs Rustoleum Salt Test - DO NOT SHARE!
Magic Rust Spray Paint - Impress Your Friends
Do You Have to Remove All Rust?
No, you don't have to remove the rust. I'd get rid of the loose scale and wire brush any really rough areas. Just brush off any rust dust and apply.
Free & Fast Bids
CLICK HERE to get FREE & FAST BIDS from local painters who can get this paint.
Do You Need a Primer?
No. There's no need for a primer with Rustproof MD paint. It flows onto the rusty metal and its thick body produces a smooth finish in most cases.
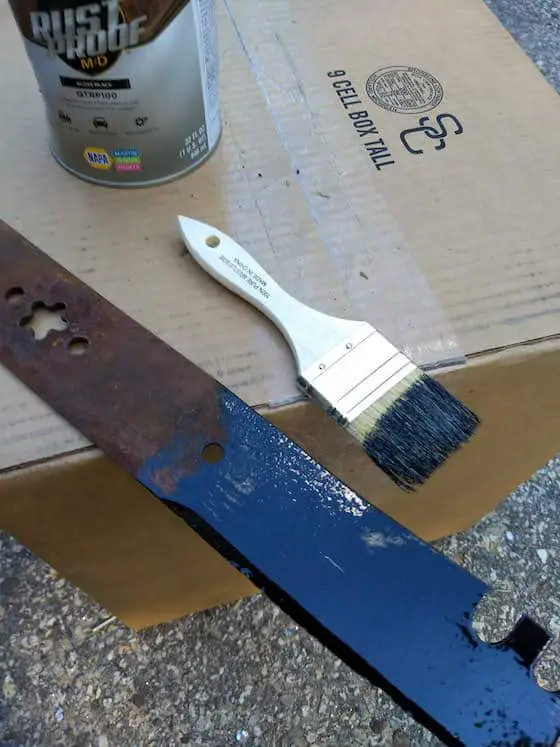
You can see the lawnmower blade is one-sixth finished. The paint flows on like lip gloss. Copyright 2018 Tim Carter
Why is Rustproof MD so Sticky?
The paint is a single-component moisture-curing urethane. Urethanes are one of the stickiest paints you can buy. The paint is so sticky that if you don't clean all the paint from the lip of the can as well as the lid before you tap the lid back on to put the paint away, you'll never get the lid off again.

The one side of the blade is finished. You need to wait a full 24 hours before you think about flipping it over. Copyright 2018 Tim Carter
Is It Hard to Clean Up Rustproof MD Paint?
This paint is not water-based and it's more of a challenge to clean you and anything else that gets paint on it. The special solvent vehicle is but one reason why it sticks so well to the rusty metal. I used mineral spirits to clean my hands. You may want to think about using disposable chip brushes you can throw away as you may spend lots of money cleaning a high-quality brush.
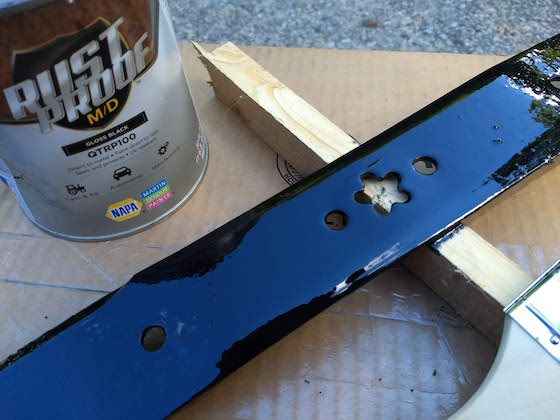
Look at how smooth the paint is! It self levels like magic. You can get pro results. Copyright 2018 Tim Carter
Will Rustproof MD Resist Sunlight?
Yes, this paint has special built-in UV resistance. Over time the sun's photons will blast apart the paint, but you might have sold the item you painted on Craigslist or a Facebook Garage Sale group.
Where Can I Buy Rustproof MD Paint?
You can only get this great paint at a NAPA Auto Parts store. Most give you a discount if you're an AAA member. Ask for it.
CLICK HERE to get FREE & FAST BIDS from local painters who can get this paint.