This is a weird newsletter with a potpourri of all sorts of goodies.
I think you're going to like it. Let's start with some something I've seen online that disturbs me.
Unethical Advertising
Yesterday I was uploading my latest videos to my AsktheBuilder Facebook page and the following ad showed up in my timeline.
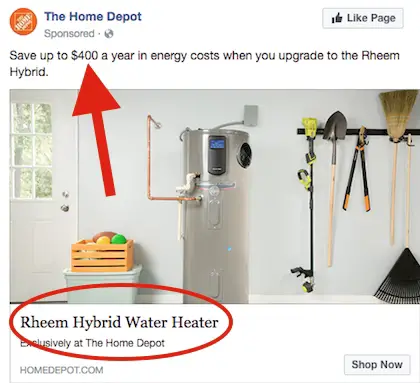
Image Copyright 2017 Facebook, Inc / Home Depot / Rheem
I get quite upset when I see things like this.
I feel it's highly unethical advertising meant to lure you into buying something under false pretense.
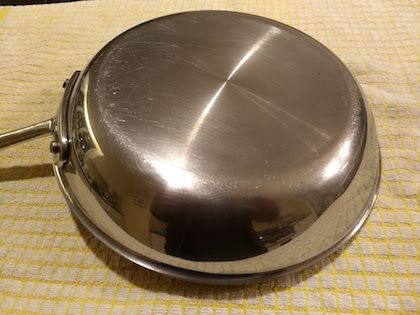
Have you ever stopped to do the math on how much you spend each day to heat the water in your home?
You should.
When you do, you'll be steaming at the above "$400-a-year-savings claim".
It's VERY EASY to come up with a fairly accurate number of what you spend to heat water assuming you heat with natural gas or propane.
CLICK HERE to see how to do it.
When you do the math, you'll probably discover you spend about $1 to $1.50 a day.
$1 per day times 365 = $365.00
$365 is less than $400 the last time I checked.
Sarcasm ALERT: So you buy a Rheem hybrid heater and you pay nothing to heat water, right.......
Let's all go out and buy one today!!! NOT!!!!!!
Big Buying Week Ahead
Can you believe my favorite meal of the year is in four days?
WOOT!!!!! Thanksgiving!!!!!
This holiday generally starts the Christmas shopping season for many.
If you shop at Amazon.com, please consider using the following affiliate link. It doesn't cause the price of anything you buy to go up.
Amazon simply shares a small part of their profit with me. It's a much-appreciated method of giving back for any money-saving tips I gave you over the past year.
CLICK HERE TO START SHOPPING
I'll resend this affiliate link on Thanksgiving night as a reminder.
Here are some GREAT Christmas gift ideas - fairly strange ones for the most part!
Succulent Tasty CA Dates
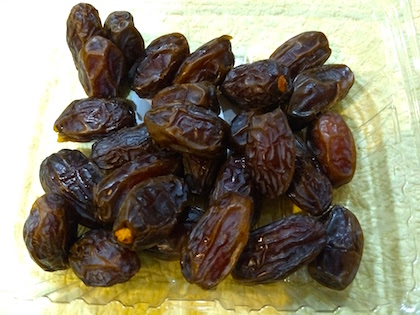
The fresh dates idea came from these EXACT ones I bought at a farmers market in Altadena, CA about twelve days ago. They're grown by the Davall Farm west of LA not too far from Joshua Tree National Park.
CLICK HERE to order them.
Be SURE you order the Medjool dates to get the ones I had. Two pounds is less than $16. WOWZA!!!!
When I bit into these plump moist dates, there was an explosion of flavor unlike any other I've ever had. I found it impossible to believe these tasty dates grew naturally!
They were the BEST MEDJOOL DATES I've ever had and Steve, my friend who lives in LA, said the same thing! He's a date connoisseur.
These are way at the top of my list for Santa. I'm trying extra hard to be good so I get some! Anyone you give these too will be very thankful!
2018 Calendar - NH Scenery

Frequently I share photos with you I take while hiking and exploring here in central NH as well as the White Mountains.
A local NH professional photographer, Chris Whiton, has produced a calendar that's now hanging on my wall. I see it everyday as I enter my man cave.
Each month has a fabulous NH nature photo similar to what you see above. Chris has gotten up in the middle of the night to hike in the dark on bitter cold days to capture rare and exceptional winter photos that you or I would never obtain.
At $13.00, this is a no-brainer. The nature-lover on your list will really cherish this calendar. CLICK HERE to order one.
New Video Format - NEED YOUR HELP!
Two weeks ago, I was getting ready to fly to LA to do a bunch of home repair projects for my good friend Steve and his lovely wife Karin.
I was lucky to leave LA with eleven new videos for you!
While taping one on the third work day, an idea popped into my head just as the camera began to roll.
I decided to turn the video into a fun guessing game.
Would you do me two favors?
1. Watch the following video - it's short.
2. Leave a comment at the bottom of the page telling me what you thought of the new format.

CLICK HERE to watch the short video.
I edited and uploaded all the other videos. I don't want to overload you with new ones today, so I'm going to share them over the next few weeks.
If you LOVE the new format, then I'm going to start to do many more incorporating this format.
Remember, you need to TELL me in the comments below the video why you liked it. I'm also open to other suggestions - so tell me in the comments how to make the videos BETTER.
Click to read Tim's Update on the request in his November 19, 2017 AsktheBuilder Forgets!
That's enough for today.
Please consider once again using my Amazon.com shopping link. It will really help keep this newsletter coming to you.
CLICK HERE TO START SHOPPING
THANKS!
Tim Carter
Founder - www.AsktheBuilder.com & Dreamer of Dates!
Do It Right, Not Over!