Using a hammer and a nail set is a dangerous way at drive in finish nails. You can miss the nail and mark up the woodwork you are installing. A great alternative is a nail gun. There are two types - pneumatic or impulse nails.
The pneumatic nail gun requires an air compressor and air hose. These are now available in smaller sizes for the home owners. They handle a variety of nails from small finishing nails to nails 2" in length.
There is another style nailer that does not require an air compressor. It has its own built-in engine. It has a fuel cell, a battery and a spark plug. This gun can be taken any where with no air hose. Just pull the trigger and it fires the nail.
These nail guns are affordable or you can rent them if you have a one time project. These nailers make your job look better, go faster and a lot more fun.
During very dry weather, it is just as important to water your foundation as it is to water your grass and plants. This is especially true if you have a shallow foundation, that is one that is only about 30" deep.
What can happen if the ground is too dry? The soil can actually dry out so much, that it can fall and the weight of the house pushes the foundation down. Resulting in a foundation crack. How do you stop that? You water the foundation.
One way of watering the foundation is to place a soaker hose around the building and let it run for a day or so.
If you are building a new home, it is a great time to put in some drain pipe down by the footer. Surround the foundation with the pipe, making sure the drain holes are facing down. At some point, bring a filler tube up to the surface. Then when it is extremely dry, just place a hose in the riser pipe and let it slowly run for a day or so. That will get water right down the foundation footer.
Water around the foundation if Mother Nature is not doing the watering for free.
If you want to change the look of a house and make it look like an older style home, just change some woodwork. For example, you can remove the standard door frame woodwork and install new Victorian style trim.
First, you need to remove the existing wood trim. Using a hammer and pry bar, carefully pull up the existing trim and set it aside.
To obtain the Victorian appearance, you can use a trim having a base block. Then the casing sits on top of the base block. Install a bead across the top of the door. Put a header on top of that and add a special crown molding cap.
Once installed, you will have changed the appearance of your house. You can check the yellow pages under Woodworking for specialty stores that can custom make the trim you require.
Fill the nail holes and add a coat of paint, and you will have your Victorian look. It is that simple.
It's easy to replace one, or even two, asphalt shingles.
Repairing or replacing an asphalt shingle is not that hard. Getting on and off the ladder is the hardest part. To replace a shingle, all you need is two different size pry bars and a hammer.
Do I Need to Remove Nails?
First, you need to remove the nails holding the old shingle. There are generally more than four nails in a shingle. There are the four that were used to mount that particular shingle, but the four nails from the shingle above it also go through that shingle.
Using one of the pry bars, lift up the tabs on the shingle above the one you are replacing. Once you see the nails in that shingle, remove them. Do this for all the nails in the bad shingle.
Slide the damaged shingle out after all the nails have been removed. Slide in the new shingle and replace all the nails that hold that shingle and the ones above it. And you are done.
Do You have a Roofing Checklist to Help Me Find a Pro Roofer?
Yes, you should use my roofing checklist to ensure you don't lose money when hiring a roofer.
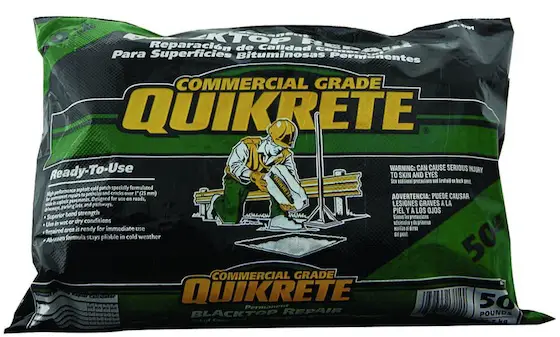
You know a lot of you've got holes inyour blacktop and I know what you wantto do. You want to make permanent repairs. Well, guess what? It's not that hard to doif you've got the right material and theright technique.
Now here's what you needto get. You can buy some really greatbrand-new cold patch asphalt compounds. Now what these are, don't confuse themwith the old stuff that used to come inan old bag that was really hard.
These thingshave got great new polymer adhesivesthat are mixed in with the asphalt and if you clean out the hole right you putthe right amount in and you compact itthese things make permanent repairs. Theold compounds would just make temporaryrepairs.
Now how do you repair the hole?Simple. Use a chisel and a hammer to makesure that the bottom of the hole is aswide as the top of the hole. That meansthat you can't have sides that slant. It's best to have the bottom bigger than the top. (See this secret tip in the July 20, 2012 Newsletter.)
Nowonce you get all the loose material out, compact any loose gravel at the bottom
or a loose blacktop. Go ahead and pouryour patching compound in there. Make ita little higher than the surroundingblacktop. Use a steel tamper to pat itdown really nice and solid and you'reready to go.
You know I told you thatpatching blacktop holes is really simple.It's so simple in fact that even ourgarden expert Ron Wilson can do it.You want to discover more home-improvement tips, go to AsktheBuilder.com.
Installing crown molding is a pretty tough job. One of the hardest jobs is getting the crown molding cut so that the miter joints are tight. Here is a neat trick that will save you time.
Cut two little test miters from some scrap crown molding. Cut them at a precise 45 degree angle. Slide these two pieces in the corner and see how they match. If they meet with no gap, you have a perfect 90 degree corner. If there is a gap, you will have to adjust your cut. A few test cuts will help you figure out the proper angle to cut the molding.
Using scrap lumber and sample cuts, will help your crown molding installation go smoothly.
After sanding your new drywall, it is time to paint it. Be careful not to make big mistakes. Use the right products and right technique to cover the joints and drywall nails.
First, buy a paint that is both a primer and sealer. The primer means there is extra pigment in the paint. This helps disguise any small imperfects in the drywall. The sealer evens out the porosity of the entire surface. The drywall seams have a different porosity then the drywall paper. The sealer evens out the porosity. This creates an even surface for your finish paint.
Most people with painting apply the paint too thin. Apply the paint heavily because most of the paint is water that will evaporate. That leaves behind only the pigment and glue. So apply it thick.
To get that new drywall smooth as glass, be sure to get the right primer and sealer and put it on nice and heavy. It will look swell.
The first step is to cut your PVC correctly. The cut has to be square and free of burrs. If you use a hand saw, make sure the cut is straight. A compound miter saw will provide a nice smooth, straight cut the first time. Before gluing, remove all burrs from the end of the cut pipe. A razor knife can be used to clean up the ends.
Next step is to clean the PVC pipe with a clean cloth to remove any dirt. Then, apply a PVC primer. The primer is a water-like substance that softens the pipe and fitting. As soon as you apply the primer, you can apply the glue.
Put glue on both the pipe and fitting. Press the parts together and twist the parts about 90 degrees to evenly spread the glue. Hold the pieces together for a few seconds to ensure they don't pop apart.
Follow the steps and you will have leak-free connections.
Does your project requires a lot of sanding? There are some really good mechanical tools and handheld tools available. If you have a lot of sanding, consider using a belt sander. Belt sanders work fast and you can switch the belts quickly. Belt grits range from coarse to fine.
For smaller sanding projects, look at one of the handheld oscillating or orbital sanders. These palm sanders come in two styles. One uses a circular sanding pad with holes in it. The holes suck up the dust as you sand. The other style uses a rectangular piece of sand paper and vibrate as it sands.
A new product is sandpaper that is attached to a piece of foam. These soft foam sanding pads allow you to sand items with difficult curves or round surfaces. The pads are reusable. Just rinse it out and start sanding.
If you pick the right tool, sanding does not have to be such a rough job!
Everyone has to paint either the inside or outside of their house at some time. What is the best paint to buy? Here are some tips.
Look on the can for the words acrylic polymer and vinyl polymer. The best paint is 100% acrylic. Acrylic resins are very stretchable and resist the expansion and contraction of wood. This helps them last a long time.
The vinyl paints are ideal for items that get repainted very few years. It does not last quite as long.
There are some new paint that go on almost twice as thick as normal paint. They come with a lifetime warranty against peeling and blistering. That will be the next paint used on Tim's home.
Expert Advice For Your Home
Subscribe to the FREE Ask the Builder newsletter to receive professional advice for your home. Complete the form below and each week you'll get:
DIY Tips
Tool Reviews
Project Guides
Product Discounts, Giveaways & more.
Unsubscribe at any time. We respect your email privacy.