Fiberglass Doors Not Maintenance Free

DEAR TIM: I plan to install a new front door for my home. The fiberglass doors have my attention. They seem to have the look and feel of wood doors but not some of the problems. Some sales people tell me that the doors are basically maintenance free. Is that true? Can you really stain the doors to make them look like wood? What happens if the finish fails? Tony D., Leesville, LA

DEAR TONY: You are on the right track when you choose to use a fiberglass exterior door. They have captured all of the positive qualities of different doors and packaged them into one product. Wood doors appeal to most people because they are so beautiful. Unfortunately wood combined with water usually produces warpage, rot, and premature finish failure. Anyone who owns a fiberglass boat will tell you that you can soak your new door for days and have no problems whatsoever.

stain and finish kit

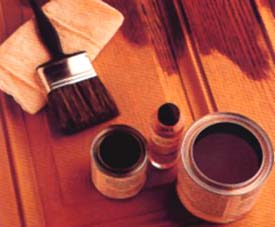
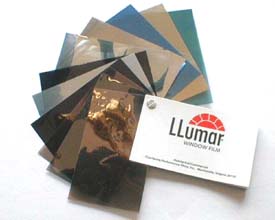
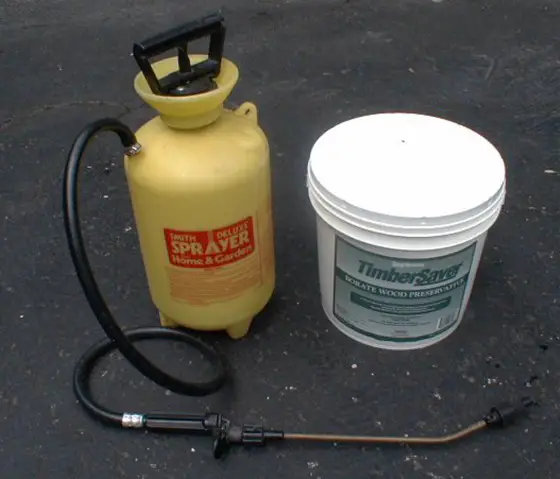
This is a typical stain and finish kit. It is easy to apply the stain and clear protective coating. But be sure to follow the manufacturer's recommendation for follow-up care. Photo credit: Therma-Tru Corporation

There are few totally maintenance free building products. Vinyl siding requires periodic washings because of air borne dirt, colorized concrete pavers can fade over time, and even your new fiberglass door finish will fail. Accept the fact that maintenance will have to be done. The trick is to keep up with it so that you can avoid a painful total finish restoration job.

The stains and clear coat finishes that are supplied with just about every fiberglass door are similar to regular oil stains and clear urethanes that are used on wood doors. Sunlight, rain and exposure to the atmosphere eventually degrade clear finishes on any surface. The fiberglass door manufacturers are continuing to work hard to produce clear water based top coats that offer excellent protection. Some are now available with 5 year finish warranties.

To extend the finish on your gorgeous fiberglass door, you need to carefully follow the instructions with regard to finishing the door. As with any coating, you must apply the stain to a clean surface. Use the cleaner provided in your specific finishing kit or an approved off the shelf cleaner. Do not use any other soap or cleaner. You may leave behind chemical components that could be incompatible with the stain and/or clear finish!

Pay attention to the air temperature. Most door manufacturers want their finish products applied when the temperature is between 50 and 90 F. Work in the shade if possible or erect a temporary sun screen so that you are not working in direct sunlight. The stain and clear coat products will be easier to work with. Try to avoid working on windy days. The components may dry too quickly or you will find it is hard to maintain a wet edge.

Be careful to follow the staining instructions to the letter. Some kits require that you wait different prescribed times for light and dark colored stains. Failure to do this can result in a blotched appearance. Usually the stain must dry for several days before you apply the final thin layers of clear coat.

Some manufacturers supply you with a cool fiberglass sample that you clear coat as well. Store this inside your house in a safe area where you can find it. Use it each spring to see how the gloss of the door's clear coat has succumbed to the elements. You need to apply a fresh coat of clear coat once the door feels rough or the gloss begins to dull. If you allow the clear finish to fail, you will be stuck with a massive restoration project.

If restoration becomes necessary, you need to remove the old finish with paint and stain removers. Most manufacturers tell you in the original door installation instructions which strippers are safe. You need to be careful as some parts of the door have special primers that can be softened by more than several minutes exposure to common paint strippers. If you allow this to happen, your visions of maintenance free products will evaporate into thin air.

Column 264

A Storage Loft in a Garage

Garage Storage Loft

This loft was built in an afternoon. I can easily move around on it.

DEAR TIM: The past owners of our home built, or I should say threw together, a questionable loft on one side of the garage. Thank goodness it hangs over my husband's car and not mine. He is hoping to build a more professional and sturdy loft on my side of the garage and possibly secure or rebuild the one on his side. We just haven't found any plans or directions to guide him. Help us Obiwan the Builder! Mary P., Streamwood, IL

DEAR MARY: The previous owners must have built that loft on the dark side of the garage. It is also possible that they were construction challenged as I tend to call it. In any event, I can help you build a superb garage loft similar to the one at my own home. It does a swell job of capturing all of the flotsam and jetsam that usually drifts from one corner of my garage to the other.

Garage lofts work well because they make use of the void space that exists over the hood of most cars. Typically you can build a 5 or 6 foot deep loft on the back wall of a garage that will not interfere with the windshield of your car. If your garage ceiling height approaches 9 or 10 feet in height, you can end up with hundreds of cubic feet of excellent storage space.

I constructed my loft as I would any exterior deck project. Because my garage ceiling height is 10.5 feet and I am short (5 feet 8 inches ), I was able to construct a loft that I can actually walk beneath. This is a great feature but it is not necessary in all situations. Believe me, the extra space you gain in the loft will more than offset the few times you have to stoop to go under a lower loft.

You begin the project by determining the height of your loft. Using 3/8 or one half inch diameter lag bolts, attach a 2x6 ledger board to the rear wall of the garage. Use a lag bolt at each wall stud and make sure the bolt penetrates at least 2 inches into the wall stud. Do not over tighten as you can strip the wood and create a poor connection.

Place the loft joists at 16 inches on center and have them project out from this ledger at a 90 degree angle. Use standard joist hangers and special heavy duty joist hanger nails for this job. Do not use roofing nails with joist hangers. They are not structural nails and the loft can fall apart if the nail heads pop off or the nail shafts shear off. High quality joist hanger and framing connecting manufacturers make these joist hanger nails. 3/4 inch thick standard sub floor plywood makes a great loft floor. Metal angle irons with holes can be used to construct a nifty pipe storage rack that is suspended beneath the loft.

garage storage loft

I used angle irons with holes to make a handy pipe storage rack. It is high enough so I can just walk beneath it.

The opposite end of the floor joists are supported by metal joist hangers that are attached to a beam that runs from one front corner of the loft to the other. This beam may be two 2x6's nailed together or two 2x8's. If your loft width or the spacing between 4x4 posts is greater than 8 feet, I would definitely use the 2x8's. This beam is through bolted to 4x4 posts that run continuously from the floor to the ceiling. Through bolts are ones that have threaded ends and use a nut and a washer to complete the connection. You can purchase very nifty metal post bases that allow you to connect the 4x4 posts to the concrete floor using an expansion anchor that is drilled into the concrete floor. Place the posts so that you will not hit them with your car.

Your existing loft can probably be salvaged. The key items to look at are the type and spacing of the lag bolts used at the wall ledger, the type of nails used with the joist hangers and the size of the beam that supports the front of the loft. Be careful of lofts that are suspended from the ceilings. There is a possibility that the roof structure was not designed for these concentrated loads. That is why I prefer to use 4x4 posts that transfer the loft load to the floor.

Companion Articles: Garage Storage - Loft Material List, Floor Plan for Garage Storage Loft, Garage Storage Loft

Column 265

Precast Concrete Foundation Walls

Precast concrete foundation walls are fantastic. They can be assembled in hours, have built-in insulation and wall studs and are strong.

Precast Foundation Walls = Fast Installation

DEAR TIM: A builder in my town has suggested that I use precast concrete foundation walls for my new home. I'm a little skeptical of this new process.

He says the walls do not require concrete footers. They use compacted crushed stone. Do you feel the precast walls are a good choice? Are there any other benefits? Are they code approved? Maria B., Paris KY

Related Content

Waterproofing Foundations Equals Bone-Dry Basements

Poured Concrete vs Concrete Block Foundations - Which One is Best?

DEAR MARIA: If the precast concrete foundation walls this builder is promoting are like the ones I've seen, they may be ideal for your new home. Precast concrete technology has been around for years in the commercial construction industry and only recently has it started to supplant traditional residential foundation construction methods. There are huge advantages in building with precast foundation components.

Free & Fast Bids

CLICK HERE to get FREE & FAST BIDS from local foundation contractors.

Precast Walls Built In Controlled Conditions

Precast Foundation Walls

This is an excellent example of a precast concrete foundation wall system. This one is by Superior Walls. Note how the corners are mitered, the closed-cell insulation and interior wall studs. Copyright 2018 Tim Carter

I have a traditional poured concrete foundation in my own home, but I also was fortunate and had the absolute best foundation company in my town install it. You might not be so lucky.

Here are a few things that can go wrong with a traditional block or poured concrete foundation system. A block foundation hod carrier may mix the mortar too weak. An inexperienced block layer may add water to stiff mortar and weaken it. The block foundation may not have any inexpensive reinforcing steel in it.

Poured foundation walls can have cold seams where one batch of concrete gets hard while the next concrete truck is mired in mud in the middle of the job site. The top of a poured in place foundation wall can be out of level.

If the forms are not checked and braced before the pour, the foundation can be out of plumb and out of square. Many poured concrete walls have no vertical steel in them. Excessively cold or hot weather can harm concrete or block walls as they are built in the field. Rainfall can stop the traditional foundation construction process in its tracks.

Crushed Compacted Stone is Strong

The precast foundation systems solve all of these problems and more. The fact that they do not require a concrete footer does not surprise me.

Virtually every roadway around the word uses crushed stone as a base. Railroad tracks are laid on crushed rock as well. Both of these support far more concentrated loads than the foundation of your home.

If the soil beneath the foundation is weak, the builder can increase the depth and width of the crushed stone. Frank Lloyd Wright used this method to support foundations on some of his works of art.

CLICK HERE to get FREE & FAST BIDS from local foundation contractors.

Precast Walls Built in Factories In Ideal Conditions

The precast systems appeal to me for many reasons. They are poured in controlled conditions in a factory. They use 5,000 pounds per square inch (PSI) strength concrete. Most traditional poured walls use 3,500 PSI concrete.

The precast walls are cured in the factory so they are guaranteed to achieve the intended design strength. The precast concrete walls are poured square. Once assembled your foundation will be plumb, level and square.

Closed-Cell Foam Means Warm Basements - Save Energy

The precast systems have 1-inch, or more, foam insulation built into the walls. This minimizes cold conduction problems in northern climates. Treated lumber nailers are incorporated in the walls as well. There is no need to build an additional wood interior wall if you desire to finish your basement.

Fast Erection Usually In One Day

Perhaps the best feature of a precast system is that it can be erected in most cases in less than a day. Once the crushed gravel base is in place, a crane and experienced crew set the panels like a giant erector set.

The wall panels come in heights from 4 feet to 10 feet. Any shape or size foundation can be built. You can have window or door openings included as well. The panels are bolted together and waterproofed with special high-performance urethane caulks. If you follow the manufacturers' backfill recommendations, you will not have a drop of water enter these foundation walls.

That said, I'd absolutely install a backup traditional waterproofing compound on the exterior to ensure water never enters your basement.

Precast Foundation Walls Meet All Codes

The precast concrete foundations should sail through your building department approval process. The precast system is recognized and accepted by many of the national model building codes. If your building inspector has a problem or has not worked with them before, the manufacturer will assist you in educating the building department in your town.

Photo Credit: Superior Walls

Companion Articles: Precast Concrete Walls, Precast Concrete Foundation Companies, Precast Foundation Wall Illustrations

CLICK HERE to get FREE & FAST BIDS from local foundation contractors.

Column 266

Window Film – It Works Well

DEAR TIM: The floor to ceiling windows in my new house are beautiful, but I feel like a turkey in an oven when the sun streams through them. It seems as if my fabulous oriental rugs are fading before my eyes. Will the window film products keep me comfortable? Do they really stop fading in carpets, drapes and furniture? Are these products do-it-yourself friendly? Sally P., Chicago, IL

DEAR SALLY: Solar radiation that comes through unprotected glass can be intense. I know this from all of the years of installing new windows on sunny days. If you think you have it bad, travel to the sunny southwest or southeast USA where solar heat gain is a serious issue. The window film industry is highly advanced and there are any number of window film products that will work to control heat gain, heat loss, ultraviolet (UV) infiltration and common glare.

window films

Here is a fan pack of the many different window films that are available. There are several manufacturers that make very high-quality films. Photo by: Tim Carter

The window film industry is one of those happened-by-accident stories. Back in the 1960's a person working for a greeting card company made several thin plastic films for a 25 year anniversary card series. He held the silver colored film up to a window to view it and noticed that it blocked significant amounts of heat energy. The window film industry was born!

Different metals are actually vaporized or sputtered onto thin polyester films. These metals work to reflect heat back to its source. Different amounts and types of metal can be applied to the films to achieve different heat blocking levels of performance. There are many different types of heat blocking window films. This allows you to choose one specific to your needs.

Special factory applied adhesives that do not distort visible light are used to attach these films to perfectly clean glass. The UV protection offered by the films is accidental. The films must be treated with a special chemical so that UV radiation doesn't breakdown and discolor the films. Old fashioned or low quality adhesive tape that yellows and becomes brittle is a good example of what UV rays will do to plastic films that don't have this special ingredient.

Colored window films can also be purchased. The color is actually imparted into the polyester film or adhesive with a dye. Some window films are one single layer while other specialized films can have up to 3 layers. The multi-layered products do a great job of protecting the ultra-thin metallic coatings.

The window films will slow down but not stop the fading process. Approximately 40 percent of fade problems can be attributed to UV radiation. The remainder is actually caused by visible light, heat, and components in the air. Your fabrics and carpets will continue to fade, but the window films do a swell job of retarding this process.

Window film installation is not a do-it-yourself project. Certain window films can not be applied to certain types and sizes of windows. Large expanses of glass can be subjected to extreme thermal stress if the wrong film is applied to a window that is too big. Some films should not be applied to clear glass thicker than 3/8 inch. Windows that are in concrete, solid aluminum or steel frames can sometimes cause problems. In other words, a professional needs to look at your windows and advise you as to what film can be safely installed on your glass.

Furthermore, the glass must be cleaned professionally for the films to be invisible once installed. Bubbles, wrinkles, and other imperfections can become a reality if an untrained person begins to install these special window films.

The window films can save you money in the long run. Most of them can be professionally installed for between $5 and $10 per square foot. Because the film colors are highly consistent, you might want to do a room or side of your house at different times if cost is an issue.

Companion Articles:  Window FilmWindow FilmsWindow Film FAQ, Window Film Companies

Column 267

Strip Finishes Off Decks

DEAR TIM: I really made a mistake. I applied a wood deck sealant several years ago that seemed great at the time, but it is now peeling! How can I remove this mess? What steps do I have to take to clean my deck? Should I power wash the stripper off the wood? Is there a product that will not peel but provide protection and beauty? Pam T., Hamlet, NC

DEAR PAM: Ouch! The pain isn't over yet as you now have to strip off the offending film former from your wood deck. The good news is that once removed and a penetrating synthetic water repellent is applied, your wood deck care problems will be minimal in the future.

Deck sealant products are available in two major groupings: film forming products and penetrating finishes. Film formers tend to look fantastic when applied. Some resemble highly polished furniture finishes. These products try to grab tenaciously to the surface of the deck lumber, but the sun's ultraviolet (UV) rays and repeated expansion and contraction of the wood caused by moisture gain and loss eventually cause the films to break down and peel.

Penetrating water repellents are finishes that deliver wood protecting resins and pigments into the top layers of the wood's cellular structure. Many of these finishes surround the wood fibers at the surface and do a decent job of repelling water and sunlight for several years. The best synthetic resin water repellents can provide protection and beauty for up to 3 years on horizontal wood surfaces.

To remove your existing film former deck product, you will need to use a stripper. Some wood deck strippers contain a chemical called methylene chloride. These are super powerful and should only be used with care. You need to protect all skin surfaces and avoid breathing the product's fumes. You may find other strippers that contain caustic chemicals like sodium or ammonium hydroxide or sodium metasilicate.

cleaning wood deck

Oxygen bleach (see link below) is deep cleaning this wood deck. The bad film forming finish was previously removed with a stripper.

Never mix these products with any other solution, chemical or chlorine bleach. You must neutralize the wood surface after using caustic strippers. Do this with lots of clear water or a 50/50 mixture of vinegar and water. The least toxic deck strippers are NMP or d-Limonene based products. These are not too toxic, but can sometimes be slow acting.

Deck stripping can take time. It is best to start in a small area to see what methods and products work best. Avoid working with the products on hot, sunny, windy days. An overcast, cool day with a temperature near 75F would be my choice. You will achieve the finest results if you follow the directions on the label of the product. Do not use a pressure washer on wood decks. The powerful stream of water that comes from these professional tools can easily erode the soft light colored spring wood that lies between the dark colored summer wood grain bands in your wood.

EB015 Cleaning & Sealing Deck eBoo Cover

Once the deck is free of the film former, you should clean it with oxygen bleach. This non-toxic powdered product mixes with water and cleans decks that have been coated with penetrating finishes or even unprotected wood. The foaming oxygen ions aggressively attack mildew, algae and dirt buildup on the deck, but do not harm the wood deck, metal connectors or vegetation surrounding your deck. You simply mop on a solution of oxygen bleach, let it sit for 15 minutes, lightly scrub it with a brush, and rinse with a garden hose.

Do not use chlorine bleach (sodium hypochlorite) or any product that contains chlorine bleach to clean your deck! Chlorine bleach blasts apart the lignin or glue that holds together wood fibers, it removes the natural wood color, it kills vegetation, and it can corrode metal deck components.

If you apply a semi-transparent synthetic water repellent on your wood deck, you will be very satisfied. These products contain synthetic resins that are not food for mildew and algae. Many common and highly advertised deck sealants are made using natural oils such as animal fat, tung, vegetable and other oils that are food for mildew and algae. I have used a synthetic water repellent on my own wood front porch for the past 4 years and it looks superb. I know your deck will look the same!

Message from Tim:

Years ago while researching a column about cleaning decks, I discovered the wonders of Oxygen Bleach. It is perhaps the 'greenest' cleaner I know of as it uses oxygen ions to break apart stains, dirt and odor molecules. There are no harsh chemicals, and it works on just about anything that is water washable.

I decided to create my own special blend using ingredients made in the USA. In fact, the raw materials in the active ingredient are food-grade quality registered with the FDA. I call my product Stain Solver. I urge you to use it to help clean your deck. You will be amazed at the results!

Companion Articles:  Wood Deck StrippersOxygen Bleach & Synthetic Water Repellents

Column 268

Metal Connectors Minimize Wind / Storm Damage

metal deck connector

The large metal connector is through bolted to the walls studs. the connector itself is connected to the foundation with the long black anchor bolt. Imagine how well these connectors hold instead of 16d nails!

DEAR TIM: I live in an area that gets just about every type of wind storm. Tornadoes have touched down very close to my existing home and I have been through several hurricanes. I am getting ready to build a new home. What can I do to hold it together as long as possible during violent windstorms? I can't build a basement. Is there a way to construct an internal shelter within my home that I can use in the event of a killer storm? Tracy G., Mobile, AL

DEAR TRACY: Anyone who watches the evening news knows that tornadoes, hurricanes and even severe thunderstorms can create winds that blast apart homes and families. Virtually every part of the United States can experience a weather event that can cause significant damage to a typical residential home. No one is really immune from a wind related personal or property loss.

Believe it or not, a majority of tornadoes produce wind speeds of 112 miles per hour or less. Residential homes that are constructed in strict accordance to most model building codes can withstand winds of this nature. The trouble is, it is virtually impossible for most building inspectors to insure that each and every nail, screw, anchor bolt, etc. has been put in exactly to code specifications.

The trick to making a wood framed structure extremely wind resistant is to create a continuous connection path from the roof rafters or trusses all the way down to the foundation. Many carpenters make an attempt to do this by using 16 penny hand driven nails fastened into all of the wooden framing components. If you want these nails to hold down the house in windy weather, they have to be driven in strict accordance with the building code. In many instances the wrong nails are used or the spacing between nails is too great.

Perhaps the best nails to use when building a home are ones driven by a pneumatic nail gun. These nails are coated with a special lubricating glue that melts as the nail glides into the wood. The glue hardens within seconds and produces greater holding power than an equal sized and shaped hand driven nail.

One of the best ways to attach walls, floors and roof structures directly to the house's foundation is to use readily available, inexpensive metal connecting plates and anchors along with approved structural nails. In a typical house, only the treated sill plate is firmly bolted to the foundation. There are numerous easy-to-install metal connectors that allow you to quickly bolt floors and walls to the foundation and then connect every other major wall, floor, or roof section to the components below. This provides a continuous metal connection path from the roof down to the foundation.

The cost for the nifty metal connectors in a typical house is less than $200. The labor to install them should average $300 or less. Although they may not keep your house together, if it suffers a direct hit from a very powerful wind storm, they may keep the roof on and the exterior walls from blasting apart long enough for you to seek shelter in a safe place.

Recent findings at Texas Tech University have shown that people who live in houses lacking basements can build interior storm shelters within their homes. The trick is to create a normal looking storage closet that consists of steel reinforced solid masonry walls, a poured-in-place concrete roof, vents to compensate for air pressure changes, and a well built pocket or sliding door that is made with several sheets of 3/4 inch plywood and covered with 14 gauge metal. This above ground shelter will resist wind blown debris, air borne missiles, etc. that can cause severe injury and/or death in a violent storm.

The size of an interior shelter depends upon how many people you want to place in it. It doesn't have to be extremely large, as most violent wind storms can last anywhere from several minutes to several hours in the case of a large hurricane. The point is you just need to be able to sit down and relax as much as possible during the storm. If you decide to build one, make sure it is stocked with several flashlights, a battery operated radio, and perhaps some bottled water and a first aid kit.

Companion Articles:   Interior Hurricane - Tornado Shelter, Fight Hurricane & Tornado Storms with Metal Connectors, Underground Tornado Storm Shelter, Tornado & High Wind Damage

Column 269

Bridges – Building in Your Backyard

bridge
DEAR TIM: There is a small 20 inch deep gully in my yard. This little valley prevents me from easily getting my riding mower to the other side of my lawn. Do you have any ideas on how to build a little bridge to span this ditch? What can I do to make sure it is not too bouncy? What is the best lumber to use? Doug R., Milwaukee, WI

DEAR DOUG: Building a miniature bridge is a really cool project. You don't have to be a structural engineer to design one since there is a very good chance you have existing bridges in your home. Anyone who has a basement, crawl space or a second story home walks across a bridge each time they pass through a room. I suggest that you study the underside of your existing floors before you build your outdoor bridge.

When you look at your existing floors you will see floor joists that span from one wall to another. In some instances they may rest upon a beam. The joists will probably be 16 inches on center. If you want a really stiff bridge, consider spacing the joists 12 inches on center. The depth or height of the joist is directly related to the length of the span. The greater the span (distance between supporting walls), the deeper a floor joist needs to be. You will incorporate these same principals in your simple bridge.

If the span of your bridge is exceptionally long, you can reduce bounce by installing vertical 4x4 posts under each bridge joist at the center of the span. These posts need to rest on 6 inch diameter concrete piers that extend to the frost line.

Because the bridge will be exposed to the weather, I recommend that you use treated lumber for the bridge joists. The decking for your bridge can be treated lumber or you can choose to use construction heart redwood or cedar decking for a more finished look.

The width of your bridge is important. Measure the width of your riding lawn mower with the most cumbersome accessories attached to it. You want to be sure the bridge is wide enough to accommodate your machinery without clearance concerns. A bridge 60 inches wide should work fine in most instances. A 4x4 curb should be incorporated at each edge of the bridge. Keep this in mind as it will reduce the overall operating width of the bridge by approximately 7 inches.

I would build the bridge just like a traditional wood subfloor. This means that a rim joist or band board is nailed to the ends of the bridge joists. This framing member keeps the joists from falling over like a house of cards when you walk or ride over it. It also allows you to build the frame for the bridge in the yard and drop it into position with the help of several friends.

The ends of the bridge joist should rest upon steel reinforced poured concrete grade beams. These grade beams need to be 6 inches wide, 8 inches thick, and as long as the bridge is wide. I like to dig two post holes under each beam that extend down to the frost line. The concrete flows into the holes at the same time as you pour the beams. These monolithic bridge foundation supports will prevent your bridge from shifting or twisting as you drive across it.

Before you pour your grade beam, be sure that you keep in mind the total height of your bridge joists and the decking. To permit a smooth transition from the grass to the bridge deck, the bridge joists ends and the grade beam must be below grade at each end of the bridge. Double check your measurements before you pour the concrete grade beam!

The decking for the bridge can be applied two ways. The simple way is to apply it perpendicular to the run of the bridge joists. If you do build the bridge 60 inches wide, you will be able to get 3 pieces of decking from each 16 foot length that you order. For a more decorative look, consider running the decking at a 45 degree angle to the bridge joists. This method will create more waste, but the diagonal look is stunning.

flat bridge

Companion Articles:  Bridge Building Tips, Bridge Joist Sizing, Bridge Planning

Column 270

The Dream Garage – It Has Lots of Room

Dream Garage

This is a nice detached garage. It could be bigger and it would really be nice if it had a garage floor drain. Photo Credit: Tim Carter

A Garage with Room

DEAR TIM: My existing garage is simply too small. I have the opportunity to build a new detached garage and want to do it right. Can you share some design tips that will allow me to construct a garage that will provide ample space for my two vehicles, riding lawn mower, bikes, a workbench, and miscellaneous other items? What other options can I incorporate that will make this the garage of my dreams? Sally M., West Point NE

DEAR SALLY: What a common problem! I thought I was doing the right thing when I made my own garage 24 feet deep by 30 feet wide. Was I ever wrong! Not only that, I made a couple of other silly errors that have become pet peeves of mine with respect to any garage space.

two car garage with custom doors

This is my daughter's garage. It would have been perfect had the garage been just 4 or 5 feet wider but the lot could not accommodate the extra width. The wall next to the left door should have been 5 feet instead of 3 feet. The same is true of the right door. The center wall between the two doors should have been 3 feet wide. Copyright Tim Carter 2024

When garages are empty, they appear to be huge. The vast open space is often the largest space in a person's home. Looks can be deceiving. The best way for you to solve your space problem is to do a quick analysis of what you need to store in your garage. Clean out your garage first. Discard accumulated trash and sell things you no longer need.

Arrange the remaining items in the manner you feel most comfortable. Undoubtedly you will see that things are still cramped. Calculate the necessary width and depth of the garage that will give you adequate walking room around and between all of your possessions. With these calculations in hand, you now have the new floor plan footprint of your garage in hand.


Is a garage addition in your future? Save time and money by using my Garage Addition Checklist. I offer a 100% Money Back Guarantee.


My guess is that you will come up with an interior size of 32 feet wide by 26 feet deep with 12 foot high walls. This garage will provide you with room to easily house all of the things you have plus give you the opportunity to construct a useful loft in one or more corners of the garage.

A common problem in most garages is not enough side clearance when you open a car door. Car doors seem to attract bicycles, garbage cans, shelving, and any other items you have placed along a side wall. Make sure that a garage door opening begins no closer than four feet from a corner. Most garage door openings (including mine!) start two feet from a side wall.

Garage doors can also be a problem. If you want a large double door, make sure it is 18 feet wide by 8 feet high. This door will give you the extra space you need in the event you have oversized vehicles. If you desire single doors and have a large sports utility vehicle (SUV), make sure at least one of the doors is at least 10 feet wide to accommodate the vehicle's mirrors. Large SUV's appreciate 8 foot high openings as well.

If your budget will permit it, consider using attic storage trusses. These roof framing members allow you to install all sorts of goodies up in space that typically goes to waste. They are made so that you can't fully stand up in the space, but can easily move about as there are no irritating truss cross members to get in your way.

Be sure to plan for your electric needs. Install two or three separate 20 amp circuits so that you have plenty of power for large tools. Do not forget to install both indoor and outdoor outlets adjacent to the garage door(s). This will eliminate the need for extension cords for many projects. Place outlets three feet off the ground for easy access. Be sure you have several outlets at your proposed workbench site. Most model and national codes require that all readily accessible outlets and circuits must have Ground Fault Circuit Interrupter protection.

Skylights are wonderful in a garage. They allow you to work inside on many days without the need for artificial lighting. Consider a through-the-wall fan to provide ventilation on hot days or while you work with finishes or chemicals that require vast amounts of fresh air. Mount this fan in such a way that it will pull air across the garage from a slightly cracked door or a fresh air intake port.

Insulate and drywall the interior surfaces of the garage when you build it, not later. If you wait until a later date, it may never get done and you will have to move everything out of the garage to accomplish the task.

If you want a book to help you design and build a really unique outdoor storage building, then The Backroad Home is a good place to start. This large format 96 page paperback book is a collection of cottage, cabin, barn, stable, garage, and garden shed plans. The thing I like about this book is that it may stimulate an idea for a unique styled outbuilding. If you like the design but the structure is too big, simply downsize the plan to fit your needs.

Companion Articles:   Garage Plans & Construction CostsIdeal Garage Plans - TipsDream Garage Illustrations

Column 271

Stop Termites and Wood Rot with Borate Wood Treatments

borate products with sprayer

Borate Treated Wood | A simple hand-held sprayer and this tub of water soluble chemical is all you need to help make sure the wood in your home doesn't end up in the bellies of a bunch of termites.

Borate Treated Wood - Effective DIY Termite & Rot Treatment

DEAR TIM: My husband is afraid that termites are going to eat the new home we are getting ready to build. I find them boring. Is there some way we can treat the lumber so that the termites find it distasteful? I don't want to use a chemical that might smell or is harmful to my children, pets or myself. If such a product exists, can it be applied by a homeowner? Lynne H., Hilton Head Island, SC

DEAR LYNNE: Your ho-hum attitude may cost you big ti.......wait a minute, I get it - boring! Well, if you don't want those little devils to bore into the lumber in your new home, then you need to apply some of the handy chemicals out there that contain boron. Not only can you protect your house's lumber from wood boring insects like termites, beetles and carpenter ants, the borate chemicals also protect against fungi (brown, white, and wet rot) that cause wood decay.

When Did Borate Wood Preservative Start?

The application of borate solutions directly to lumber is not really new. These chemicals have been widely used in Europe, Australia, and New Zealand since the 1960s. The use of borate chemicals in the United States is beginning to grow for several reasons. The termite treatment industry in nearly a 2 billion dollar per year industry. This money is most often spent once the termites and other insects have already shown up for dinner at most homes. Applying borate solutions to lumber allows you to protect the wood before the unwanted guests arrive!

Are Borate Wood Preservative Products Powder or Liquid?

The borate chemicals can be either a powder or a liquid. Borate in powder form readily dissolves in water. The borate chemical is derived from naturally occurring minerals that are easily mined. Once the solution is applied to bare lumber, it can soak deeply into the wood. The depth and extent of penetration depends on several things: temperature of the lumber, lumber species and texture, the internal moisture content of the lumber, and the number of applications. Dry, rough lumber absorb borate chemicals readily.

What are the Advantages to Using Borate Wood Treatment?

There are numerous advantages to using borate chemicals on lumber. Although they are highly toxic to wood boring insects and fungi, they exhibit low toxicity to humans and other mammals. Once the wood has been treated and kept dry, the borate protection is extremely long lasting. What's more, the borates do not affect the appearance or workability of the lumber. The borates are non-corrosive to metal fasteners used in lumber, they are odorless, and they are extremely cost effective.

borate wood treatment

This is borate wood treatment. It's a powder you mix with water. You can have it delivered to your home in two days by going here.

Can Borate Treatment Leach Out of Wood?

The borate chemical treatment does have an Achilles' heel. As previously mentioned, you mix the powder with water in order to apply it to wood. This same water in the form of a plumbing, roof, or siding leak can, over time, re-dissolve and remove the borates from the lumber. If this occurs, the wood is susceptible to attack.

Should Borate Treated Wood be Used Outdoors?

The only place I'd used borate treated wood outdoors is the Atacama Dessert. It's not rained in this place for decades. Borate chemically treated lumber isn't readily used as an exterior wood preservative against insect and rot attack because rain will soak into wood, re-dissolve the chemical, and then remove it from the wood as more rain washes onto the surface.

Rain water and contact with moist soil will simply render the chemicals ineffective over time. To protect exterior lumber that has been treated with borates, you need to apply a penetrating water repellent on a regular basis. Since most lumber used in homes stays dry for the life of the home, water leaching shouldn't concern you too much.

Is Borate Wood Preservative a DIY Project?

You can apply borate chemicals to the wood in your new home yourself. It's best to apply it to lumber when the house is under roof and the framing lumber will receive minimal or no direct rainfall. You want to spray or brush on the borate solution before the lumber is covered over with insulation, drywall, or plastic. Consult with your builder as to how you can be worked into the construction schedule. With a couple of helpers and some hand pump sprayers, you can complete this job in no time. If possible, consider two applications on separate days.

Can I Apply Borate Chemicals to Existing Homes?

Borate solutions can be applied to existing homes. The problem, however, is that many wood surfaces have been covered by other building materials. Wood boring insects may be able to still inflict damage by finding their way into untreated wood.

When you go to buy borate chemicals, look for ones that are labeled and registered as wood preservatives. These are the ones that are classified by the Environmental Protection Agency as safe for use by the general public. Some borate chemicals are registered as insecticides and can only be applied by licensed and trained technicians.

Companion Articles:  Borate Chemicals for Wood Preservation About Borate Chemicals, Using Borate Chemicals

Author's Note: We've received other emails with similar problems or questions. Here's one from Aaron S. of Los Angeles, CA, regarding termite fumigation.

"My house was fumigated for termites covered with a tent etc. After removing the tent two days later, we entered our house but there was no odor of gas at all.  A while later, we saw insects, spiders, roaches etc. moving around. The fumigation company claims that they mix a substance with the gas so that it will not have an odor. My question: Shouldn't there be a gas odor and dead insects? We can't see the termites inside the wall, but we feel that if all the insects are still alive, probably the termites are not dead either. Please, let us hear you opinion. Thank you very much!"

Doing a little online checking, the chemical used during termite fumigation is targeting only termites. It will not kill spiders, ants, bed bugs or cockroaches. So Aaron, you may still see other insects moving around.

This column was the Tip Of The Week in the June 18, 2014 Newsletter.

Column 272

Electrostatic Air Filters

Electrostatic Air Filters

My electrostatic filter is on the left. It has a built-in carbon monoxide alarm. The black-plastic mesh is perhaps 10 or 15 layers and does a great job of stopping very fine dust particles. It is easy to rinse it with a garden hose. The filter on the right is a different high-performance rinseable filter.

Electrostatic Air Filters

DEAR TIM: I am tired of using those flimsy disposable fiberglass filters for my furnace. I feel it is bad for the environment. Unfortunately I can't afford an electronic air cleaner. Are there reusable air filters that do a great job of capturing dust? Has technology improved to a point where filters are able to capture and trap carbon monoxide? What should I look for when purchasing a reusable air filter? John R., Shelbyville, IN

DEAR JOHN: I share your feelings about those inexpensive fiberglass filters. My dislike grew even more once I found out that those filters are designed only to protect the furnace and air conditioning components. They are virtually useless in capturing visible and invisible dust and pollen particles.

Residential air filters are not made equal - not by a long shot. Different styles and types trap different sized particles. For example, the expensive built-in air filters that are connected to 120 volt household current do a swell job of grabbing very small particles like smoke. However, because of their internal design, larger sized particles can sometimes pass through these filters and become heavily charge with electricity. Once the particle leaves the duct work, it is immediately attracted to any object that has an opposite electrical charge. You can often see evidence of this when you see dust and dirt trails around supply duct registers.

Air Filters Video Transcript

CLICK or TAP HERE to get a full transcript of the above video.

Did you know you actually may be able to afford an electrostatic air filter? You can purchase very slick tribo-electrostatic reusable filters that slide right into the same slot that you place your existing disposable filter. They cost just a fraction of what you would pay for a built-in electronic filter setup. The photo to the right shows two different filters. The one on the left has a built-in carbon monoxide detector.

These washable filters are made from a variety of plastic and paper filter media that have their own built-in electricity. When air passes through the filters, the electrical charges increase dramatically and allow the filters to grab very small invisible particles that are floating in the air. Some of the pleated paper electrostatic filters are not washable. Once dirty, you are expected to throw them away.

You need to pay attention when you purchase one of these reusable filters. Furnaces and air conditioners are designed to handle a certain amount of resistance within the duct work system. Many furnace manufacturers do not want the overall resistance within the system to exceed .5 inch water column resistance. In many houses the duct work and the supply and return register grilles create approximately .2 inch resistance without any filter in place. Since the filter creates more resistance to air flow as it picks up and retains dirt and dust, you want to purchase a filter that has the least amount of initial resistance. Initial resistance is the resistance to air flow the filter creates when it is perfectly clean. You can purchase some electrostatic filters that have a low initial resistance of just .08 inch!

If you suffer from certain allergies, it is also possible to purchase these reusable filters with anti- bacterial protection. The anti-bacterial compounds are actually part of the plastics that are used to build the filter media. When you wash the filters on a regular basis, you do little to diminish the anti-bacterial protection. Tests have shown that the filters retain their ability to inhibit the growth of the bacteria, mildew and mold for up to ten years.

Technology has advanced a great deal with respect to electrostatic filters, but not as far as you would like. Although no electrostatic filter can trap carbon monoxide, you can buy certain filters that have a built-in carbon monoxide detector. Most furnace and air conditioning systems are designed so that all of the air in your house is transported through the filter every 15 minutes. This means a filter with a built-in detector can act as a fantastic early warning system in the event a furnace, hot water heater, or other appliance begins to emit poisonous carbon monoxide. The detectors in these filters have special sensors that minimize false alarms. In the event of real danger, these detectors sound an alarm that passes right through the duct work and alerts inhabitants in each room of the house.

The filters that have the carbon monoxide detectors are also equipped with a very handy feature that will save you money. They have a built-in electronic cleaning reminder tone that issues a friendly signal telling you it is time to clean the filter. If you choose to ignore the tone, the filter becomes more persistent and chirps at more frequent intervals. It works to your advantage to clean the filter as soon as possible. Clean filters allow your heating and cooling equipment to operate at peak efficiencies which lowers your utility bills!

Companion Articles:   Electrostatic Air Filters & Cleaning Tips, Carbon Monoxide FilterElectrostatic Filter Resistance Comparison

Column 273