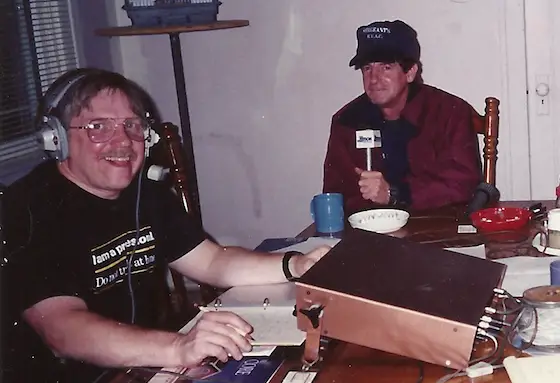
There's my buddy Richard! He's holding the microphone and was kind enough to help me on one of my radio shows. I suspect this photo was shot in 1995-1996. We were doing a live remote broadcast from Lisa Motz's home on Clough Pike. I had a two-hour call-in show on 1450-WMOH. It was all about how Lisa was eating an elephant by undertaking a massive DIY project on her own. She was in way over her head.
Richard P. Anderson - April 16, 1946 | October 25, 2020
Richard P. Anderson was my best friend in Cincinnati, OH. I can't begin to share with you the depth of his wisdom, generosity, integrity, diligence, determination, and discipline. He was an inspiration to me in so many ways and as often happens, I failed to tell him how much I admired him and how much he meant to me before he was sent back to Heaven on October 25, 2020, on very short notice.
Have you made that mistake before with someone you've loved? Don't make it twice.
I feel it's important for you to know as much as possible about Richard because sterile obituaries often just give you the view of a person's life from 30,000 feet. I want you to come to know the Richard I was with down in the trenches of life on a weekly basis.
Mark Ossege's House
Richard and I came to know one another through a mentor of mine, Bill Lange. Bill was a retired engineer, mechanical I believe, who was a friend of my father and mother-in-law. He had a lovely wife named Helen and they lived in Maderia, OH. One day I was with Bill at an old Cincinnati company called Stampco. This was a company that sold heating and cooling ductwork supplies and they made custom ductwork. HVAC contractors would purchase their extended plenums from Stampco. An extended plenum is the large sheet-metal box that fits on top of a furnace.
I was about to build my first custom home for Mark Ossege, the owner of Dillionvalle IGA. Bill and I were at Stampco getting some part and he asked one of the counter employees who was the best small HVAC guy that came in to purchase supplies. "Oh, that's easy. Richard Anderson of Sergeant's HVAC." The Stampco employee wrote down Richard's number and that was the beginning of a most wonderful 35-year friendship.
Richard came to the new house job site as we were framing the house to get a set of blueprints. He was dressed in crisp and clean professional dark-blue uniform pants and a matching short-sleeved shirt with a "Rich" name patch over the left pocket. He also was wearing a Sergeant's HVAC baseball cap. I would come to find out that this is exactly how Richard was to dress whenever I saw him in a work environment. He was the consummate professional.
Do It Right, Not Over
Richard installed a complex heating and air-conditioning system in Mark's house. It was the first custom house I built. I knew just enough about building at the time to be very dangerous. Richard was six years older than I was and it wasn't his first rodeo. It became crystal clear within days that he only did things one way - the right way.
One of the things I noticed right away was how clean all of his equipment was and how at the end of each day he cleaned up any and all debris he had created. Most other sub-contractors and I hate to say this, were slobs. Not Richard. He swept up every day and by the time his white van was driving away, you'd never even know he'd been there.
My customers came to love Richard as much as I did. It was as obvious as the nose on your face that he not only cared about his work, but he also cared about the customer's home. That construction characteristic in workers is rapidly transitioning from history to legend, to myth in today's job-site environment.
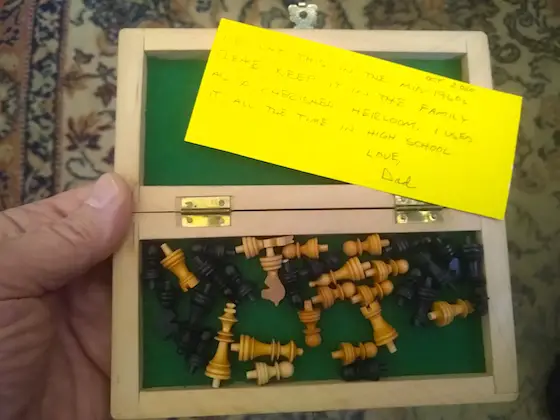
One of Richard's favorite tools was a hammer he used to assemble his sheet metal. It had a brown handle and a very square head much like my geologist's hammer from college. I remember how he guarded this hammer as a mama bear would protect her cubs.
I hope one of Richard's sons or his daughter keep this in the family as a cherished heirloom. I can only ponder how many times Richard grasped this hammer in all sorts of weather on countless jobs to tap together ductwork for a system that kept homeowners comfortable in their homes.
I mentioned Richard and this hammer in a special story I wrote back in the mid-1990s about tools. I need to find that story and republish it here on the website. (Author's Note: Go here to read that special Men and Their Tools story.)
Wisdom
Richard was extremely intelligent. He was wiser than many who have a Ph.D. after their name, yet I'm quite certain Richard didn't graduate from high school. He did receive his GED while he was in the US Marines.
Some of his best mental skills were those about people. Richard is the one who tamed that wild mustang inside of my head when I was in my mid-30s. This brusque attitude caused me to want to be right all the time in any conversation I had with anyone.
"Tim, you need to know that the strongest person is the one that offers the olive branch." That statement seemed so wrong to me. My brain screamed that it should be the weakest person that caves first or offers up an apology. Once again, I was wrong and Richard was right.
Richard always was thinking of things that didn't exist yet, or if they did, we didn't know about them. For example, twenty or more years ago, he thought cars should be equipped with a remote ignition kill switch so in police chases, the police could just turn off the engine to the speeding car. Brilliant!
Well, many cars today have such technology. You can start your car without being inside it.
Vietnam
Richard enlisted in the Marines back in the 1960s if my memory is correct. He became a sergeant and platoon leader. I know after his first tour of duty, he went back a second time. I often attempted to talk with him about his battle experiences trying to get a feel for what my Dad went through in the great WW II.
But Richard never seemed comfortable talking about certain things of his time as a Marine. I'm positive it brought back lots of bad memories. This is why it was never talked about in my own home growing up. My Dad was haunted by demons from his war experience as a medic and German POW for seven months.
One day while at a job site I asked Richard, "How close were you to the enemy in a typical skirmish?" Richard had a way of rapidly blinking his eyes when he was nervous or in deep thought. He didn't answer right away, got up, and picked up a rock that was about the size of a tennis ball.
"Throw this for me as far as you can." He said while handing it to me. I did and it went 60 feet, maybe a little farther.
"That's how close we were. You just threw a hand grenade." It was a sobering moment because I thought about how accurate rifles were at close range like that. In my head, I thought battles were fought at much greater distances.
Richard received great honors while in Vietnam. If I remember his story, he and his platoon were put in charge of a village. As best as I can understand it, Richard was the governor and he had to set up all sorts of services to help make life better for the Vietnamese people in the village. I'm certain he told me about a young teenage girl in the village that knew English. She acted as his translator. I so wish I would have tape-recorded all of this twenty-five years ago when he shared the story.
When the general flew in to give Richard his medals and awards for this great work, I remember him saying the general was very short and Richard was not to look down at him giving him eye contact. The general was very sensitive about his height. Someone took a photo of Richard getting the award or medal and I got to see this priceless moment in time captured with silver bromide crystals on photographic paper.
Being in the Marines no doubt helped polish Richard's amazing diligence, determination, and discipline. My guess is those qualities are beat into recruits in boot camp. I doubt they had to work hard with Richard as they were already instilled in him.
One of his funny war stories was about the transport ships that took him to Vietnam. It was hot and miserable on the ships and often the ships would stop in the ocean and Richard and hundreds of others who could swim jumped in the water to recreate and cool off.
The trouble was US Navy sailors were issued rifles and posted as lookouts on the deck to watch for sharks. At some point after swimming a few times, Richard watched the sailors practice their shooting skills. They would throw an empty 55-gallon drum overboard and use it as a target. Suffice it to say that many of the sailors couldn't hit the drum. If they couldn't hit a large floating drum, how in the world would they shoot a moving shark? I don't believe Richard swam after seeing this poor exhibition of marksmanship!
Speaking of marksmanship, Richard was an excellent shot and got all sorts of high marks for his skills and accuracy. I believe he had the highest rating for both rifle and the .45 1911 pistol.
Ask the Builder
I'll never forget Richard and his wife Linda being my biggest cheerleaders when I decided to stop building and invest all I had in my fledgling Ask the Builder media career. He always offered encouragement and supported me.
Just months after launching my Ask the Builder newspaper column, I started a talk-radio show on 1450 WMOH in Hamilton, OH. I was horrible on my first show. I'm almost certain Linda called in with a fake question to try to get me to calm down. After the show when I got home, Richard called me to tell me how great I was. He was so very good at being mendacious!
Richard and Linda gave Ask the Builder its first dollar. I'm sure you've seen this before in bars and other businesses where they frame the first dollar they get from their first customer. I still have the check for $1.25 they sent for the first Builder Bulletin I published. I framed the check and it was in my basement office. That framed check is now packed away in a box in my garage, but you can bet I'm going to dig it out and proudly display it in my current office.
The Swimming Pool
Richard and Linda had a giant above-ground swimming pool in their backyard. It was an oasis of fun and memories. I had an open invitation to come over and swim on hot humid Cincinnati days. My two youngest kids have great memories of these adventures. I have wonderful vivid memories etched into my gray cells.
I had just made the transition from builder to columnist and money was tighter than a banjo string at the Carter house. I couldn't even think of taking my kids to Kings Island - it was far too much money. Swimming at Richard's house cost $5 in gasoline to get there and back. My youngest daughter reminded me that we got into a rut listening to Van Halen songs going to and from Mr. Anserhan's house. That's how my young son pronounced his name.
One of the things we'd do each time is create the infamous Richard's Whirlpool.
"Let's make a whirlpool!" Richard would exclaim. Everyone would get next to the railing on the outer edge and we'd all try to run in the water around the pool in the same direction as fast as possible. This would get thousands of gallons of water swirling in the pool. It was exhausting trying to battle your way through the water, but fun.
Many a game of Marco Polo was played in this pool. My kids learned to swim in Richard's pool.
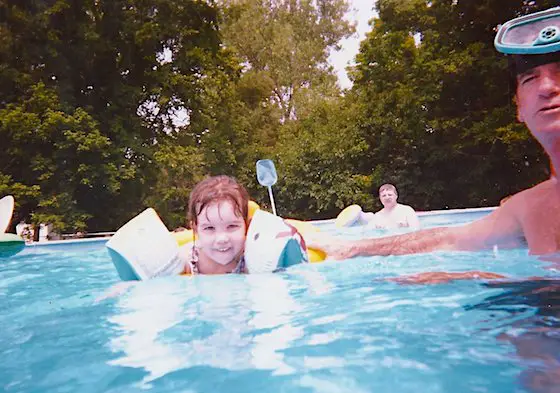
Here's Richard with his snorkel mask helping teach my youngest daughter how to swim with water wings and a floatie. RIP Richard!
Linda would always have hot dogs, hamburgers, macaroni and cheese, and other treats for us. She loved my kids as if they were her own. Richard did too.
Projects on Howard Road
Richard and I would never hesitate to help one another. If I needed service on my furnace or AC unit, Richard would fix it as a magic elf might do it. He'd always refuse to take money and for bigger jobs that took the better part of a day, I'd have to force it on him.
Many years ago his house needed a new shingle roof and I put it on with my two helpers in a couple of days. I remember helping Richard extend the drain pipe from his septic tank down into the creek that ran behind his house. The crazy plumber that installed the septic tank put it too deep into the ground. Idiot!
One day Richard came to a job site of mine and said, "I want to build a cool shed in the back yard. Do you have any tips?" I remember helping with much of the shed and framing the roof is a vivid memory because I was horribly sick with the flu when I did it. A task that should have taken two hours took all day I was so weak.
Richard set up a model train setup in the shed and it was his fun adult clubhouse if I remember correctly.
Music
Richard loved music. He liked all types. One of his favorite songs was Joe Walsh's Life's Been Good To Me. We would both enjoy it on many a day when we'd drive from my house to lunch at Skyline Chili in Kenwood.
Politics
Back in the mid-1990s, Richard was consumed by politics. He'd watch C-SPAN and would tell me all about exactly what this or that politician had said in a speech on the floor of Congress. I was so crazy busy trying to scratch out a living with my new Ask the Builder venture I had no time ever to watch any television. What's more, I had my head in the sand about politics in general at that point in my life.
Richard loved to go on and on about how this or that politician was lying or telling half-truths. Little did I realize that this was foreshadowing what I'd learn from Louis Katz, a prominent Amberley Village attorney that I served with on Amberley Village Council.
One day Lou said, "Tim, you know why when a person is sworn in that they have to say they'll tell the whole truth and nothing but the truth?"
"No, why?" I responded. I had never really thought about that oath.
"It's simple. A half-truth is a whole lie. Judges and juries need to hear the whole truth to make correct decisions in legal matters."
Richard thought the act of telling a half-truth was hateful.
Drifting Away
Unfortunately, the farther I walked down the pathway of my Ask the Builder media career, I noticed that Richard and I started to slowly drift apart. When I was still building, we would see each other frequently on the job site. Richard worked so very hard at staying connected after I started working from home and anytime he was working near my house, we'd always try to go out for lunch.
He'd stop by the house and come down to my basement office to get me. Off we'd go in his trademark white van filled with all the tools and parts he needed to service furnaces and AC units. He preferred Gold Star Chili over Skyline - my favorite - and he'd never complain if I nudged us to go to Skyline. We also had many a lunch at Pleasant Ridge Chili too.
When I moved to New Hampshire in the summer of 2008, I know it made Richard very sad. I hated leaving him, but it had been a life-long dream of mine to live in New Hampshire. I always encouraged him and Linda to drive up to visit, but he never was able to pull it off.
The phone calls became more and more infrequent over time, but I knew that we were still the best of friends. Looking back now, I can tell you I made a grave mistake of not calling Richard at least once a month to share what was new and how things were in New Hampshire. He subscribed to my weekly newsletter, but I should have given him a personal full report instead of him getting the version everyone else got.
I'm not ashamed to say I loved Richard, but my only regret is I never said those words to him.
When Linda called us here the day after Richard passed, she shared a funny anecdote. Richard always said he wanted to go first and he told Linda, "Be sure you put $300 in my pocket before they take me away."
"Why?" Linda asked the first time he said this.
"It's simple. I'll need it to pay your way into Heaven."
I hope he took enough money for me too! RIP Richard, I'm going to really miss you.
Author's Note:
Richard's wife Linda and his youngest son Scott discovered this page as I knew they would. It was important to me that it happen that way. Here's what Linda wrote:
"Tim, Thank you so much for this awesome honor to Richard. It brought happy tears to my eyes. It was right on target about him. You were his best friend also, no matter how far away you two were. I miss him terribly, and I will look forward to the day we are together again in God's home. This is the best tribute to him, and I love you for doing it. Take care, and I have an 8x10 picture of him at age 69, in my kitchen, he is flexing his muscles and was working out a lot then. I leave it there. He says to me "BE STRONG". I am trying, not easy, but in time?"
Here's what Scott sent:
"Thanks, Tim! You made my mom's day! He always talked so highly of you. He sure was good with that hammer. I will look for it soon. You take care of yourself and your family! Love, Scott"
I hope Scott does locate the hammer. It should be framed and passed down through the family for generations to come.
I met Scott, Linda, and Scott's girlfriend for breakfast in October, 2021 on a visit to Cincinnati. Scott shared with me a story he wrote about a fun experience he had with Richard one afternoon. I suggest you read it.
I shared this narrative with the 31,000 subscribers who received my November 1, 2020 FREE newsletter.
Tim Bucher
On October 25, 2021 I received the following email from Tim Bucher:
Just wanted to let you know they found the hammer! My name is Tim and I moved next door to Linda in July and just found your page today on the 1st year of Richard’s passing. I don’t think it’s on accident. I have never met Richard in person but I can’t help but feel his presence still here on Howard. Here’s the newspaper articles you mentioned. Richard installed the HVAC unit in our house in 1993 and it’s still working. Like you said “do it right”. Take care.
I responded and Tim then sent this:
I had a good laugh and a few tears reading your tribute to Richard. I myself have always been a skyline man too, but maybe tonight I'll get gold star and take it to Linda. Just reading what you wrote, Richard knew you loved him, I'm going to go crank up some Joe Walsh. I want to try to see if we can locate other recipients of the walking sticks he gave out of the years, Linda said it was over 100!, maybe we could get a picture of everyone or have a walk in Richard's name. I found one in my garage when we moved in, I like to think Richard left it for me. Meeting his family has given me a glimpse of who he was, and I feel obligated to do something to honor him.
We continued the email conversation over a few hours and he sent the following photo looking out of his window over to Richard's deck and the shed I helped Richard build. Tim is holding one of the walking sticks Richard made. I have one of the first ones he hand-crafted.
I asked Tim if I could re-publish the photo and he sent this:
You're looking at Richard's deck with his US Marines flag and Old Glory waving on a gorgeous April 24, 2022 day. That's the top of Tim Bucher's walking stick made by Richard. Photo courtesy of Tim Bucher
You sure can, however you want to reference me or the picture is fine. I read about the shed, I wanted it in the photo too. That shed is going to last longer than me!
Richard's Walking Sticks
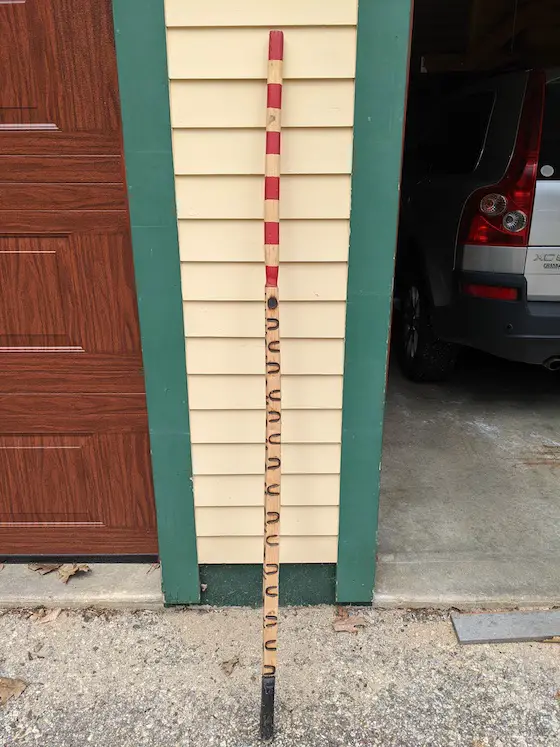
Before I moved to New Hampshire, Richard gifted me a walking stick. Prior to this he had given me quite a few unique gifts. When this was happening, I had just started Ask the Builder and money was tighter than a banjo string. I was unable to reciprocate giving him gifts.
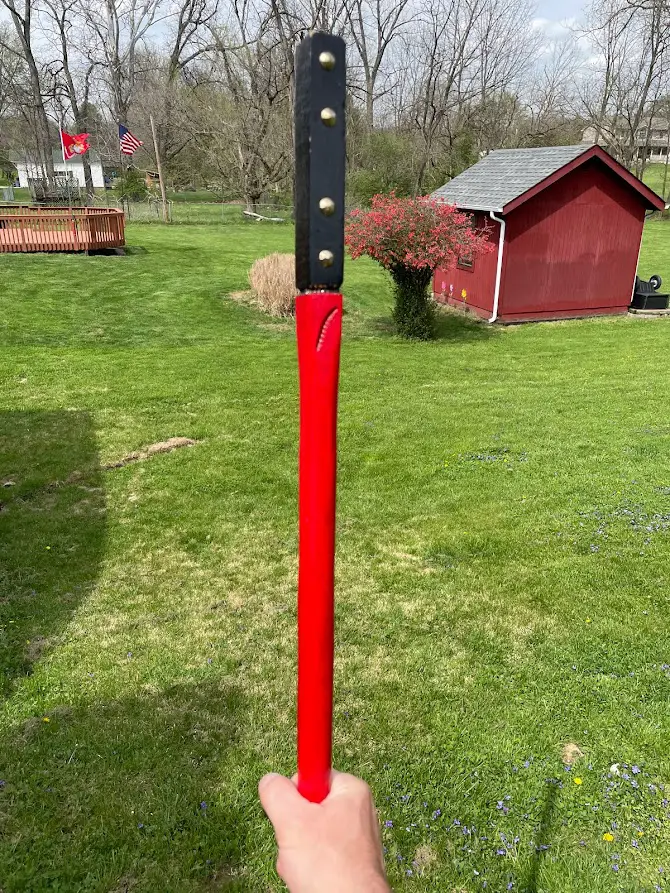
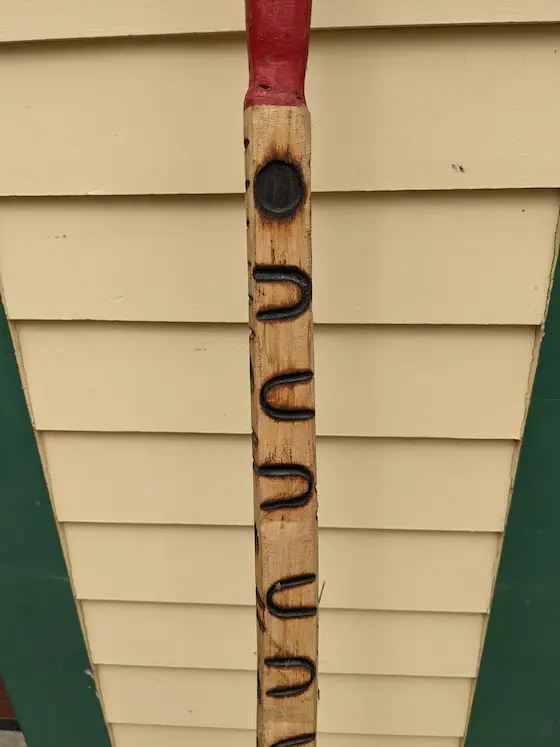
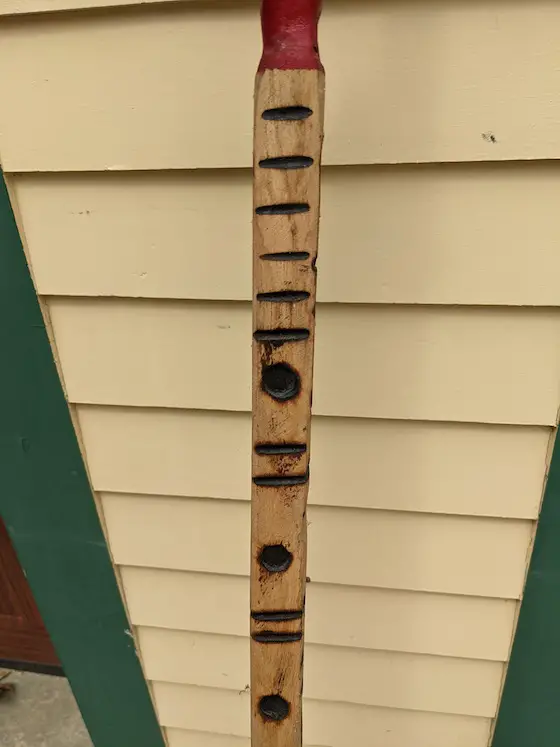
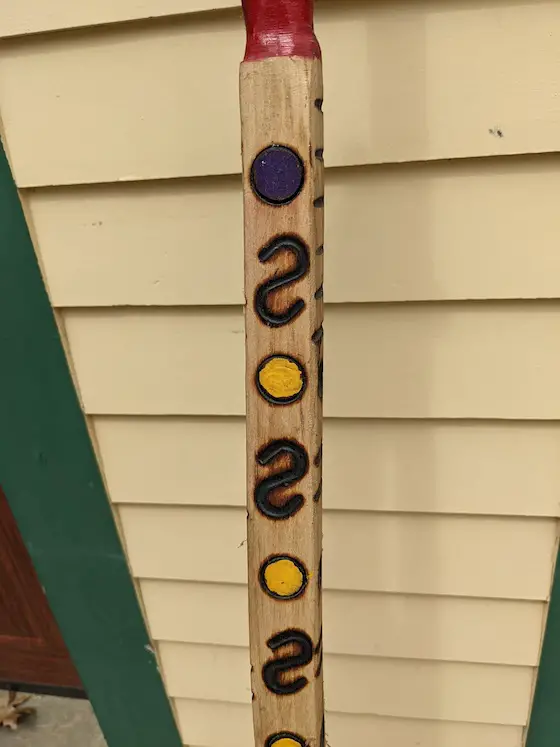
Look at the detail Richard put into this stick. My guess is as he made more of them, he became more creative. In the last photo, you can't see the violet color in the one circle very well, but it's vivid in person.

This is a walking stick made by Richard. Tim Bucher found it in his home when he moved next door to Richard's house.
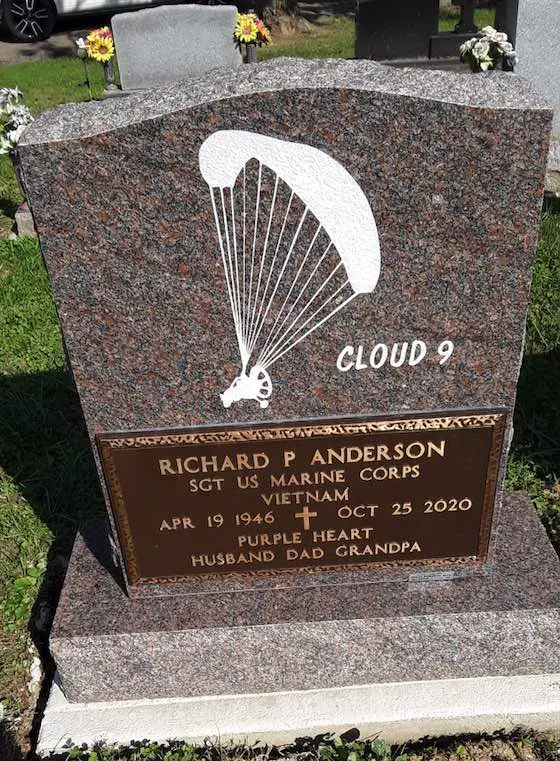
Richard's Headstone
Richard's wife, Linda, stays in touch with me. We're dear friends and she was in many ways a fantastic aunt to my kids growing up. She loved all three of them and they talk about her and Richard frequently. The fun summer days swimming in the pool and eating Linda's delicious hamburgers, mac & cheese, beans, and ice cream are tattooed in their brains.
Linda was kind enough to send me this photo of the rear of their joint headstone. I'll never forget when Richard talked to me about buying his Cloud 9 flying machine. He was so excited. It was a two-seater and one day he took me for a ride. It was a marvelous experience. Richard immersed himself in flying and he did it with the same care, thought, and attention to detail he put into everything in his life.
I was unaware the following video existed. It was recorded by one of the top photographers of the Cincinnati Enquirer - Michael Keating. It brought me such pleasure watching it because I could HEAR Richard's voice again! Listen to the amount of pleasure flying gave Richard:
It's only fitting that this image of him be part of his legacy and I can only imagine what visitors to the cemetery might ponder, 'Who was this man who flew that contraption?" I'll tell you - He was my best friend.